Ted Forbes over at The Art Of Photography YouTube channel recently started a photo assignment project for his viewers. The idea is to create old school photographer notebooks, the sort we all used back in school to help get our thoughts and technique together. I still use such a concept to storyboard editorials, but that is more sketching. I also use Pinterest and Evernote in a similar fashion. I actually maintain a shooting log in Evernote, complete with final photos etc.
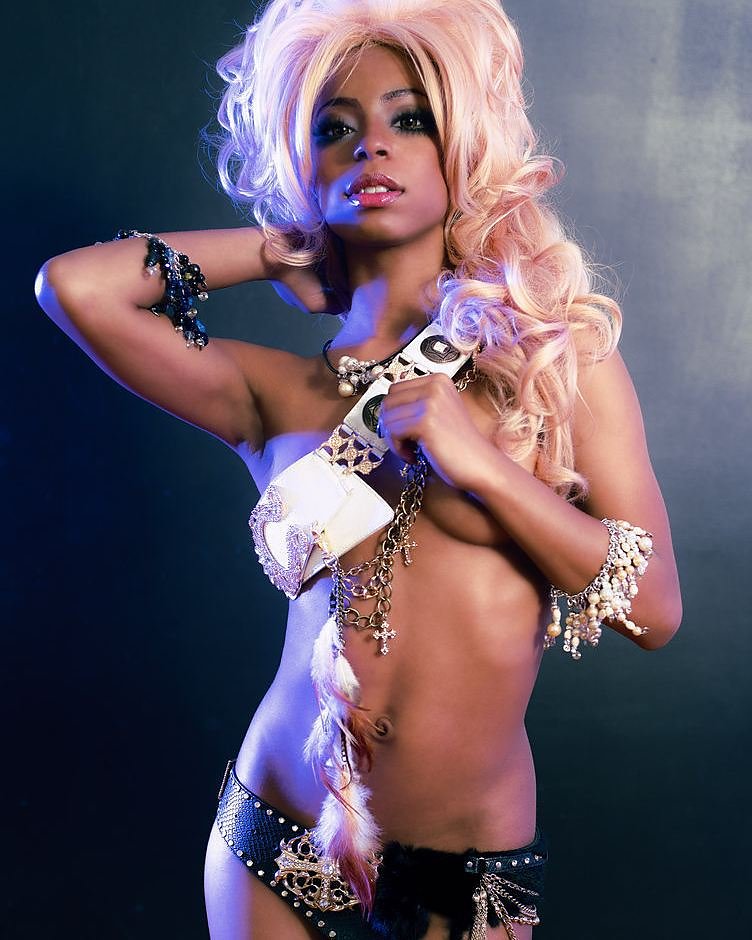
I decided to join in this project for a couple of reasons. The two most important were the fact I have been feeling a bit creatively restricted. Ever since I have gotten to a certain level on Instagram, I've been getting many requests to shoot from agencies and agency models. Almost all of these requests have been for lingerie or boudoir and some occasional fashion. The fashion I love. I am allowed to shoot editorial there. The lingerie and boudoir is a little different. Boudoir is very stylized and plays within a certain box, while lingerie can be editorial in nature, most of the models requesting it want something more Victoria Secret's than something more editorial.
Above is an example of what I've been shooting of late. In truth while I really like that shot, I was more excited to shoot a young woman named Caitin. Here is what we did.
I just love that shot. The other reason is I wanted to create content that went away from what I have been creating for this blog and my own YouTube Channel. There are a million channels that go over gear and technique and will walk you through Photoshop et al. Honestly I was feeling like an idiot doing that. There are folks that do it far better. After starting this is have decided to focus that part on what it is like for me to be a photographer. My process and what it means to me. So many thanks to Ted Forbes to starting this project and inspiring me to change what I do here. Hopefully all of you join me in this adventure. Now without further ado, the ten viewpoints....
Ten Viewpoints
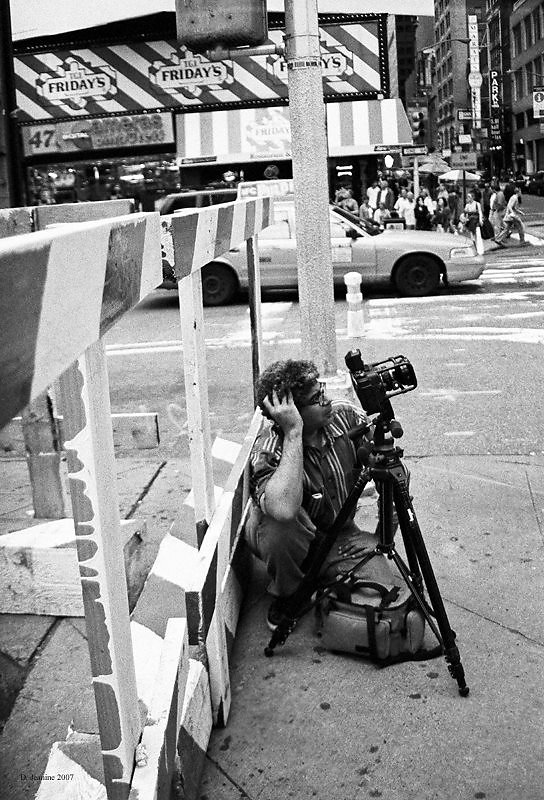
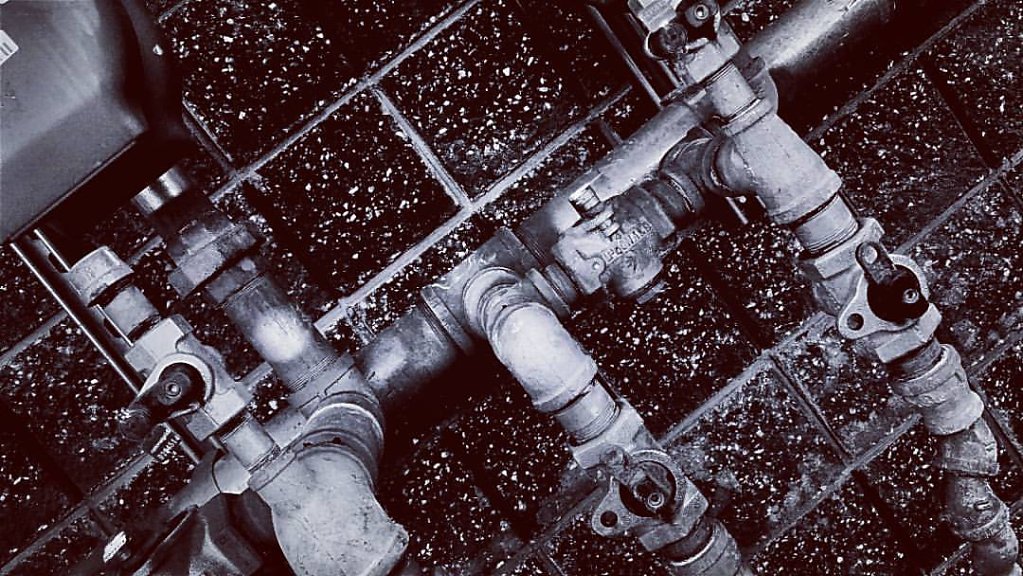
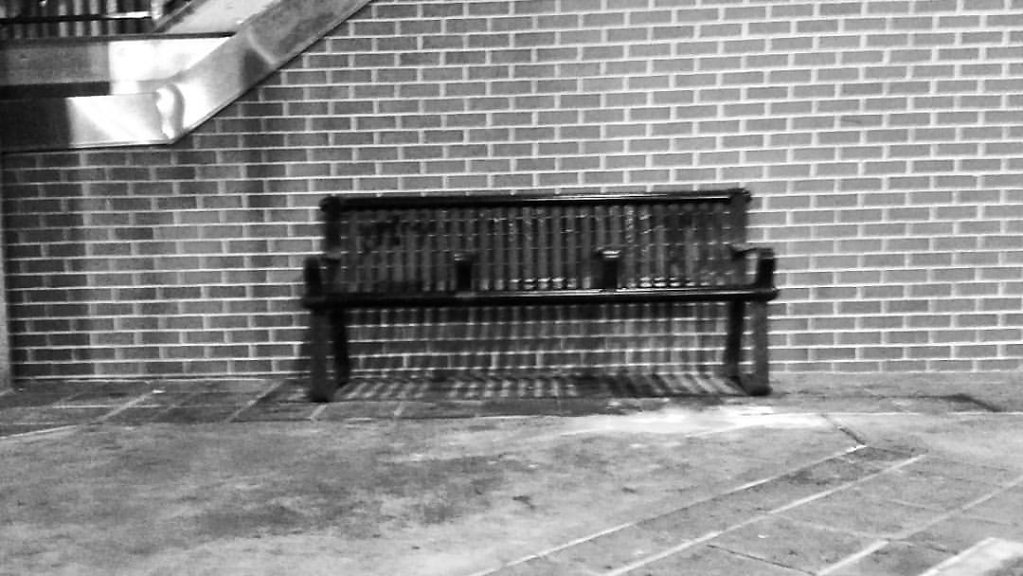
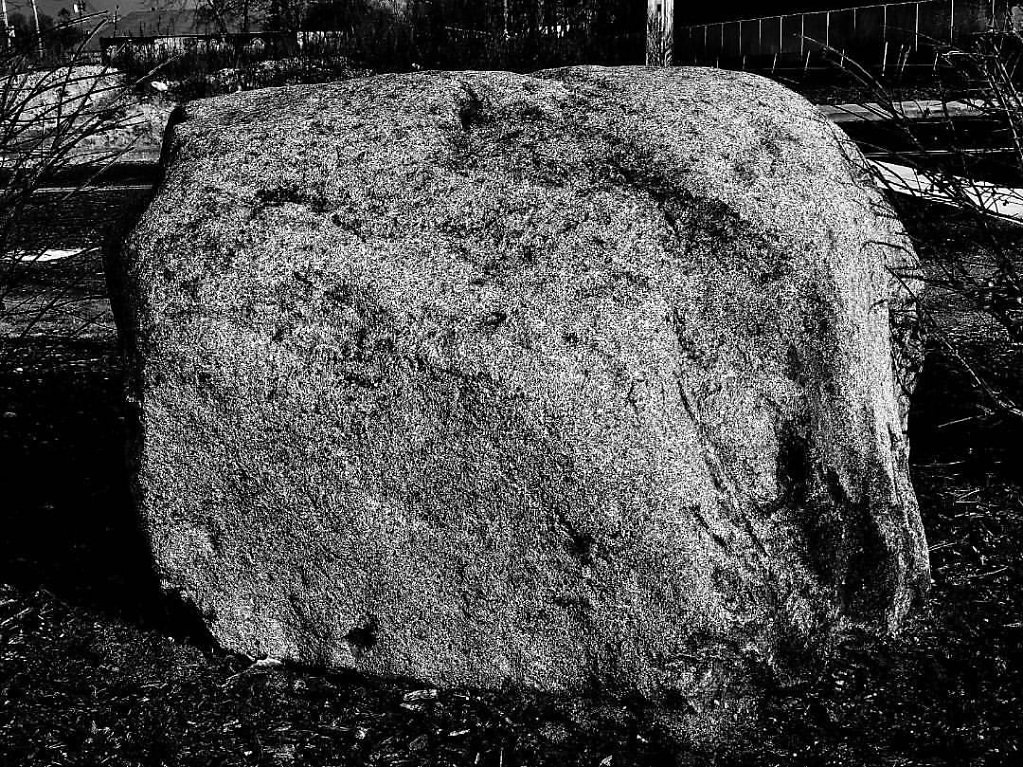
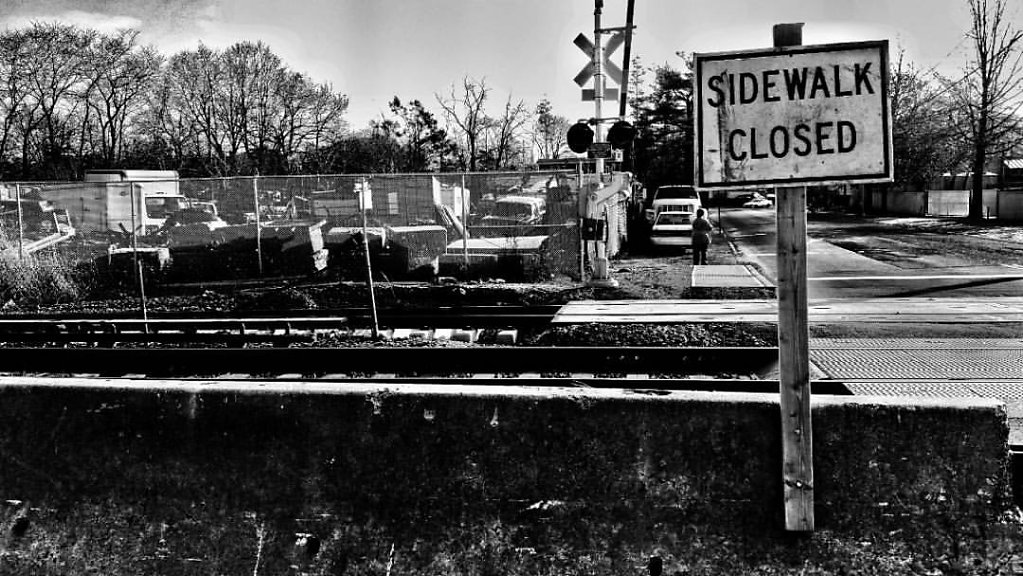
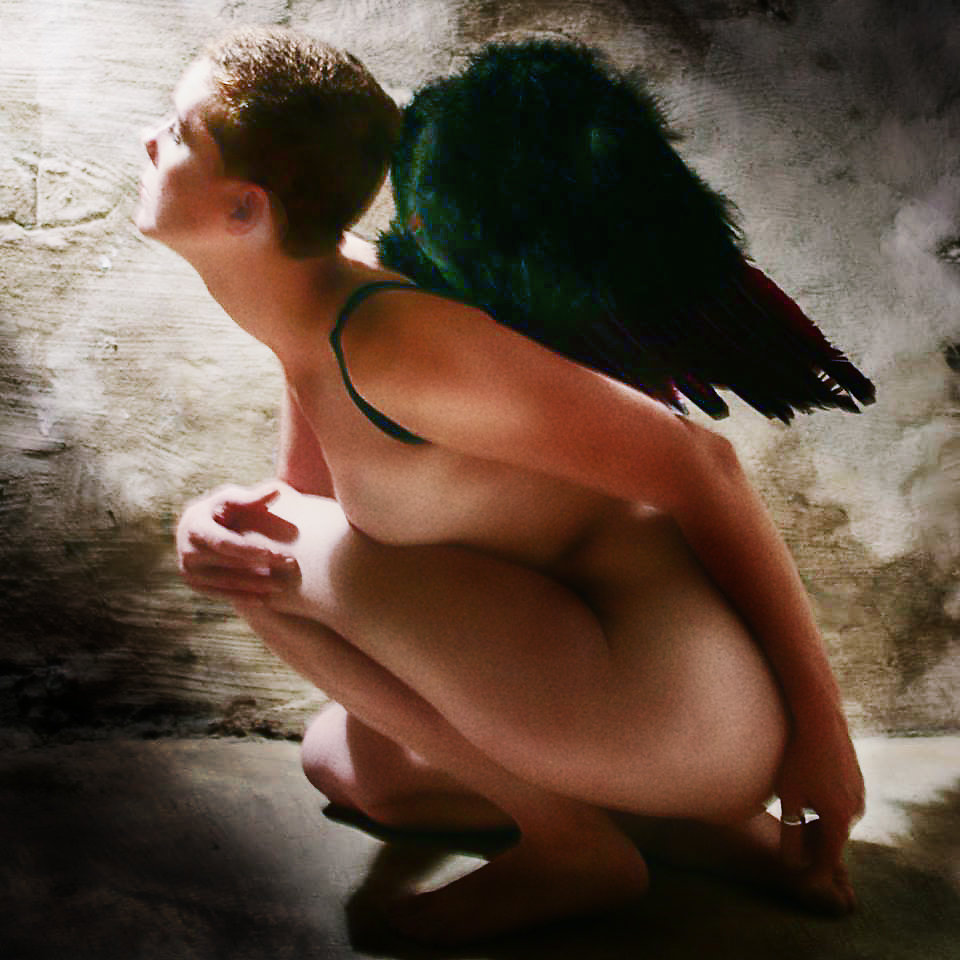
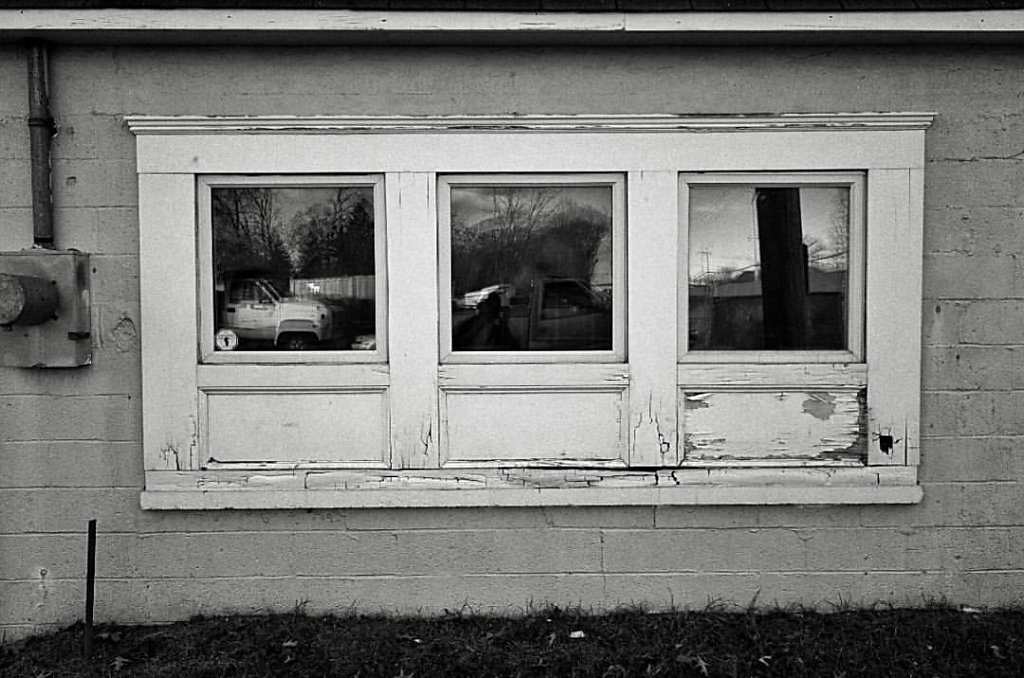
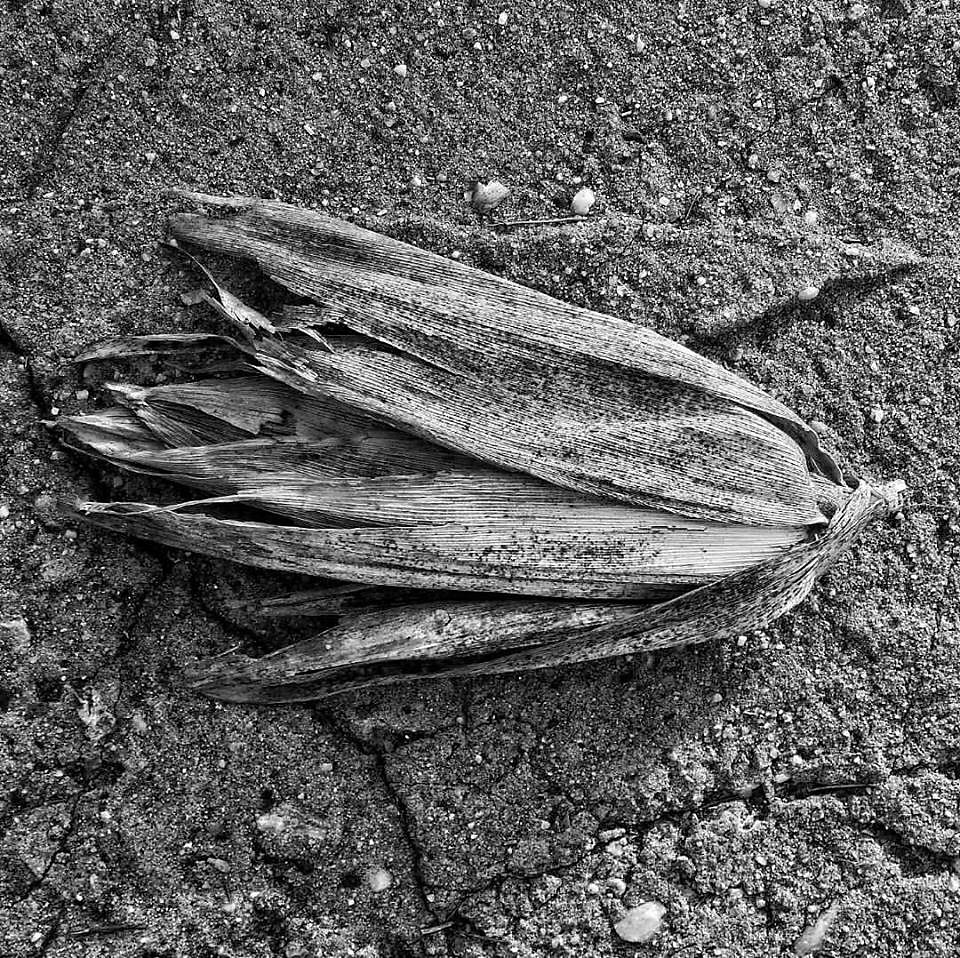
The first assignment that Ted gave was to take one subject or idea and shoot it from ten different viewpoints. In truth I shot 13. No edits, no selection from a larger set, all thirteen images right here.
The above is the actual notebook I pasted my shots after printing them out. I know it looks a bit old school, but the charm of it is what makes me happy. Below are the actual shots with the notes I scribbled along the edges.....
•••
Shot on a Samsung Galaxy S5 with Camera FV5
I was a bit distracted when I started this. I couldn't decide what to shoot with. I spent so much time worrying about gear rather than what I am shooting.
The hard part was getting it to focus. Finally I just gave up. In the end I just went with it. In the end I really loved what I got. I ended up shooting 13 images. I wonder what Ted will assign next?
Why B&W? I think mostly because of the abstraction of B&W. It basically reduces things to just light and composition.
If I were honest, these shots may not be as creative as some of the other work others have done for this. I'm perhaps lacking the level of creativity and need to push there.
All italicized text is as exactly written in my notebook.
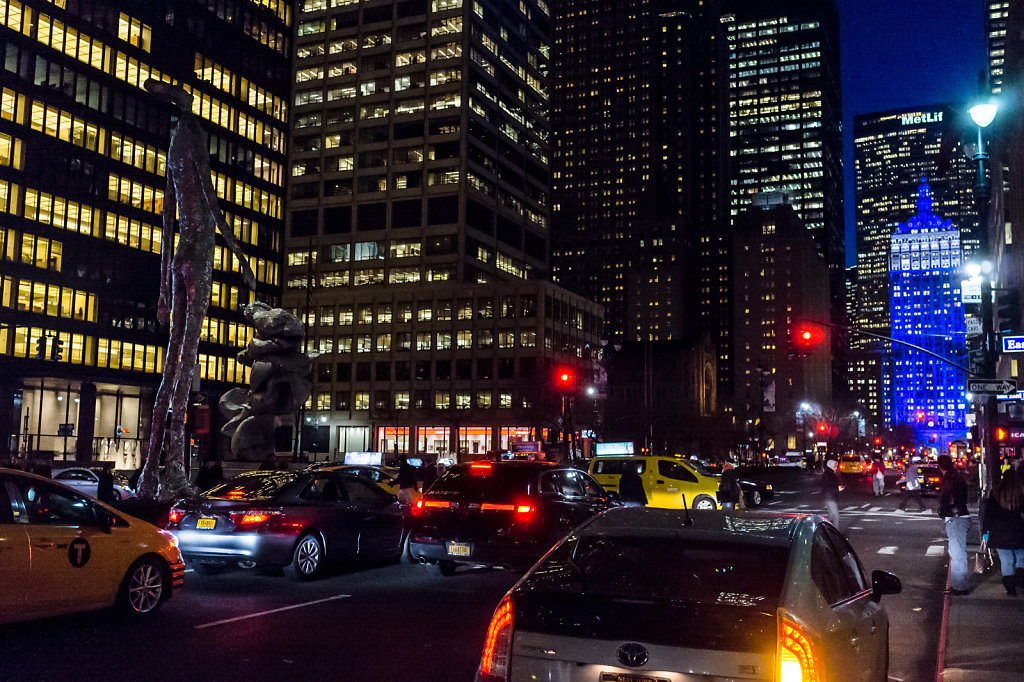
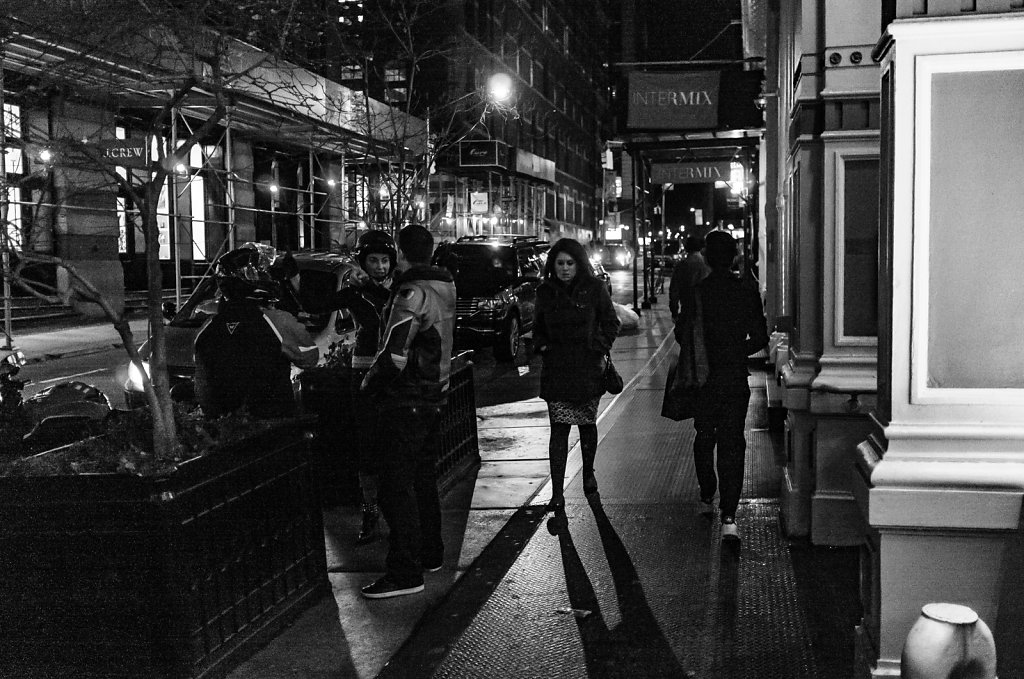
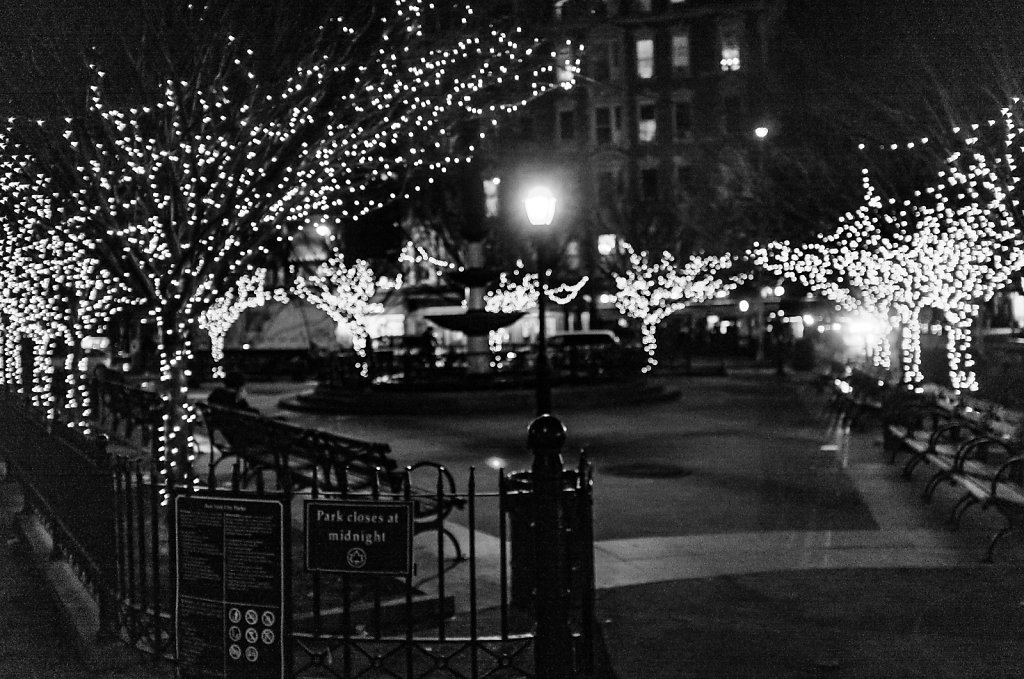
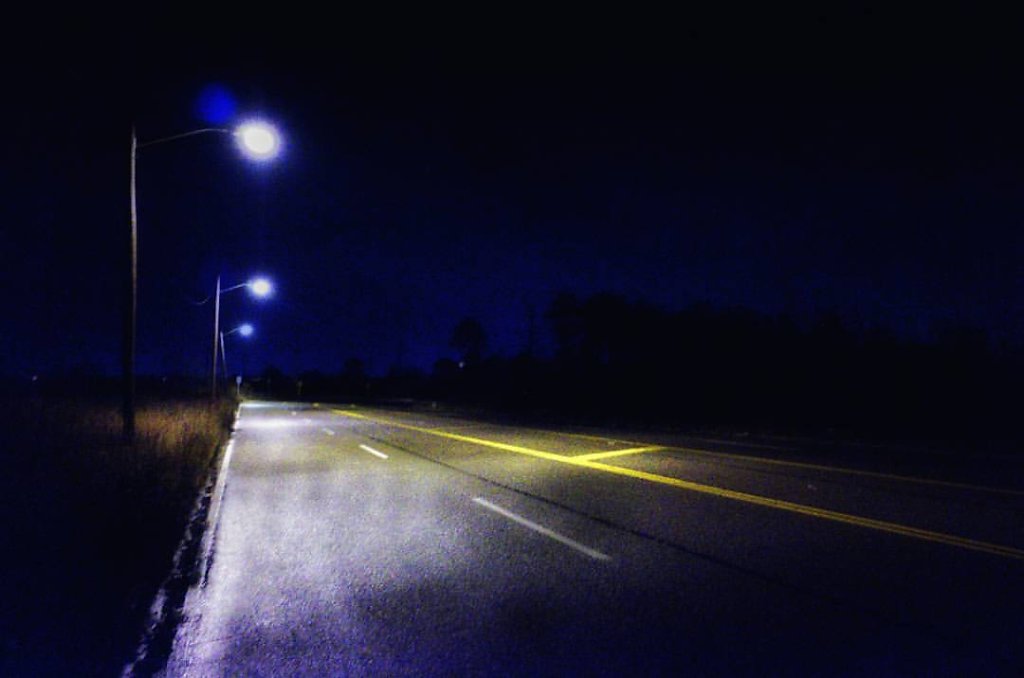
Twilight falls upon the City. New York becomes this wondrous place when Helios takes his chariot beneath the horizon and the stars like diamond dust fill the skies.
The people who live and work here bustle about, the City taking a deep relaxing breath as it heads from twilight to an obsidian night.
Like fireflies the leviathans along the great avenues begin to flicker and glow, their light filling the void with amber and blue.
The people look up into that brilliance amazed the garish beauty of it all, enthralled by the spell the City weaves in neon and sodium light.
No matter where in the City, no matter the business the Night becomes a new and different form of life.
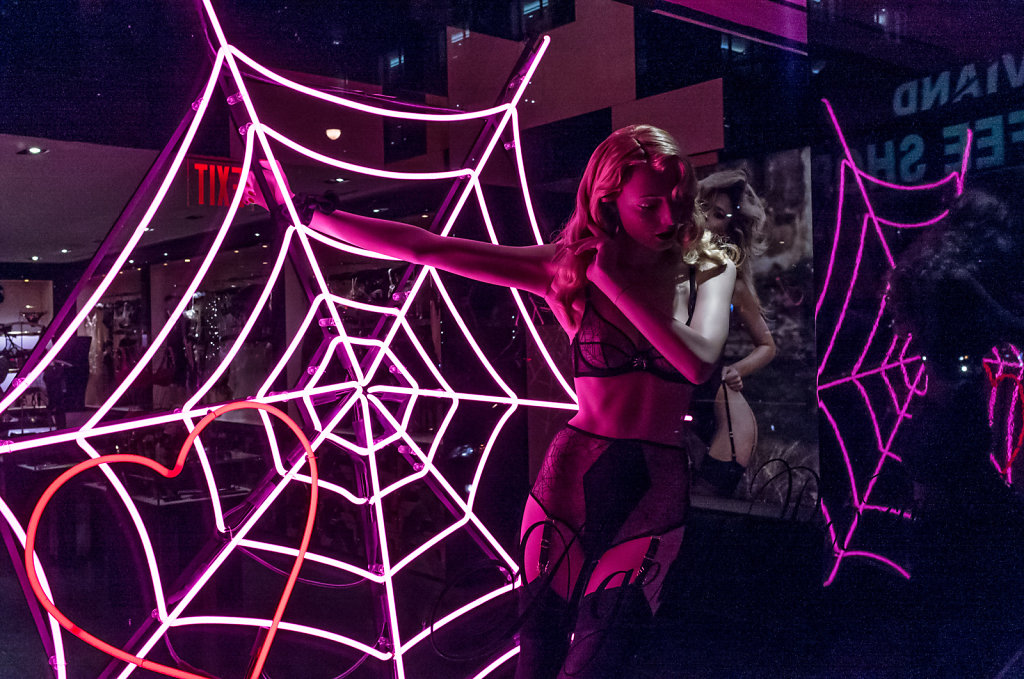
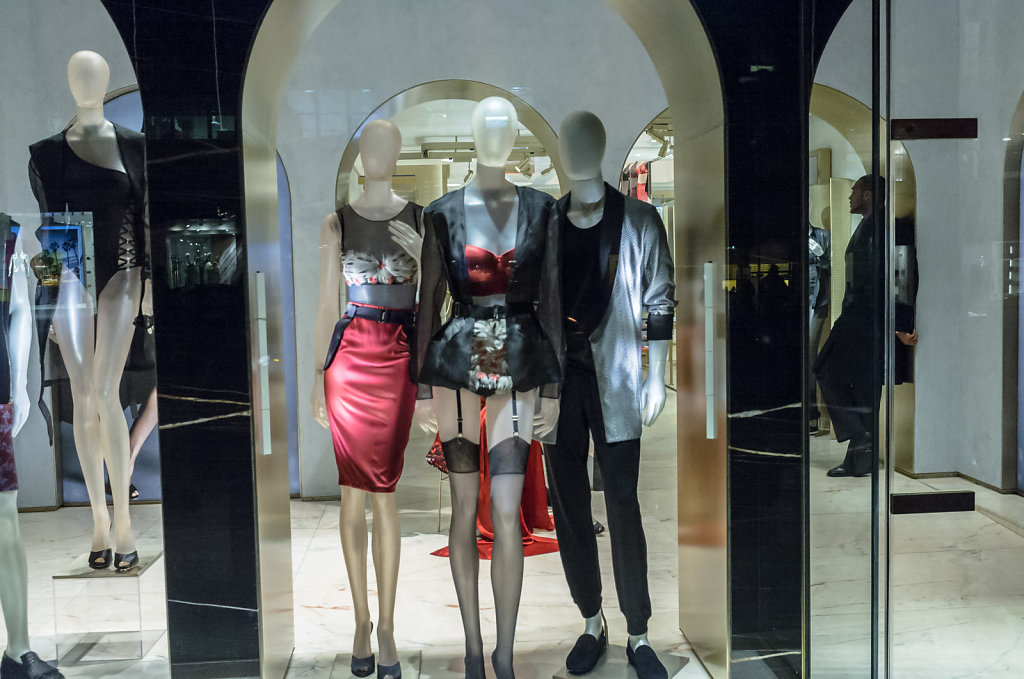
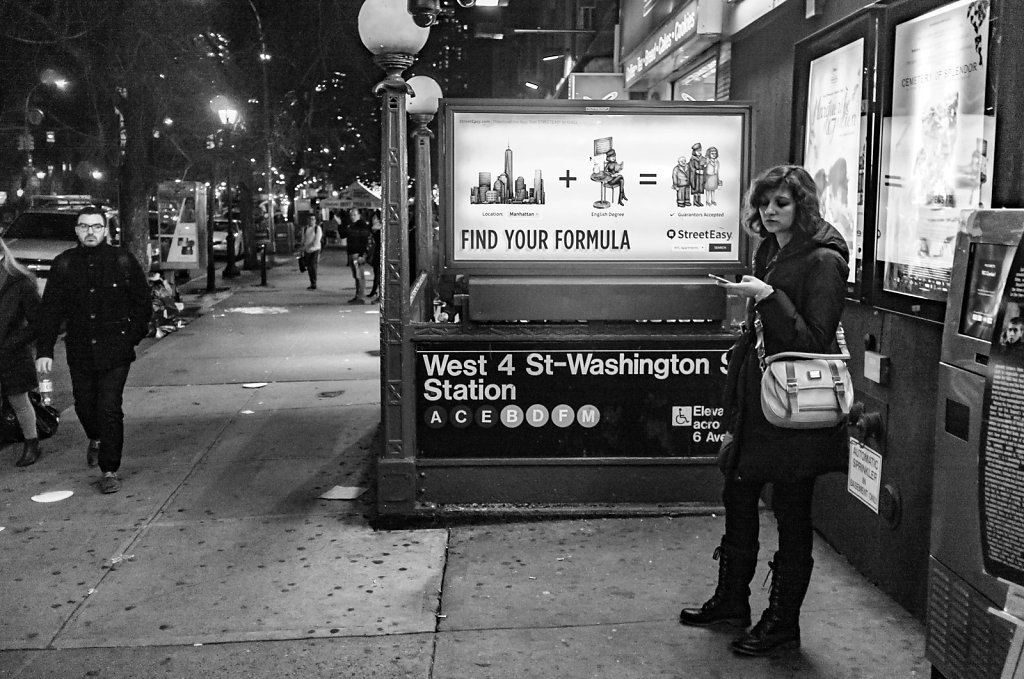
The windows of the great stores on Madison giving a floor show for all who wish to see.
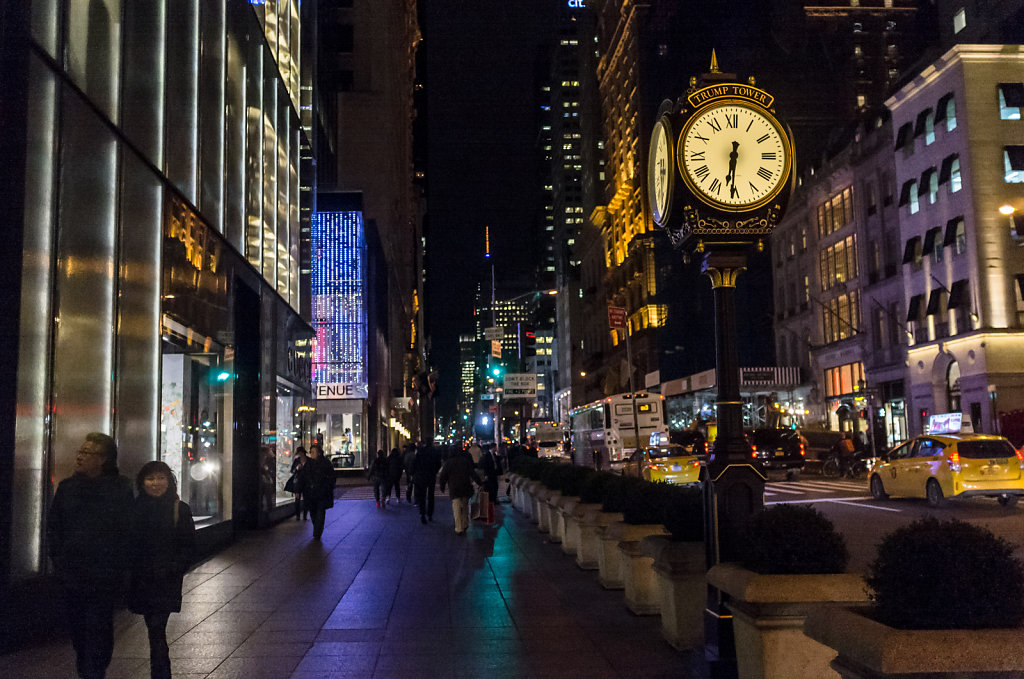
All the while people live their lives with their friends,
And begin their journeys home
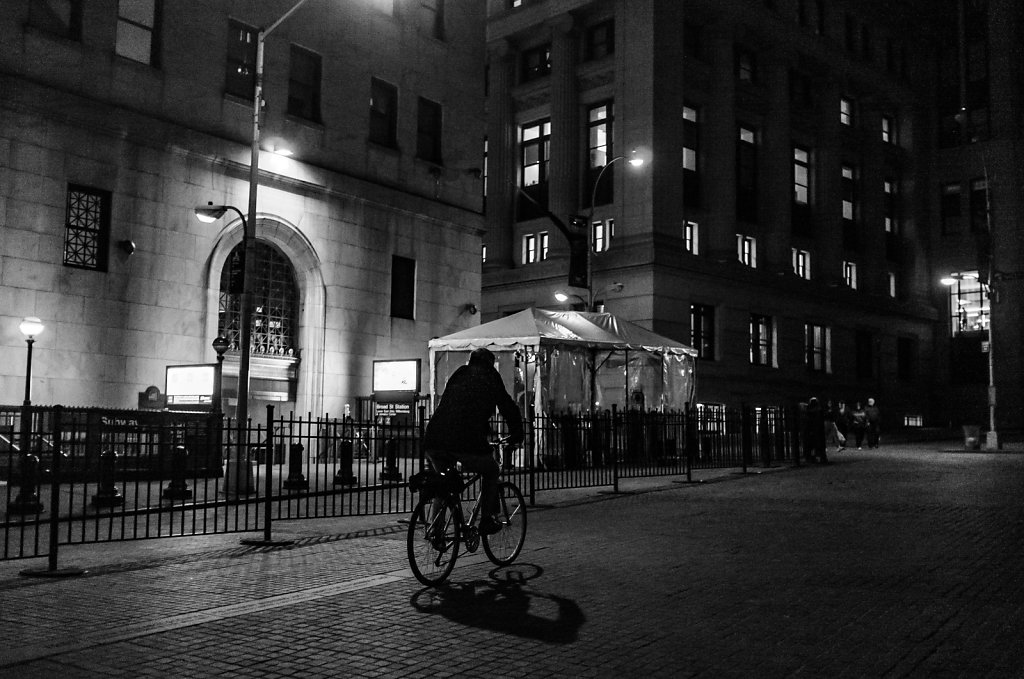
The cars filling the streets looking to escape back to wherever they need to be
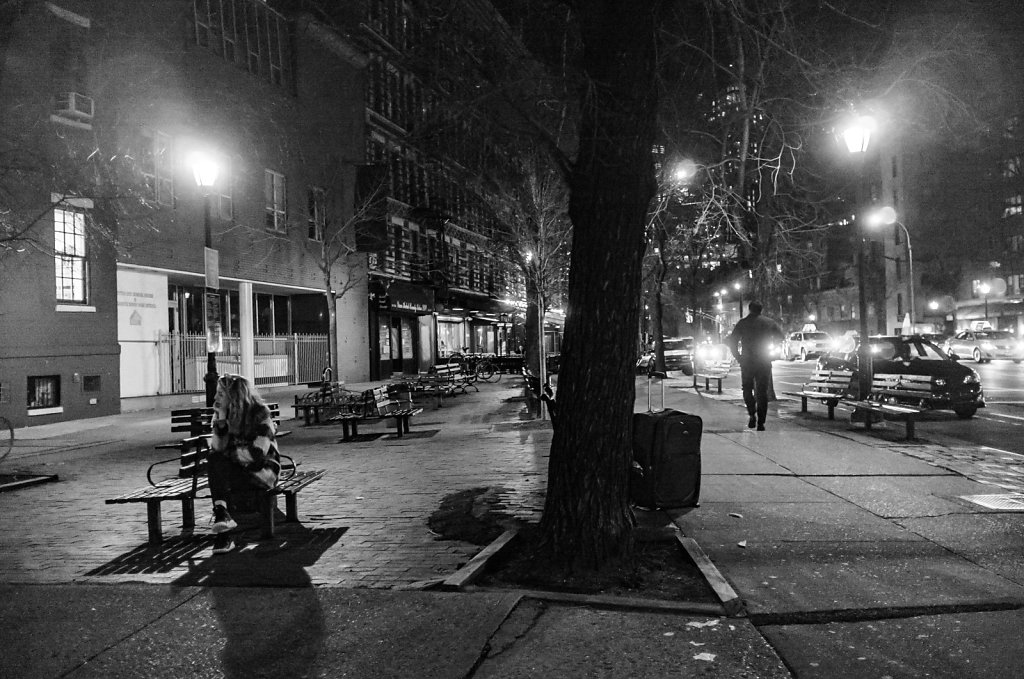
Slowly the streets empty
And the color finally washes out to a soft white
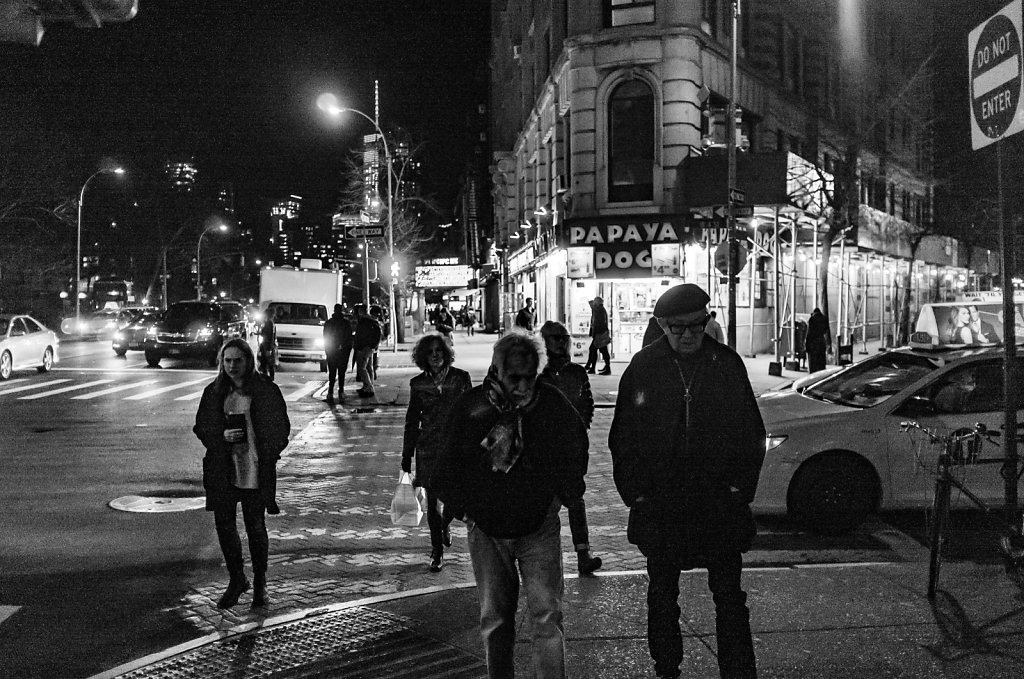
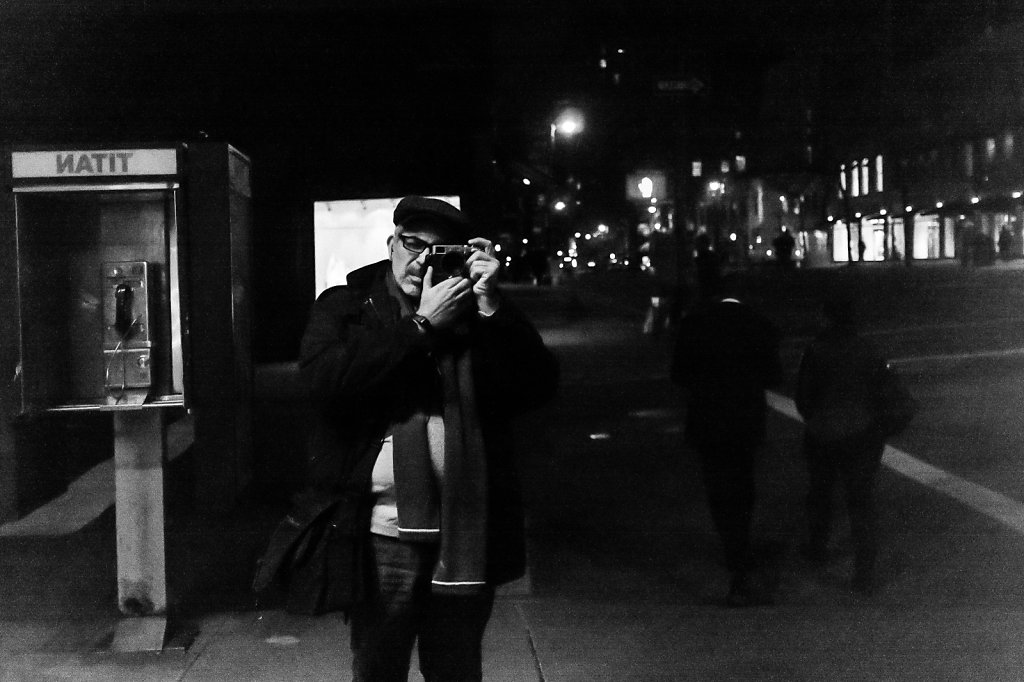
A different magic begins to fill the Night now
One in which retrospect of the day that has passed begins to fill our thoughts
The urgency to find sanctuary heightens as we look for that safe haven until the Sun rises again
We wonder if we shall be abandoned and forgotten in the fading glow
Perhaps a late show to chase away the feeling of isolation
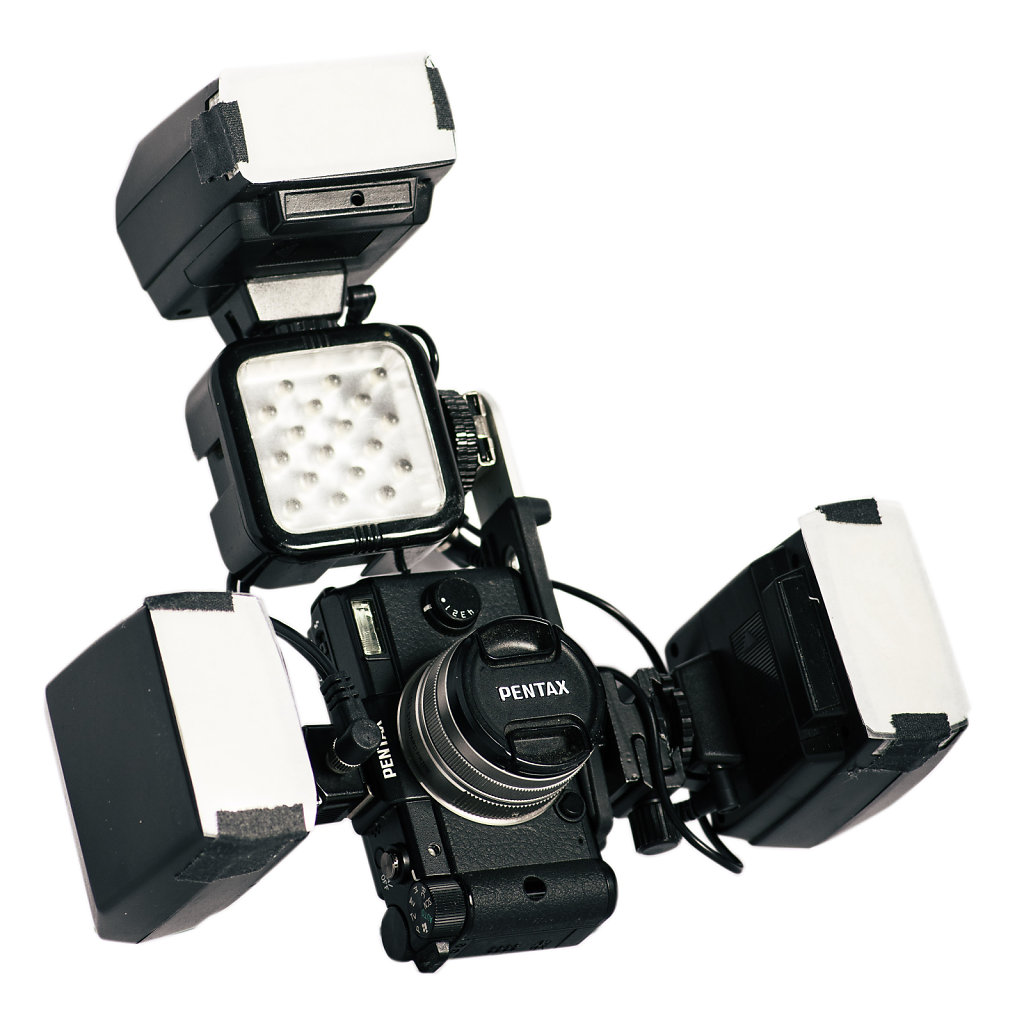
In this edition of “What’s In My Bag” I’ll go over one of my favorite toys, my “Frankencamera” setup for stills using a Pentax Q.
What’s Actually In The Bag
Let’s first start with the bag itself, my old Dome F-803 Messenger Bag. It’s an old bag, so old the strap has worn off so I went and purchased a military bag strap made of the same canvas at an Army/Navy surplus. As you can see besides the strap, this bag has lasted me about twenty years! The F-803 is usually a 6 pocket affair that comes with an insert to make the main compartment a three pocket setup. I’ve taken the insert and use it in my F-802 that you’ve seen in the previous edition of this series.
The rig itself is from an old Sunpak Slave flash as well as an IKan cold shoe. The video light is used as a focus assist light in this setup while the three F-18 flashes have diffusers made from tracing paper sandwiched between plastic from a clear plastic folder and held on by gaffer’s tape. To trigger all this I use a Pentax 2P Hot Shoe Adapter that has a pass through to allow the flash mounted on the hot shoe of the Q to fire as well as a PC Port with a splitter to connect the other two flashes via sync cables. Basically this whole rig cost at most $80 from parts that are readily available In another article I’ll go over shooting with this rig and how I post process everything.
As many of you know I shoot with a Pentax 645Z for a large portion of my work. Prior to that I shot with a Pentax 645D and before that I rented a Phase One back for an old Contax 645 I use to own. Now many of you will of course ask the obvious, why shoot medium format digital today? With cameras available in the 30+MP range that are smaller and less expensive what is the allure that would lead one to medium format? Let me get this clear right off the bat, I have a very strong relationship with Ricoh Imaging, the owners of the Pentax brand. This article was suppose to be a simple white paper on how to get around Capture One for tethered shooting. It was suppose to be quick and easy, but with many thanks to Ricoh and of course much patience and a few revisions this has become something a bit longer.
Now back to the question - “Why Medium Format”. As I noted there are cameras by several manufacturers that easily get into the resolution of many medium format units. Cameras by Sony, Nikon, Canon and soon Pentax as well all have “full-frame” options that reach into the 30+ mp range. Resolution must therefore not be the driving reason for the desire to shoot medium format. What could it be?
In the image above you see three shots side by side using different cameras and their respective “normal” lenses. Each uses a different sensor size and have the identical field of view. In all the shots the ISO and aperture are identical as well as the FOV. Yet in each the DOF is vastly different, getting shallower with each increase in sensor size. Why is this? Focal length is the answer. On the far left is a shot using a Pentax Q with it’s 8.5mm f/2.8 lens, next to it is a shot from a Pentax K3 using a 16-50 at 35mm, and finally the Pentax 645Z using a 75/2.8. Even though each of these lenses provides a near identical FOV, the shorter actual focal lengths will have a lot more DOF. You cannot argue with he law of physics. This is why one shoots Medium Format, you use longer focal lengths for the same FOV. Because of this you get better subject isolation and shallower DOF for the same FOV. The penalty of course is you need to be a lot more careful with your focus technique, and of course you can’t shoot rapid fire, willy nilly. The exploit the benefits of Medium Format fully, you have to slow down your approach and take a bit more time.
Now let’s move on to the next matter, workflow. When Pentax released it’s first MFD, the 645D, it enjoyed support in Capture One for DNG conversion. One could capture via a workaround into Capture One as well, much like Hasselblad H3D users had to do. Unfortunately Phase One has decided to block DNG support not only for the 645Z, but all Pentax cameras. Since their product is vastly more expensive with far less technology, Phase has decided to block all competitors in an attempt to monopolize the market and take choice away from the consumer. Now for the vast majority of Pentax users this is of little consequence, but for 645Z users this is a major headache. Most work done with Medium Format cameras is done in a tethered workflow model. This is primarily due to the market sector MFD users are in. While the 645Z has expanded these markets and the places one can confidentaly use a MFD, the vast majority of the work still is done in markets where an AD will want a realtime view of what is being shot.
Thankfully for us Capture One is not the only solution available. Adobe’s Lightroom CC provides us with two methods to implement tethered workflow. One of these methods also provides the added benefit of compatibility with Lightroom Mobile, thereby allow you to provide an experience similar to using Capture Pilot only without the iOS only restrictions. So let's dive in!
Option 1 Pentax Transmitter Software
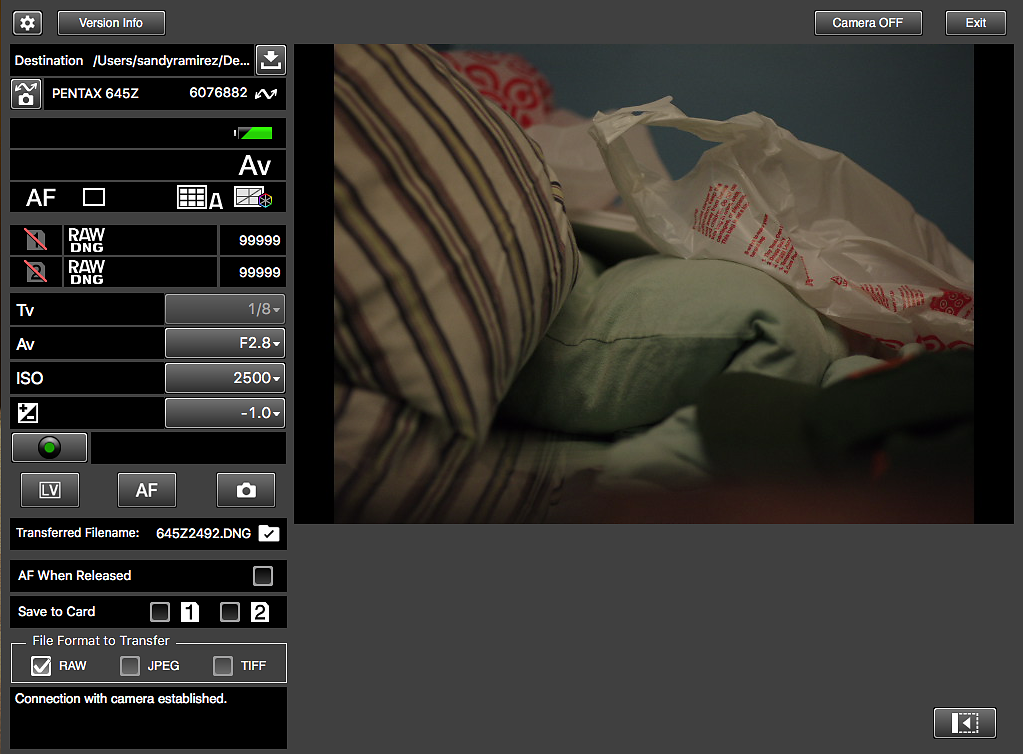
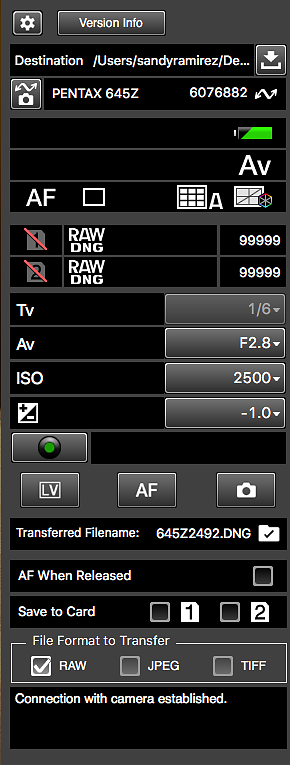
This first option is the least desirable of the options available. It is basically similar to the old “watched folder” work around in previous versions of Capture One. The application is Pentax Image Transmitter 2.0. This version of the package does provide an image preview and allows you to fully control the camera as seen from the screenshot below.
One very interesting thing is the LV function that gives you the Live View screen right from the camera. It also allows you to write directly to the memory cards while tethered, and allow you to shoot in TIFF as well as the usual DNG and JPEG formats. What Image transmitter basically boils down to is a quick and dirty way to whether and capture to your computer.
The control panel above is the key for what we are trying to do. The section at the top marked “Destination” is where you will choose the folder your captured images are stored. This will be important when we get to Lightroom in the next step. Now the most important thing to remember is that folder must be empty for Lightroom to do what we need it to do. The video below will demonstrate the final steps.
The live view feature is the most interesting thing and as you can see includes focus peaking. The only real bad thing here is the fact that one cannot enlarge the window or use the Transmitter Software to also do video capture direct to the hard drive. Another limitation of this method is the fact that in Lightroom I cannot target a Collection. Collections is where the real power of Lightroom in a capture workflow lies. Collections allow you to sync via the cloud to mobile devices such as an iPad or Android Tablet like the Samsung Galaxy Note Pro.
Option 2 - Pentax Tether Plugin
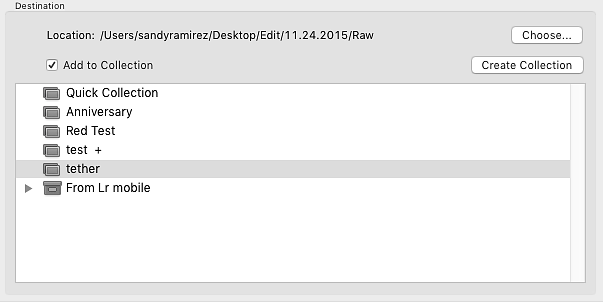
While the above does work to capture to a hard drive and as you see in the video above apply a recipe as the images are imported into Lightroom, the limitations on syncing with an exterior device is problematic. Another issue is of course the need to run additional software. The less one has to worry about the better. To that end the folks at Ricoh Imaging worked together with Adobe and created a plugin for Lightroom that allows direct tethered captured. The major benefit of this is that you can send the files directly to a Collection that can be synced with Lightroom Mobile. This allows you to hand the client a tablet and they can watch the image pop up right there. Now granted Capture Pilot does this as well, but Lightroom Mobile goes a few step farther allow not only selection of the images which gets synced back to Lightroom, but it works via the Adobe Cloud, not just WiFi. This allows the client to be remote from the shooting location, hell even the other side of the globe if need be. LR Mobile also allows the client, or better their Art Director to modify the DNG development recipe and have those changes updated to whatever the photographer is shooting.
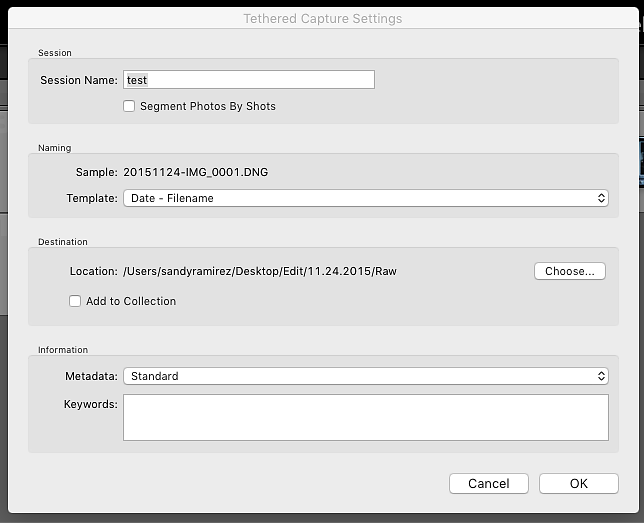
After going to File>Tethered Capture the following dialogue box should pop up. Here much like in Capture One you can set the location, file naming, metadata and of course the ability to “Add To A Collection” where the real magic happens. Once you click OK the following control bar pops up;
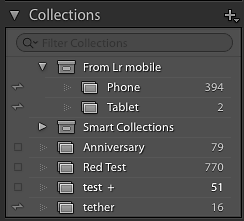
Unlike the Transmitter Software, the options are far more limited for camera control. Outside of the big silver button to fire the camera, the control panel only shows the information that you have set on the camera itself. usually I first create a collection for the shoot and make sure that I have it sync with LR Mobile. On the Collections Panel this is represented by a small double ended arrow to left of the collection name.
Once Capture occurs the images are transmitted immediately to LR Mobile allowing the client to select and of course if they are capable make needed adjustments to the photos and have those elections and adjustments sync back to the host computer.
In the last article we discussed the various capabilities in using old lenses on modern digital cameras, MILC to be exact. In this article we'll go through the complete process of developing RAW files with an eye on how to correct or enhance the unique look of these optics using the Pentax Q and Kern Paillard lenses from the late 50's.
What you see above is my Pentax Q with a C-Mount adapter to use the Kern Palliard (KP) SWITAR 25/1.5 lens. C-Mount lenses cover a 16mm film frame and currently are available in two types - motion picture and CCTV. Now while the modern CCTV lenses are multicoated affairs, they are optically inferior to their motion picture brethren. The KP's (the one on the camera is from 1956) are considered to be the Leica of 16mm motion picture lenses, with incredible optical quality. The downside of using vintage motion picture lenses is they are made of either single or uncoated optics that can cause a bit of chromatic aberration that can be difficult to correct for. In this case we have a single coat optic.
Since this article is about dealing with these sort of optics let's just dive right in. Above is a shot of Cory Nova from the Q shot using the KP. As you can see the contrast is a bit low and the color a tad cool. What really stands out though is while technically sharp the lens due to being single coated has a certain softness. The first thing we must address is the color and contrast.
First off we address the color by shifting it just a tad warmer. We also drag down the highlights and bump the shadows up ever so slightly. Oddly we decrease clarity and do nothing in the contrast. The clarity drop is to give the skin a smoother look. Increasing contrast is not done as that would tend to contract the histogram, giving less leeway when doing post production in Photoshop. Please note this is the ACR control panel, not Lightroom. We'll delve far more into that application when I publish my 645Z articles. So if I didn't add contrast how did the contrast increase ever so slightly?
In the latest versions of ACR and Lightroom there is an FX tab that has a wonderful feature when dealing with the "haze" that single coat optics have on digital sensors - DeHaze. This is a bit different and not as destructive as just cranking up the contrast slider. The idea here is not to use too much. A small amount goes a long way. One thing you'll note is that I did not address the "sharpness" of the image yet. I don't in the ACR, but do in Photoshop. At this point I export out a 16 bit TIFF and move to the next step.
One reason I use Photoshop over Lightroom is the extensive retouching one does in much of the work I do. It is by adapting the technique I use for retouching images I can increase the "sharpness" of the final image. Above you see the final exported image. The next step is prepping this image for retouching by making two duplicate layers.
The first layer is what we call a "low frequency" layer. It is created by duplicating the original image onto a new layer then applying a slight gaussian blur. This is the layer we use to correct color and such.
The next layer is the "high frequency" layer. This again is a duplicate layer, this time applied to the low frequency layer and creates a grayscale image that contains all the detail information for retouching. At this point I do all my retouching work. Once done I duplicate the high frequency layer leaving the blending option at "Linear Light".
Much like the ""high frequency" layer this adds detail. I drop the opacity to around 50% so as not to over sharpen the image. From this point I flatten the image and carry out my final post process procedures. Now while this may seem a bit long and involved it really isn't. About the best way to perhaps save time in this process is to create a custom lens profile for the ACR module. Now since this is just a small MILC and not a Medium Format legacy camera like say a Mamiya RZ or Hasselblad 500CM using a Phase One back, I really see no reason to go through all that. In the future however I will do an article on this in case any of you do want to do this. I'll leave you off with the final image to enjoy and hope you all join me here for my next article.
The photos you see below were all shot digitally on cameras that do not have the mounts natively of the lenses used to shoot them. You see the lenses used to shoot these images are between 50 and 60 years old. How could I shoot these old lenses on a modern digital system? I used a pair of Mirrorless Interchangeable Lens Camera (MILC).
Over the last few years these types of cameras have become more prevalent in the consumer sector and with the introduction by Sony of a "full frame" MILC, now begins to enter the professional market.
The question many of you of course who aren't acolytes of the modern camera world will have is what exactly is a MILF anyways? Granted the vast majority of you will be a bit more advanced and will know what they are, so for those of you please indulge me while I educated the less initiated among our readers.
Basically cameras use one of three systems to create a way to preview an image prior to shooting. The most common on cameras where you can change the lens involves a mirror in the path of the light between the lens and the focal plane which bounces the light into a prism and mirror system so you can see what the lens is pointed at. This is known as a Single Lens Reflex camera. When you see the contraction DSLR you are basically discussing a camera with this type of viewing system for composing and focusing the camera.
A MILC eschews the mirror in the light path either using direct viewing or some other system to compose and focus the image. In most modern digital MILC that would be either the rear camera screen (giving us a digital version of direct viewing such as one would have on a large format camera) or on cameras sold more to the enthusiast market an Electronic View Finder (EVF). I could discuss Rangefinders but that would needlessly confuse the situation, so let's just work with the above.
The benefit of using a MILC is that they tend to be much smaller that cameras with the same sensor size since there is no need to create space for a mirror and it's flipping and instant return mechanisms. Smaller cameras usually means smaller lenses and less weight to carry around all day when you are out shooting. There are of course drawbacks, but technology is quickly eliminating many of the issues.
One of the benefits of all this is that the registration distance (the distance between the back of the lens to the focal plane is reduced. This has become a major selling point of these systems, many competing to get thinner and thinner.
Now why is this benefit? With such short registration distances this allows for a unique situation, if one can via adapter extend that distance and allow the mounting of other lenses, one could conceivably mount practically any lens one wanted at any time. Capitalism being what it is a small cottage industry around just that very idea has evolved in the last few years. Almost any MILC can currently be adapted for almost any lens mount out there. Now personally I don't understand why anyone would want to mount say a Canon or Nikon lens to an MILC outside of being a bit of a gear freak, but for those of us who have lenses for systems long abandoned prior to the digital revolution this becomes a very attractive option.
I personally own two MILC systems specifically for this purpose. One is a Sony NEX-6 which I use with Olympus Pen F lenses from the 60's. The other is a Pentax Q which I use with Kern Palliard C-Mount lenses from the 50's and Pentax Auto 110 lenses from the 70's.
The above image demonstrates what I love about these old lenses. The draw of these lenses is due to the very different formulation as well as the fact that these lenses were hand built and hand polished. They had a very different character than modern lenses, a bit softer but still "sharp". Of course using these older lenses does incur some penalty on digital sensors. The biggest issue is that to modern eyes these lenses tend to have low contrast.
The major reason why is that lenses back in the 60's and 50's either had no coatings (the case with a certain Kern Palliard you'll see in part two) or are just single coated, like each of the Pen FT lenses I use with the Sony NEX-6. Of course more recent lenses, those built mostly in the 80's onwards tend to have a good look on a digital camera, but these older lenses do need some work.
Both of the shots above for instance were shot using a Olympus 38/1.8 for the PenFT. Being single coats the contrast was quite low compared to a modern lens. Another issue is that older lenses tend to be a bit warmer in color rendition than modern lenses, requiring a bit of work to adjust color unless you are willing to create a lens profile for it.
Of course if you are using a 500 series 'blad with a Phase One back, this is something you've probably done, but if you are using some funky lenses on a consumer digital, you've probably haven't, and if you are into Lomography may not want to.
Now granted the focal length's I am using on these systems are fairly easy to match with modern lenses for each system, but with that said, there is a certain charm and of using these older vintage lenses. The feel of a smooth focus ring, the satisfying click of the aperture ring, and most importantly, that unique look lenses of those eras give an image.
In part two we'll look at some images from the Pentax Q and go over ACR processes to keep in mind when working with these vintage lenses.
I love George Hurrell. Now a few of you may be asking "Who is George Hurrell?" Without going to far into a history of 20th Century Photography, George was the man who MGM back in the Golden Age of Cinema would have photograph it's stars. Folks like Veronica Lake, Bette Davis, Joan Crawford, Clarke Gable and Marlene Dietrich among many others were subjects of his 8x10 camera. Many times these shots were done on the very sound stages in between setups that were being filmed, George having mere minutes to setup the shot. So great was his skill that even at the end of his career, entertainment's latest and brightest would make the pilgrimage to his lens. Madonna and Brooke Shields among some of his final subjects.
What made George so great? It was the fact that he was the master of using a single light. Now there are many of his shots when he had the chance to shoot in his own studio that used more than one light, but his most iconic shots of the great stars of the silver screen are one simple light, usually shot "broad" in Rembrandt position with the light to camera right. No diffusion, just a hard light usually some motion picture light swung into position for the 20 minutes or so he was given to shoot his subject on set.
Above is the diagram for the typical setup George used. Since he was on an 8x10 his portrait lens was a 300mm/5.6 lens wide open. That is basically for you 35mm folks a 50/1.0 or so for FOV and DOF. For me it's basically my 75/2.8 wide open using my Pentax 645Z. Mastering a single light is honestly one of the hardest things for a photographer in my humble opinion. A single light takes discipline and skill. No reflector no diffusion, nothing but the purity of light that a single light can afford. It's my favorite way to light a portrait, especially a glamorous one. Here is a shot I recently did of Adriana Vago using what I call "Hurrell Lighting"....
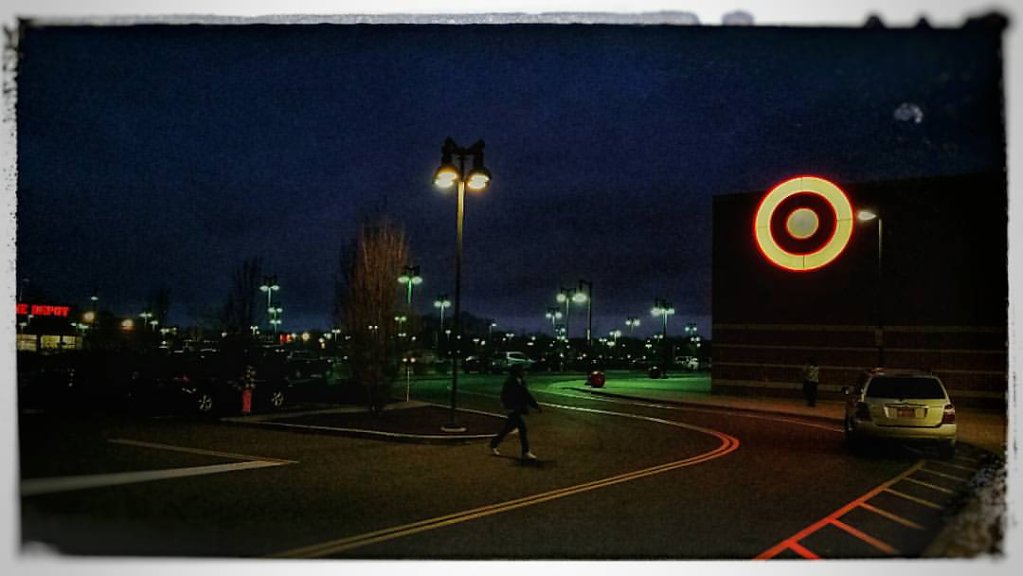
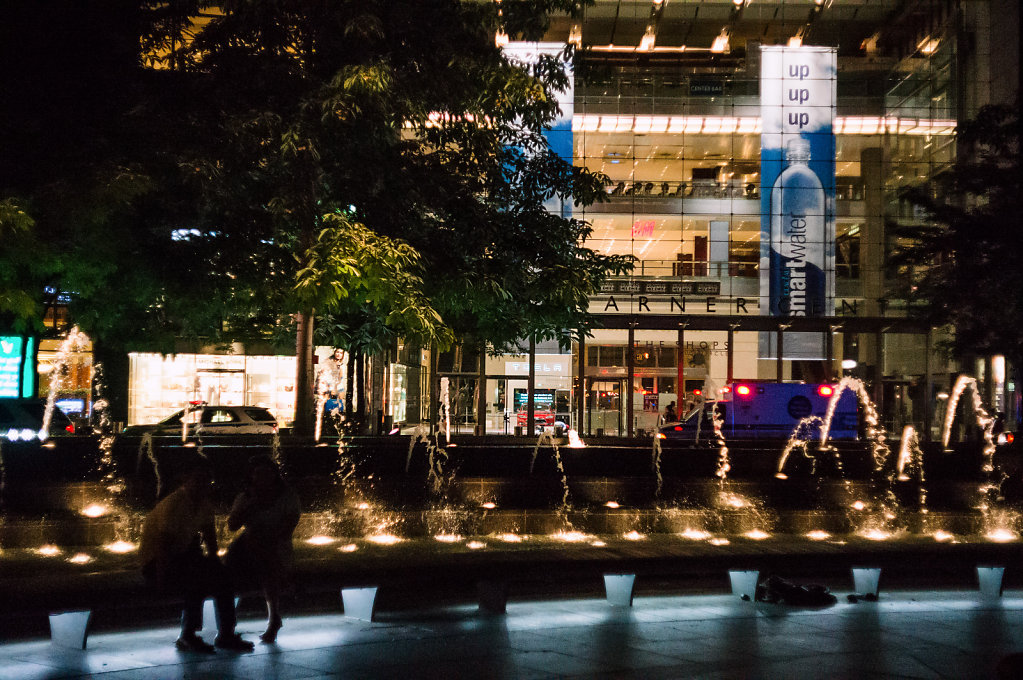
I wish I could show you all what I shot today. Unfortunately it was client work and must wait before it is featured here. Today was a physically difficult day to shoot. It was humid, hot and the clothing was winter outerwear. This entry will be brief, but I will share a location scouting shot with you all......
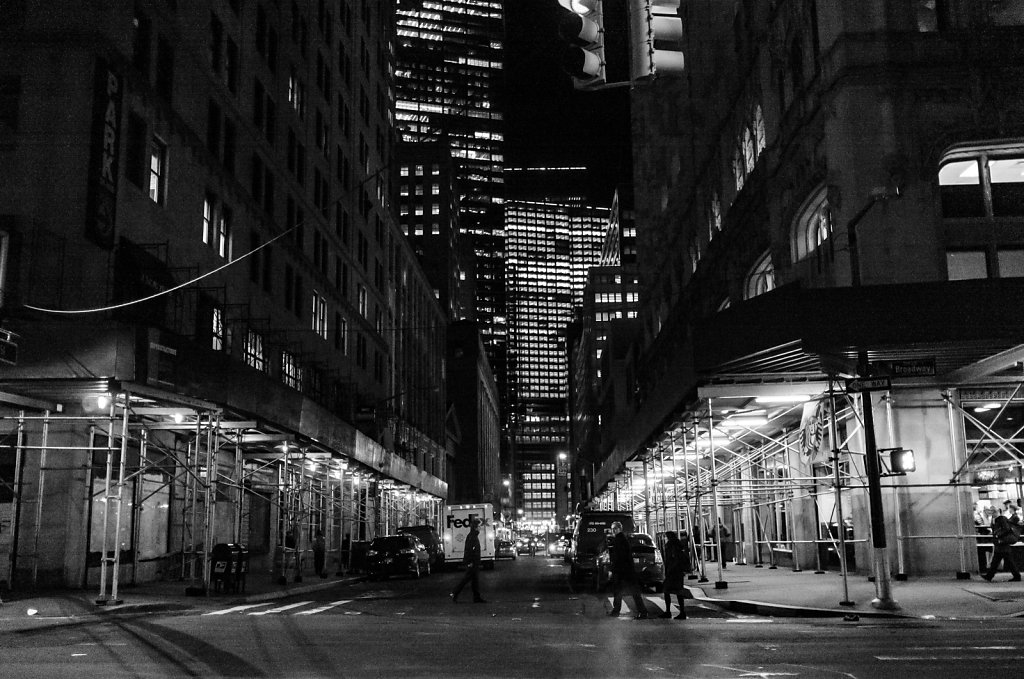
Concrete canyons and caves of steel, the sun rises on spinning wheels.....
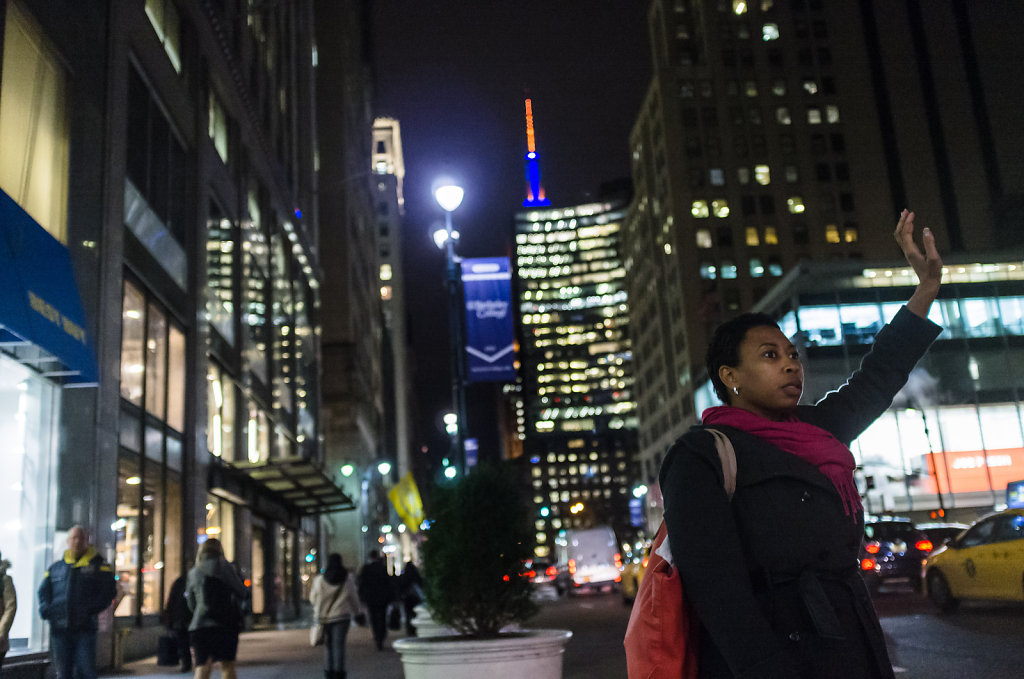
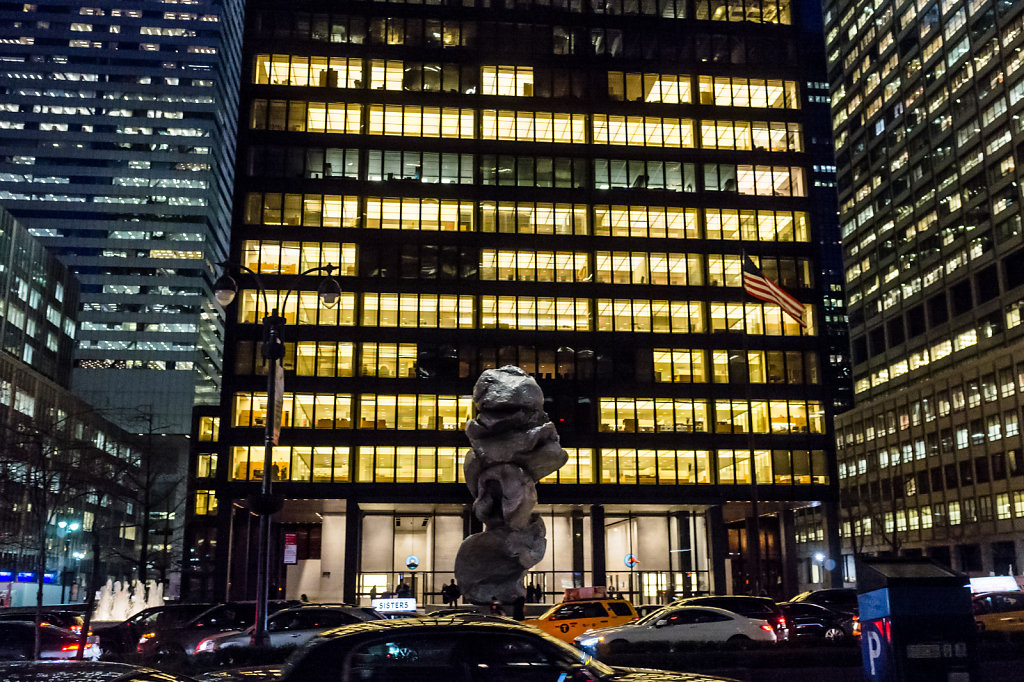
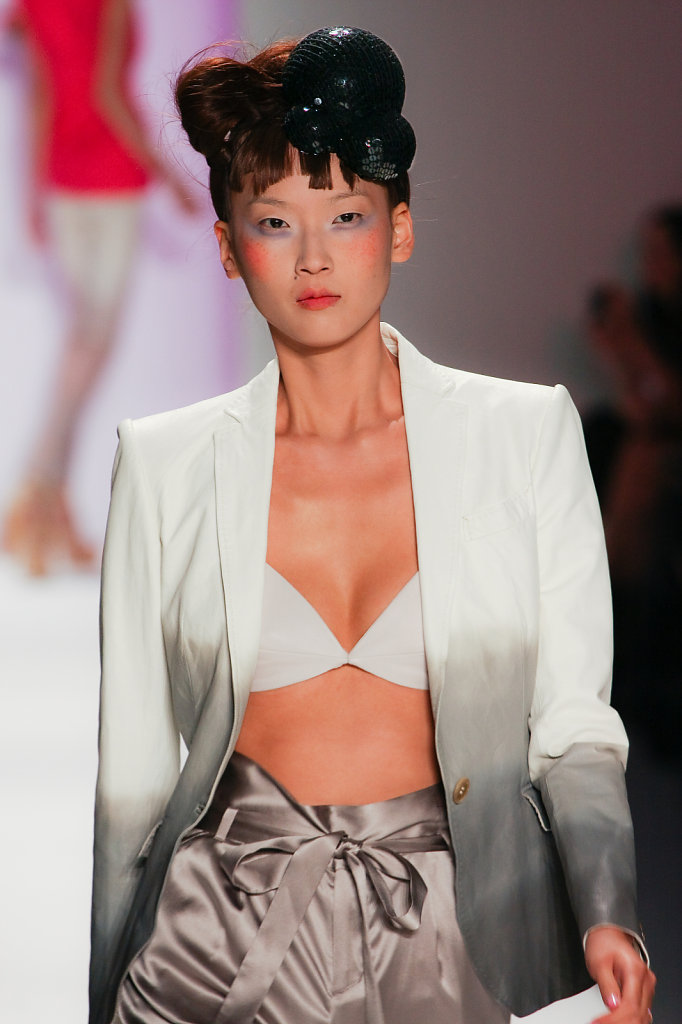
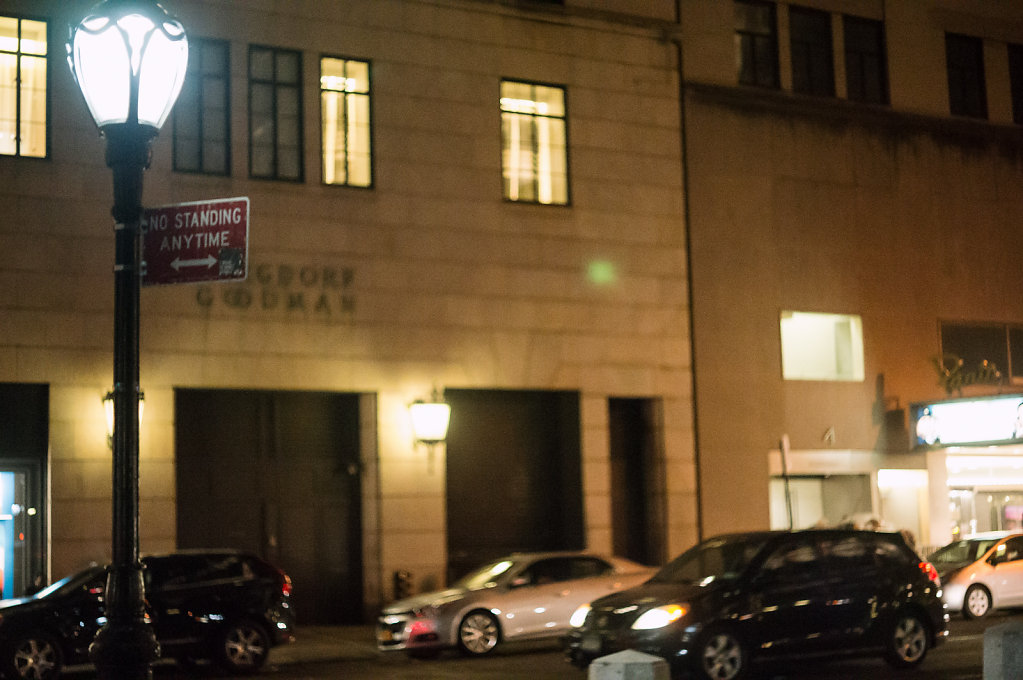
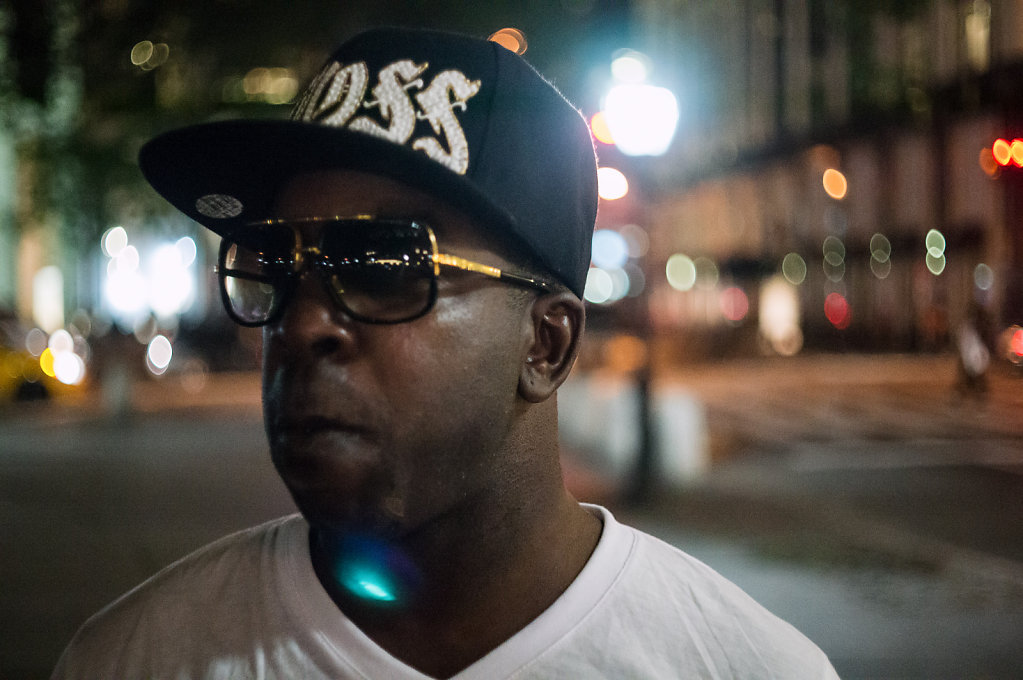
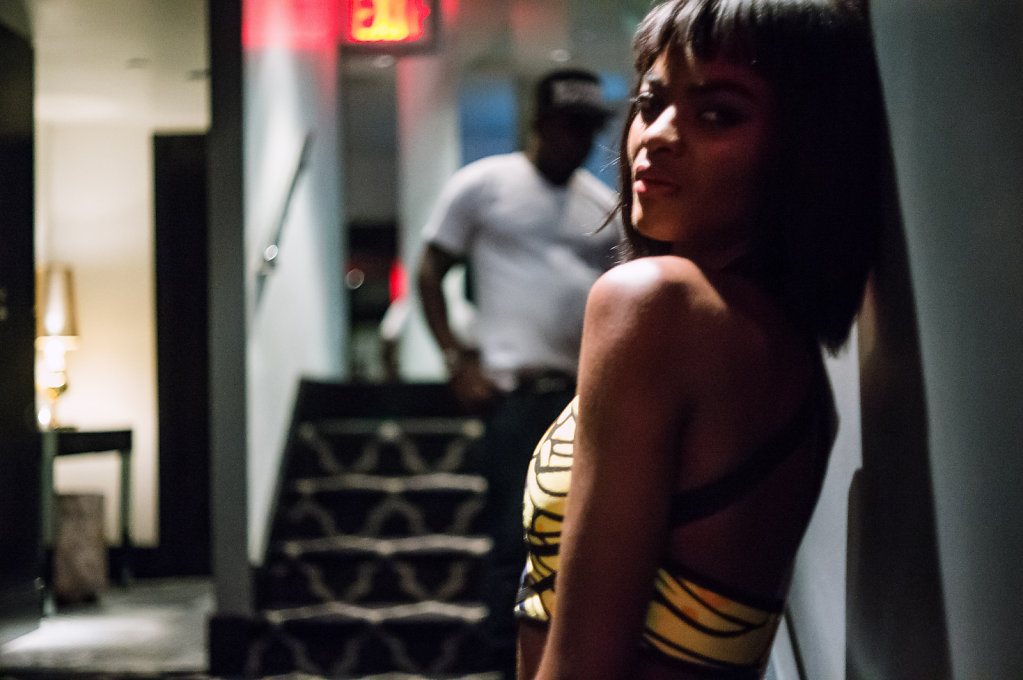
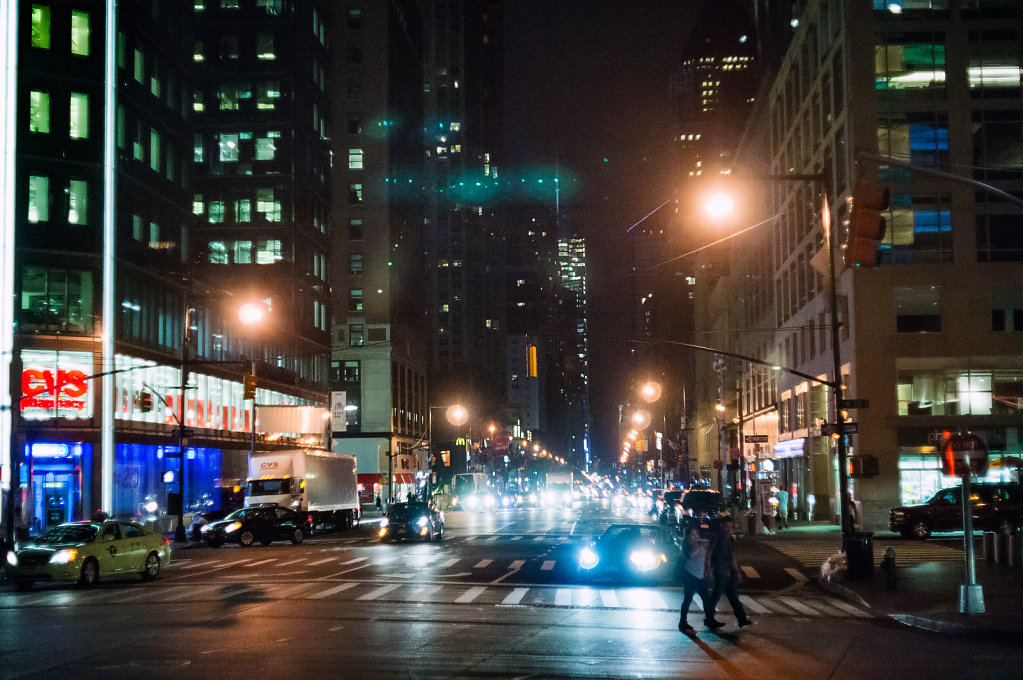
Well I try to write daily into this blog, but that isn't always practical. This week is such a case as it was the inaugural CFDA Men's Fashion Week here in NYC. It was the Spring/Summer 2016 Collections on view and between the house gigs and WWD I was kept somewhat busy. Wednesday night however I took the time to celebrate with my friend Loris Diran after his show which was a great success.
After enjoying a quiet though happy celebration at the Park Plaza Hotel by Central Park, I took the opportunity to do a little street photography using a camera I recently purchased used so I could adapt some classic lenses from the 60's that I love. At some later time I'll discuss more about adapting lenses to mirrorless cameras, but for now enjoy these shots of NYC at night.....
Shot on a Sony NEX-6 using a FotoDIOX PenF to NEX Adapter. Lens is an Olympus F.Zukio Auto-S 38/1.8
"Is in focus?" As a photographer you get this question often. Often enough a shot in crystal razor sharp focus is what is best. Then sometimes in a rare bit of luck you just discover that magic happens....
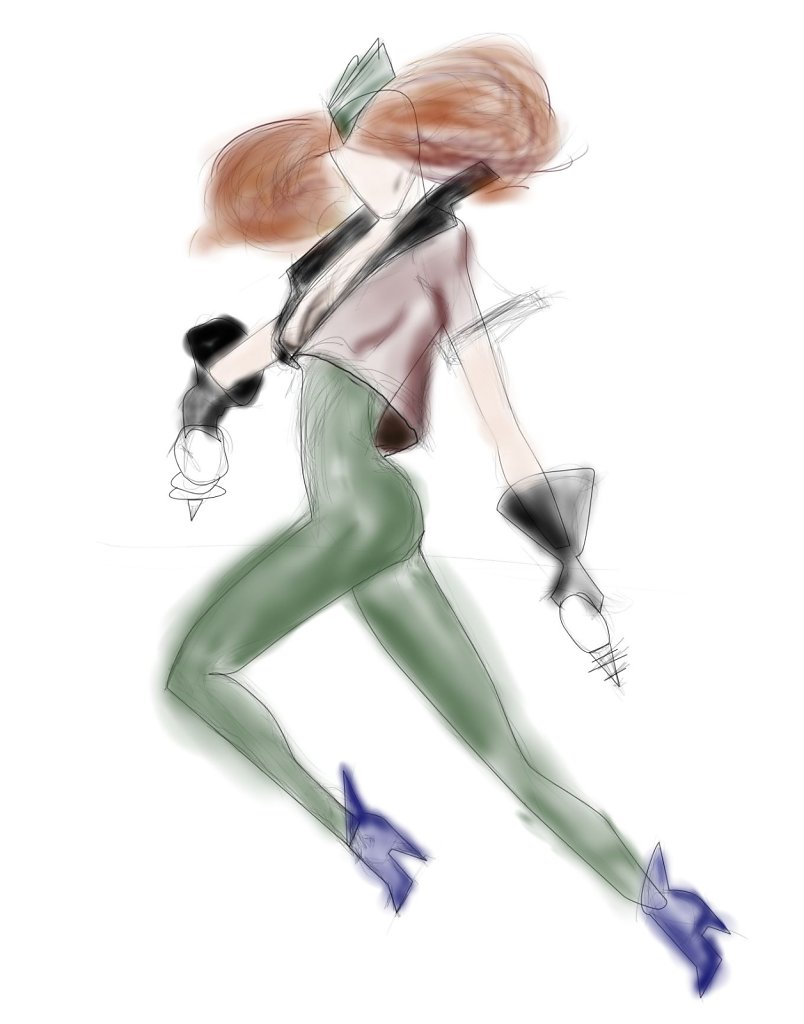
Folks who know me can tell you I have a very involved process when shooting. This is especially true of editorial and advertising spreads. Secretly I always wanted to be Stanley Kubrick. I want to make incredible films. Obviously I have not a single clue how to do that but do take an approach to editorials that I have learned from film making. That is the "storyboard" concept.
Now I am no illustrator. I will never get a sketch into a museum. That said I do plan my shoots when doing an editorial using storyboards. I create a virtual shot list that will tell the story I'm looking to tell via these sketches. So in this post I will share three storyboard sketches with you all. The story is called "Raygun". It was something I've been wanting to shoot for a while, but just haven't gotten around to actually doing. Maybe one day I will....
Just a quick entry now that the site has been redesigned and all my various online outlets consolidated to here. If you are looking for my work over on Blogger, I will not be publishing there any longer. Trying to keep all the sites together is just too much work. This is why I chose this new design for my site.
Today every website needs a blog to give insight to the company, service provider or artist that the site represents. Why make those interested in what I do and say go to several different sites just to figure out who I am and what I represent? It is quite liberating not having to worry about updating 3 or 4 different sites at once. One site to rule them all!
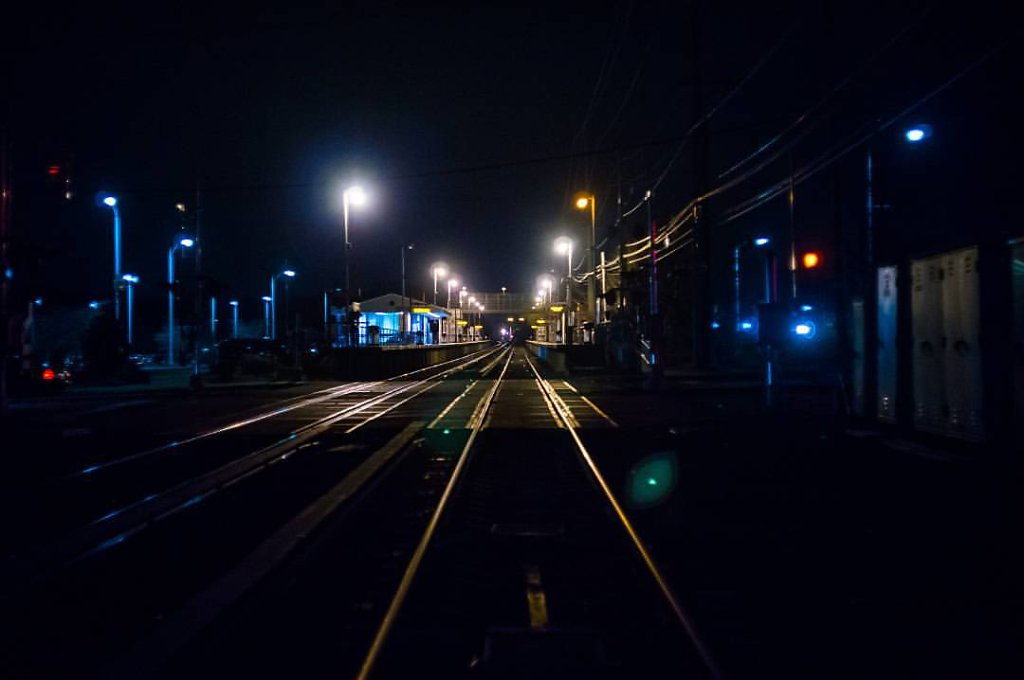
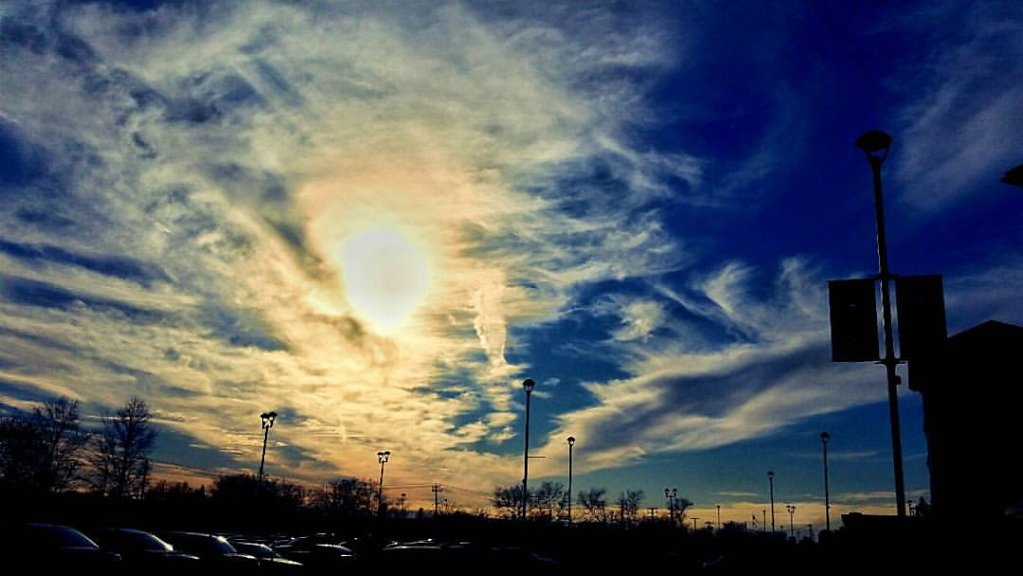
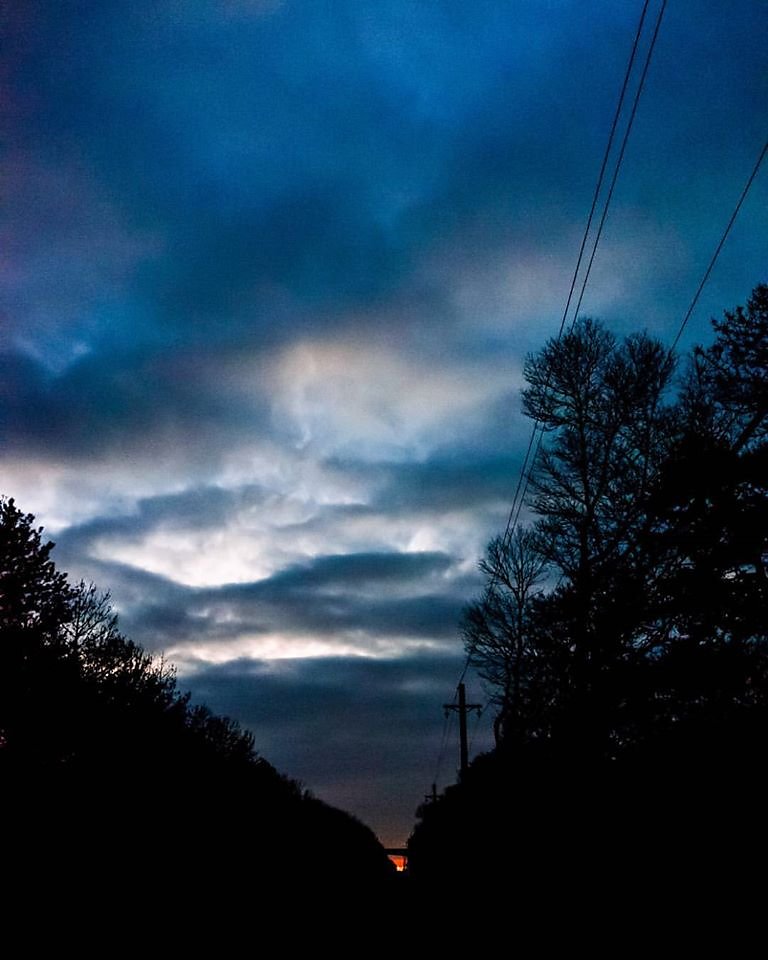
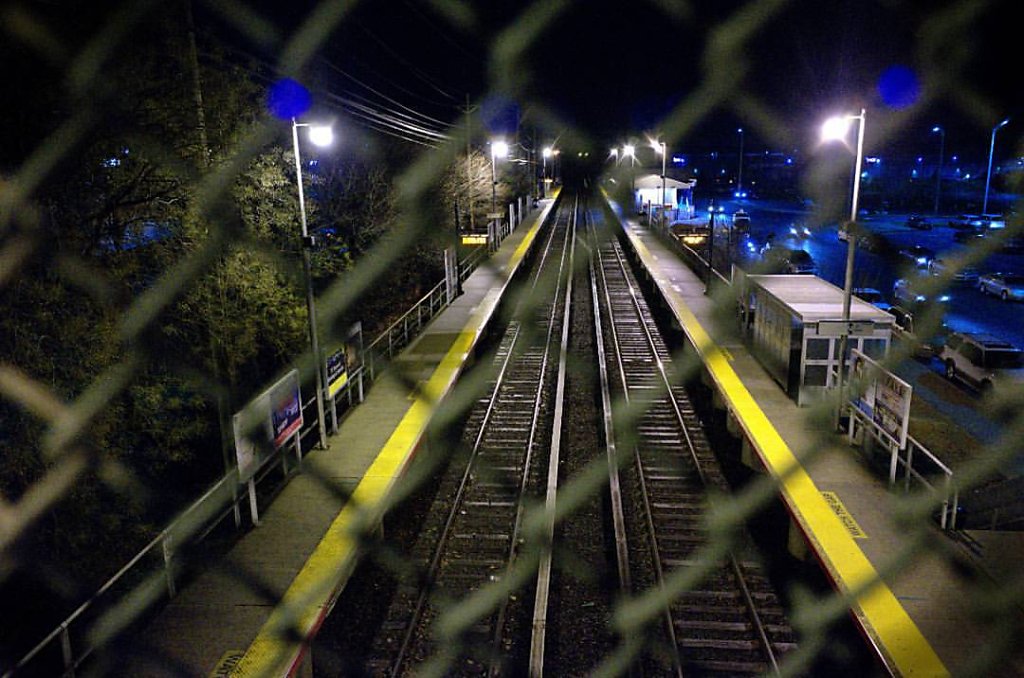
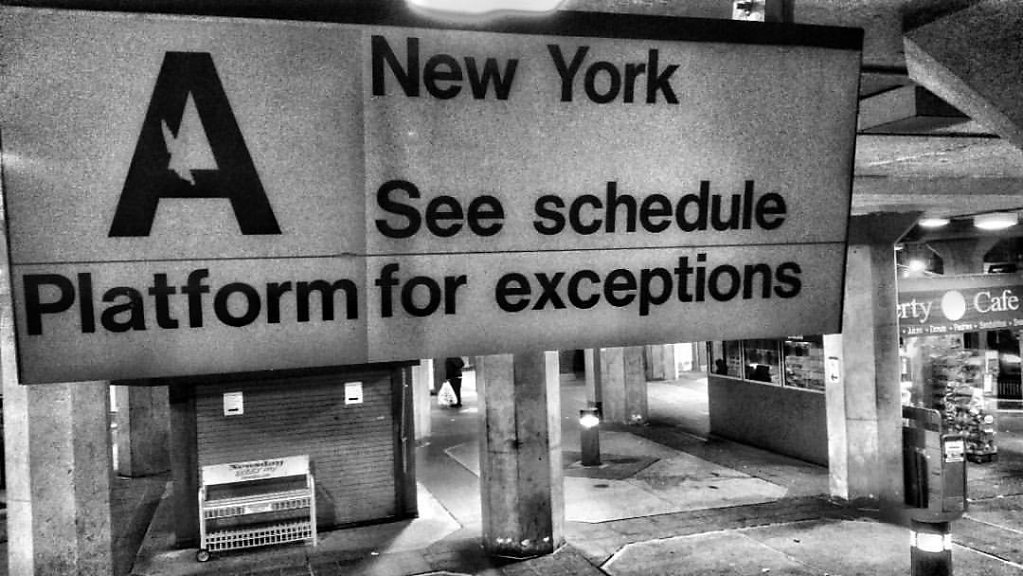
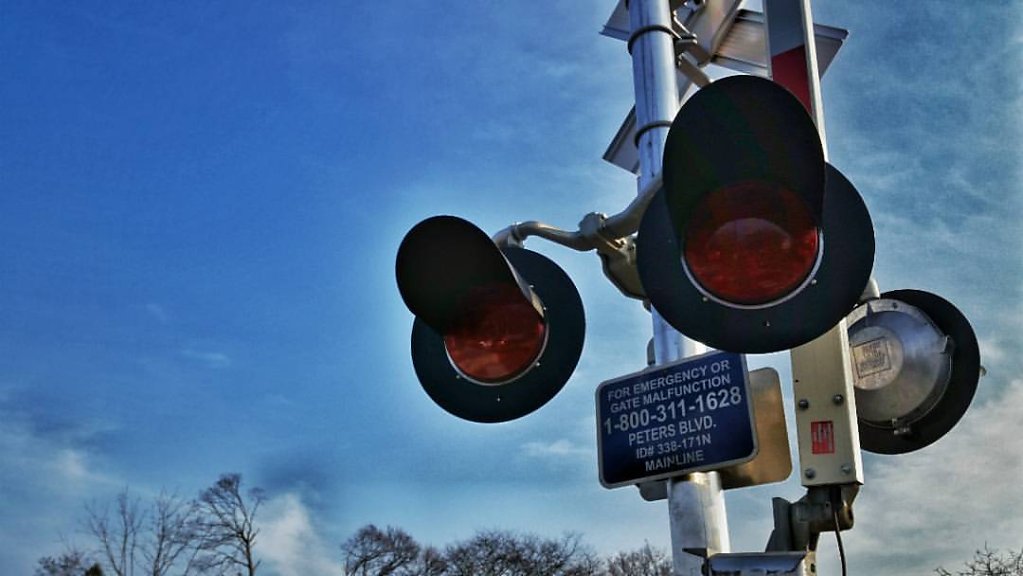
After updating and finishing the redesign I went out for some snack cakes and coffee and had my Galaxy S5 with me. I quickly in the fading twilight saw two wonderful things to shoot. The rail crossing and the sky....
Nature provides the best fireworks. Happy Independence Day folks!