Ted Forbes over at The Art Of Photography YouTube channel recently started a photo assignment project for his viewers. The idea is to create old school photographer notebooks, the sort we all used back in school to help get our thoughts and technique together. I still use such a concept to storyboard editorials, but that is more sketching. I also use Pinterest and Evernote in a similar fashion. I actually maintain a shooting log in Evernote, complete with final photos etc.
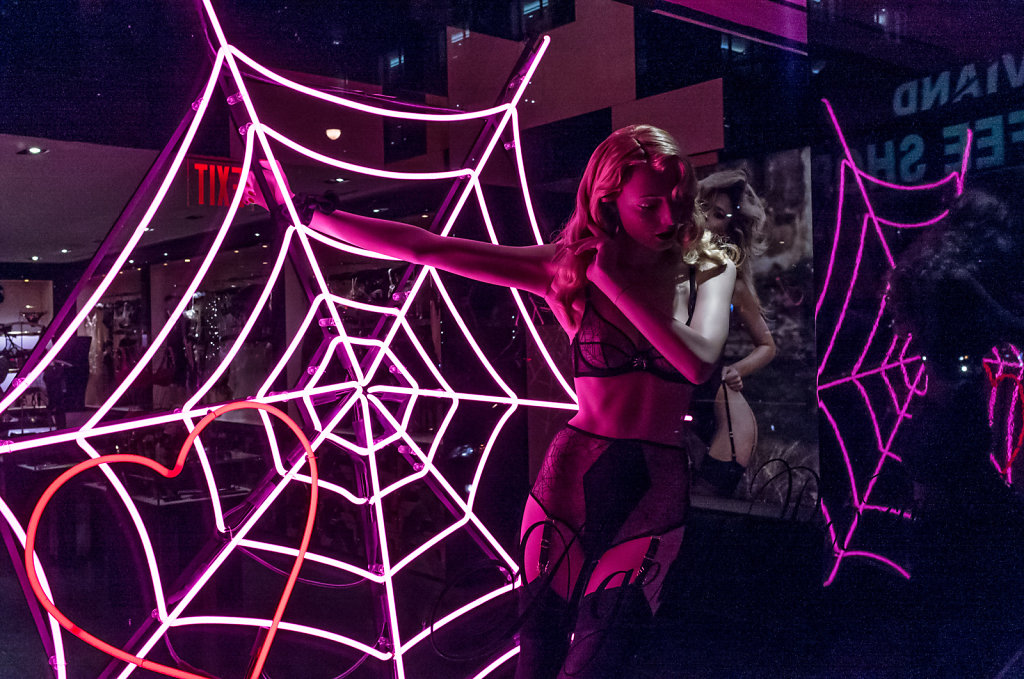
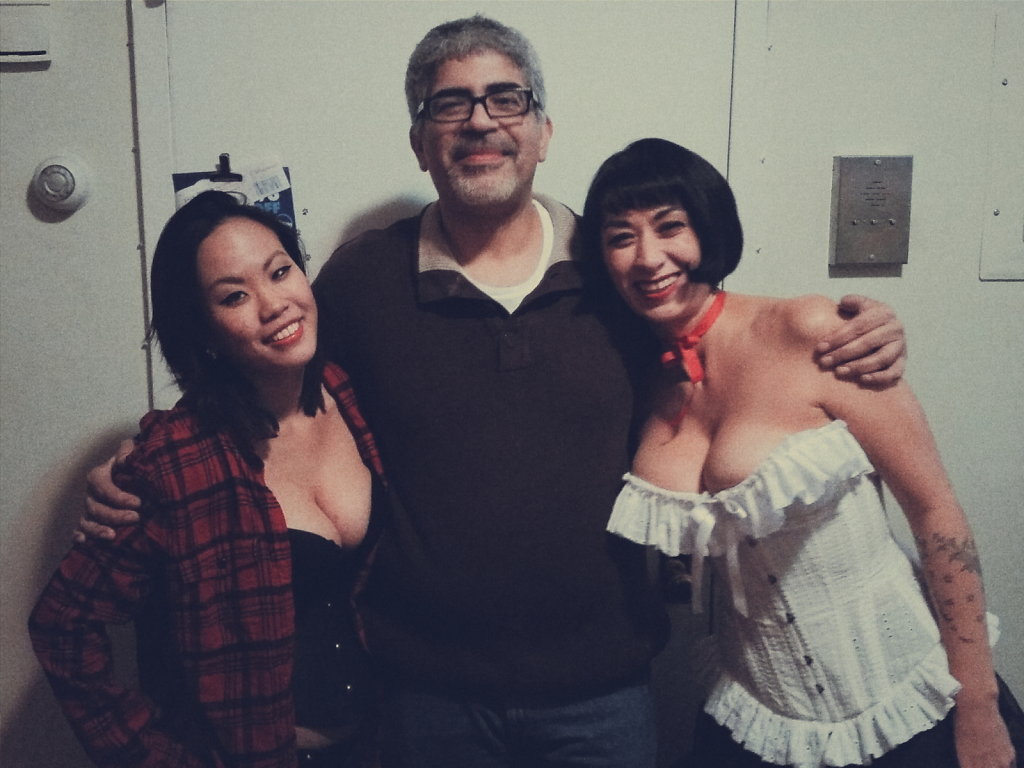
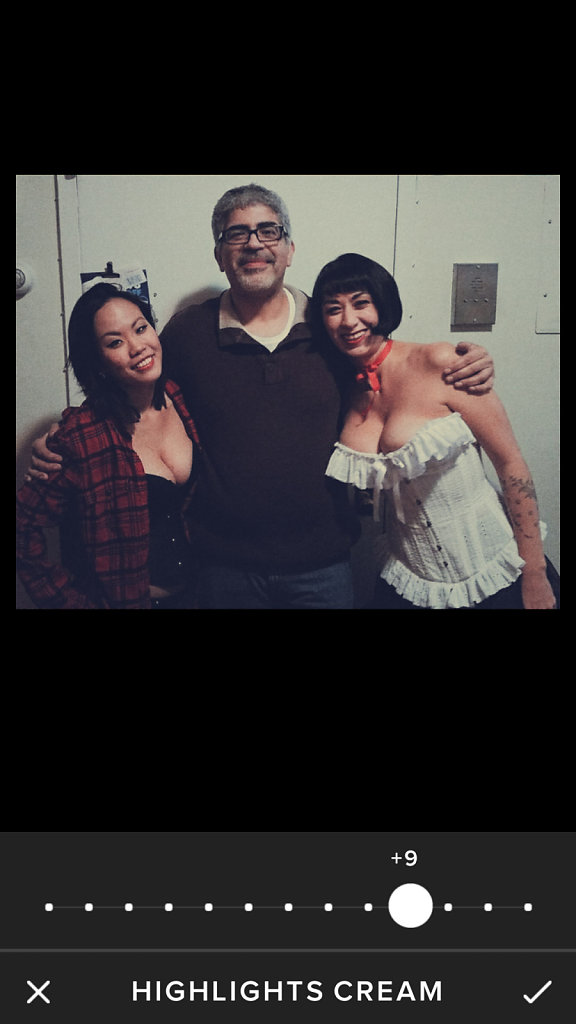
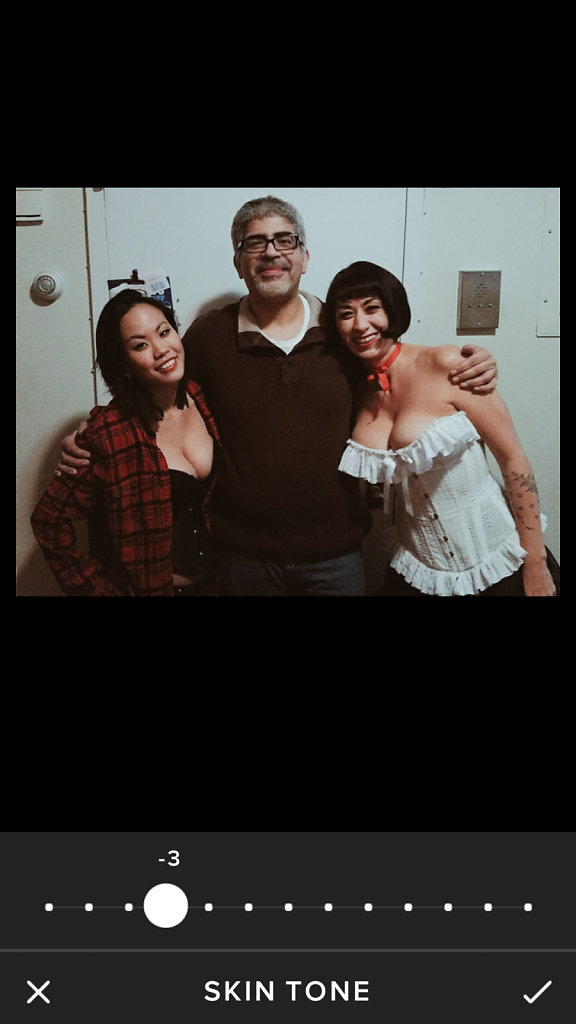
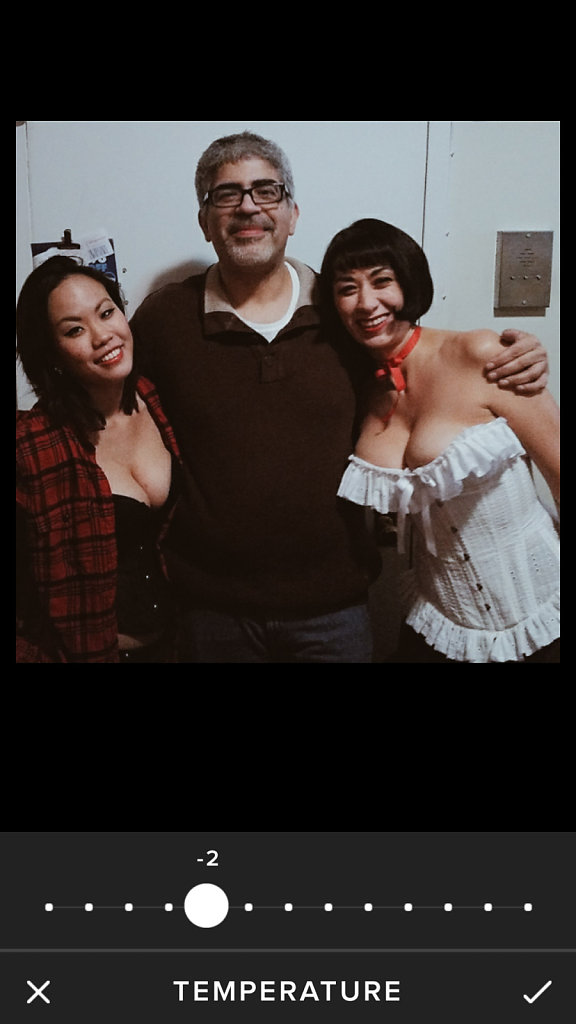
I decided to join in this project for a couple of reasons. The two most important were the fact I have been feeling a bit creatively restricted. Ever since I have gotten to a certain level on Instagram, I've been getting many requests to shoot from agencies and agency models. Almost all of these requests have been for lingerie or boudoir and some occasional fashion. The fashion I love. I am allowed to shoot editorial there. The lingerie and boudoir is a little different. Boudoir is very stylized and plays within a certain box, while lingerie can be editorial in nature, most of the models requesting it want something more Victoria Secret's than something more editorial.
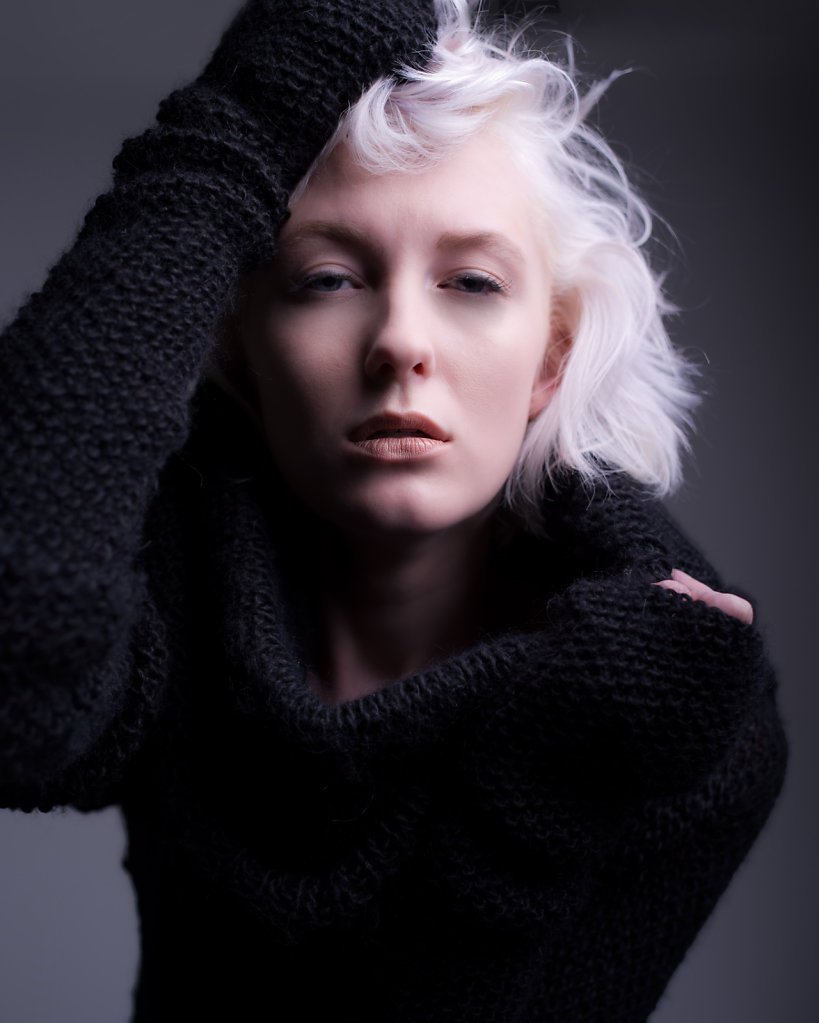
Above is an example of what I've been shooting of late. In truth while I really like that shot, I was more excited to shoot a young woman named Caitin. Here is what we did.
I just love that shot. The other reason is I wanted to create content that went away from what I have been creating for this blog and my own YouTube Channel. There are a million channels that go over gear and technique and will walk you through Photoshop et al. Honestly I was feeling like an idiot doing that. There are folks that do it far better. After starting this is have decided to focus that part on what it is like for me to be a photographer. My process and what it means to me. So many thanks to Ted Forbes to starting this project and inspiring me to change what I do here. Hopefully all of you join me in this adventure. Now without further ado, the ten viewpoints....
Ten Viewpoints
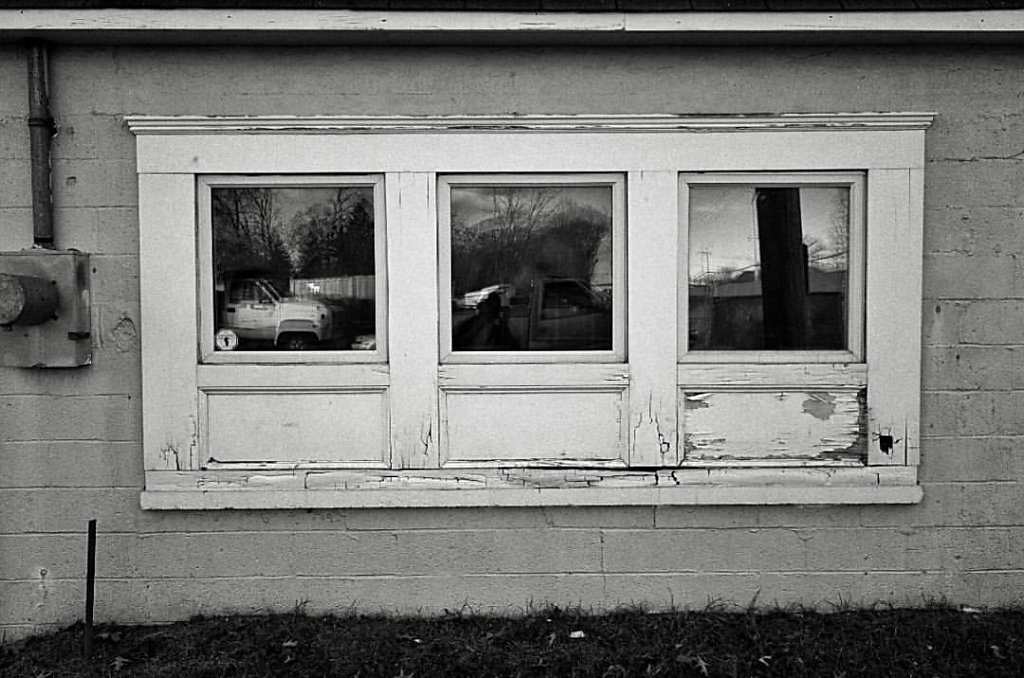
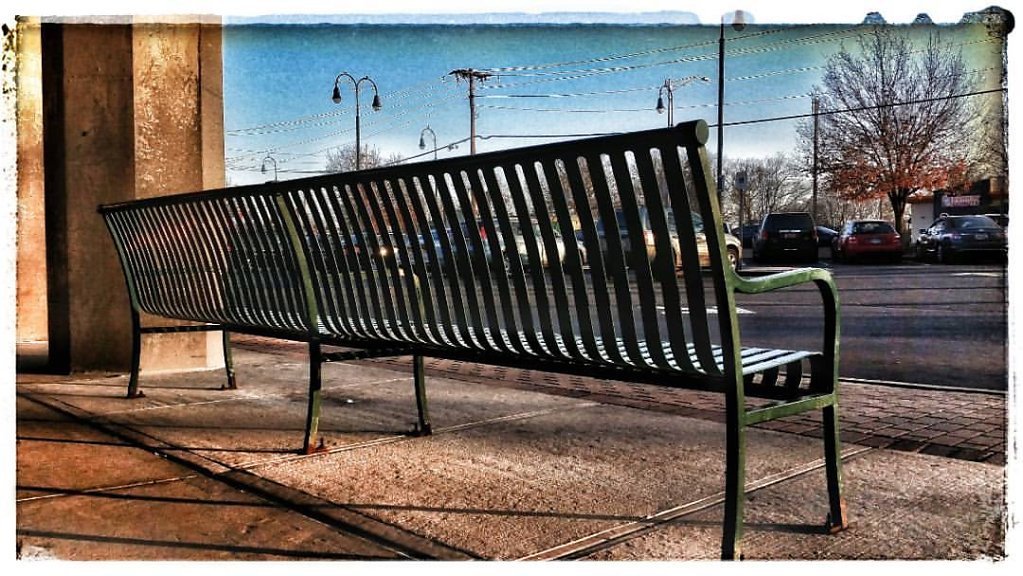
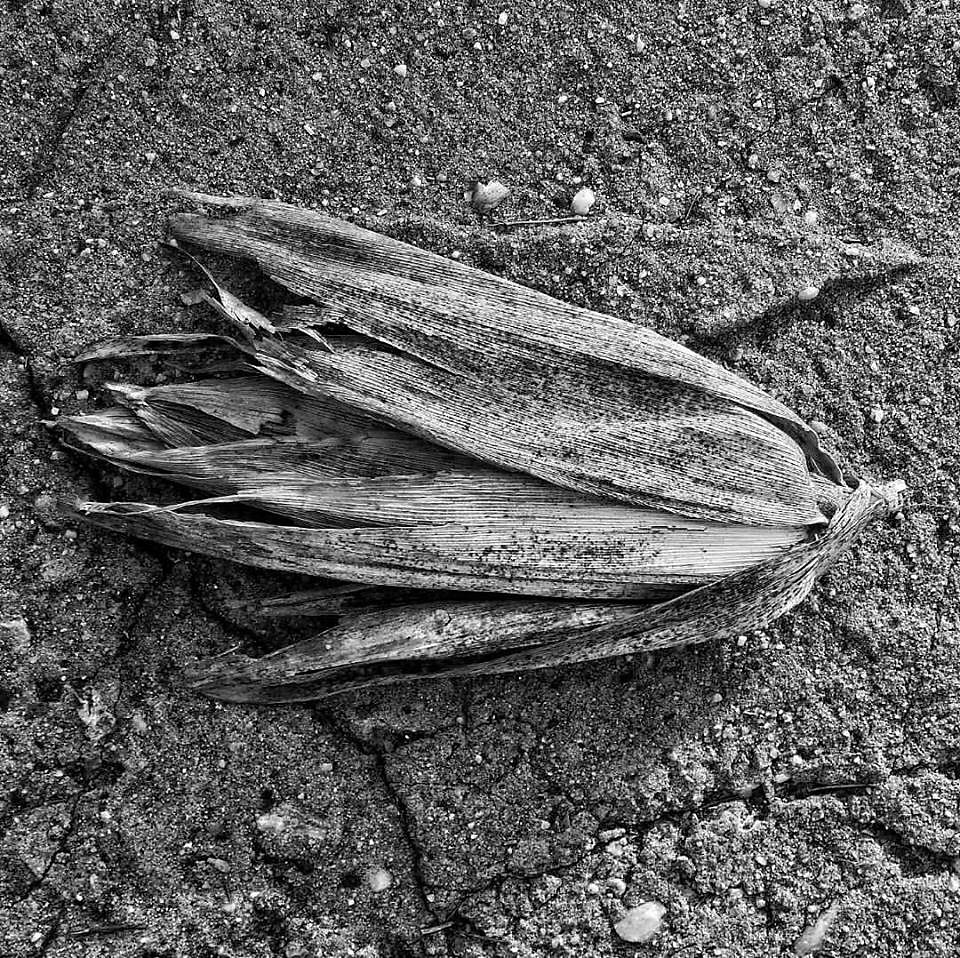
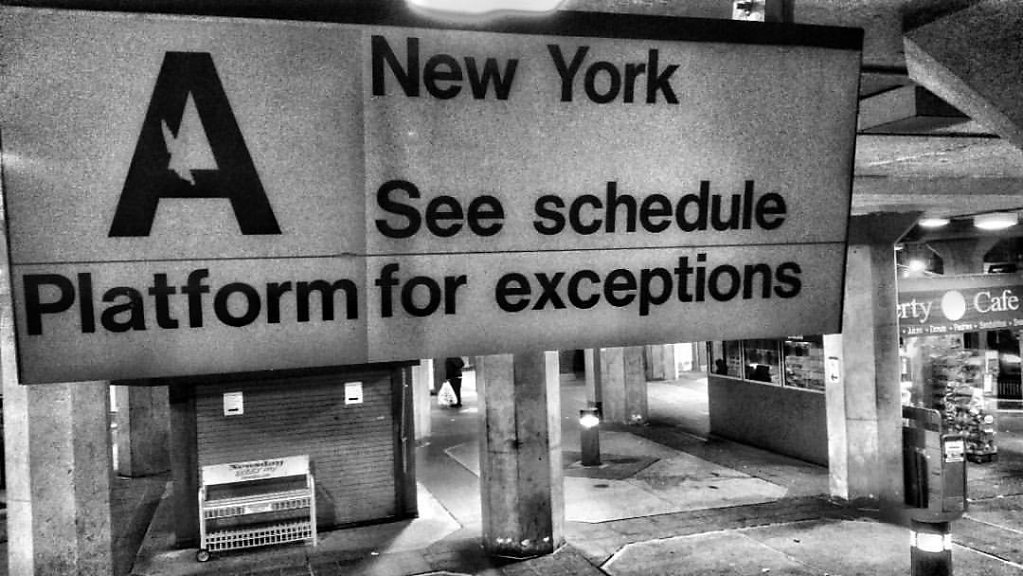
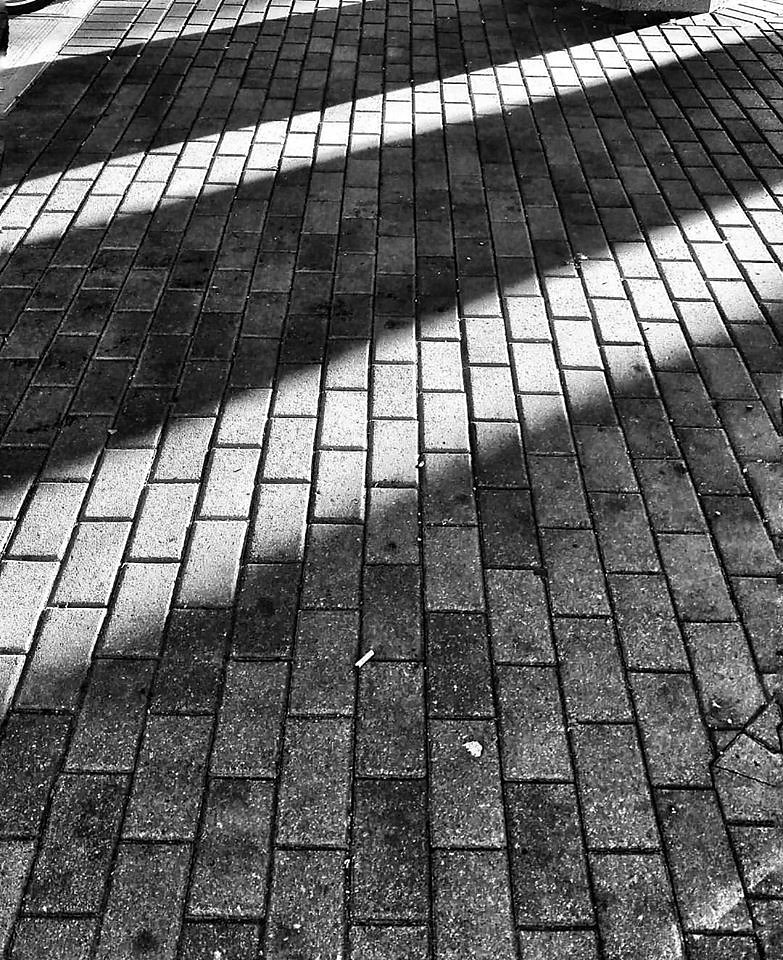
The first assignment that Ted gave was to take one subject or idea and shoot it from ten different viewpoints. In truth I shot 13. No edits, no selection from a larger set, all thirteen images right here.
The above is the actual notebook I pasted my shots after printing them out. I know it looks a bit old school, but the charm of it is what makes me happy. Below are the actual shots with the notes I scribbled along the edges.....
•••
Shot on a Samsung Galaxy S5 with Camera FV5
I was a bit distracted when I started this. I couldn't decide what to shoot with. I spent so much time worrying about gear rather than what I am shooting.
The hard part was getting it to focus. Finally I just gave up. In the end I just went with it. In the end I really loved what I got. I ended up shooting 13 images. I wonder what Ted will assign next?
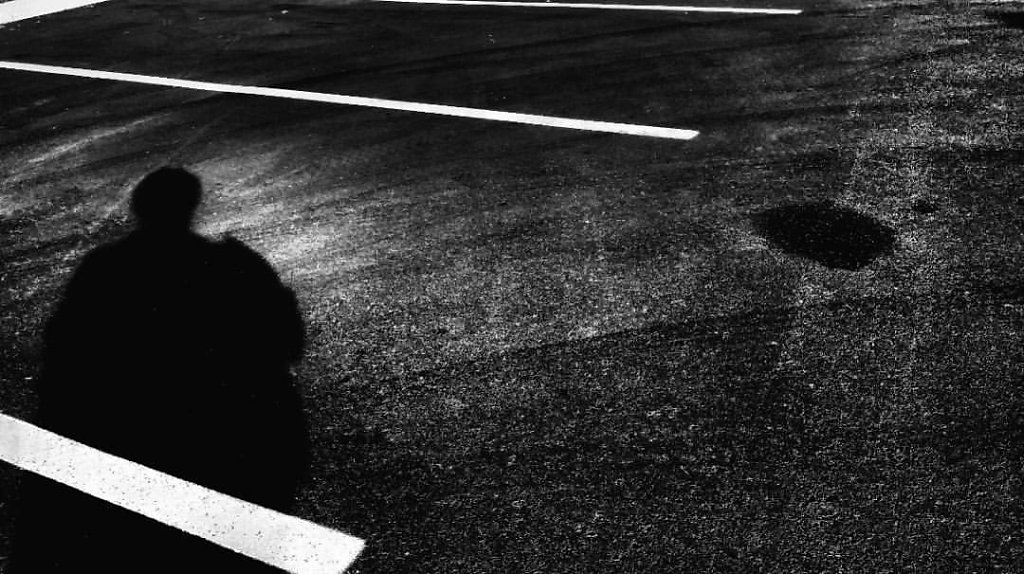
Why B&W? I think mostly because of the abstraction of B&W. It basically reduces things to just light and composition.
If I were honest, these shots may not be as creative as some of the other work others have done for this. I'm perhaps lacking the level of creativity and need to push there.
All italicized text is as exactly written in my notebook.
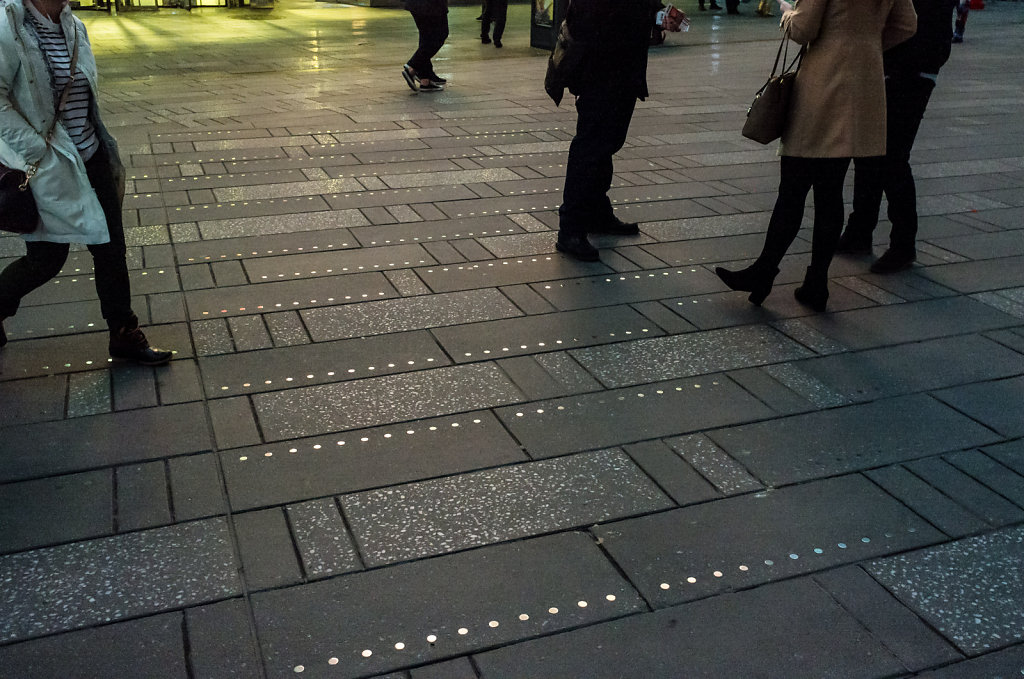
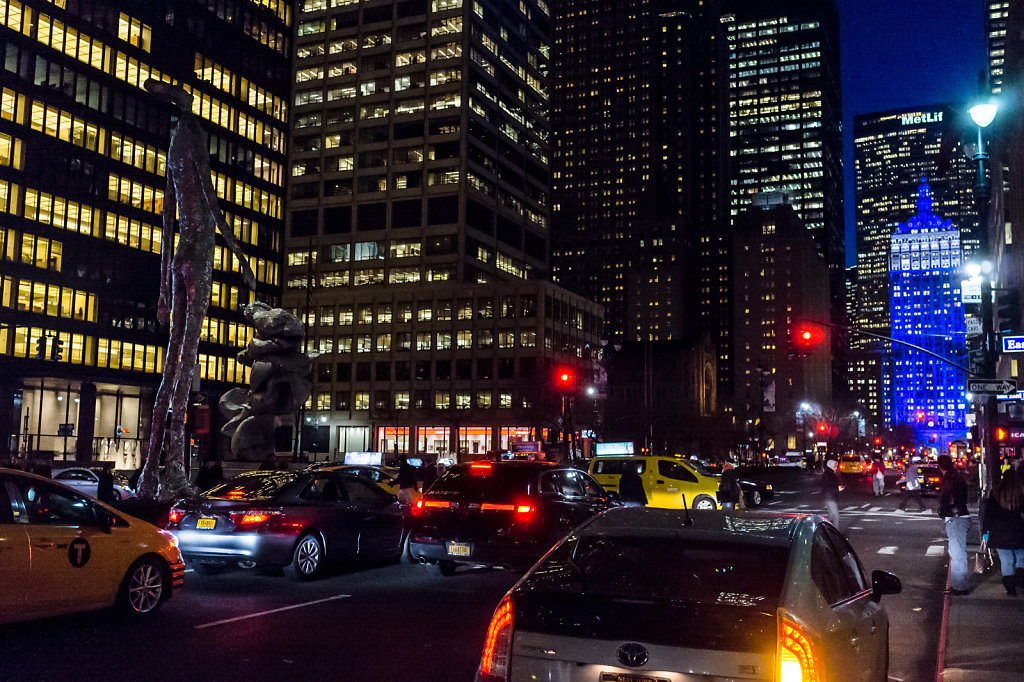
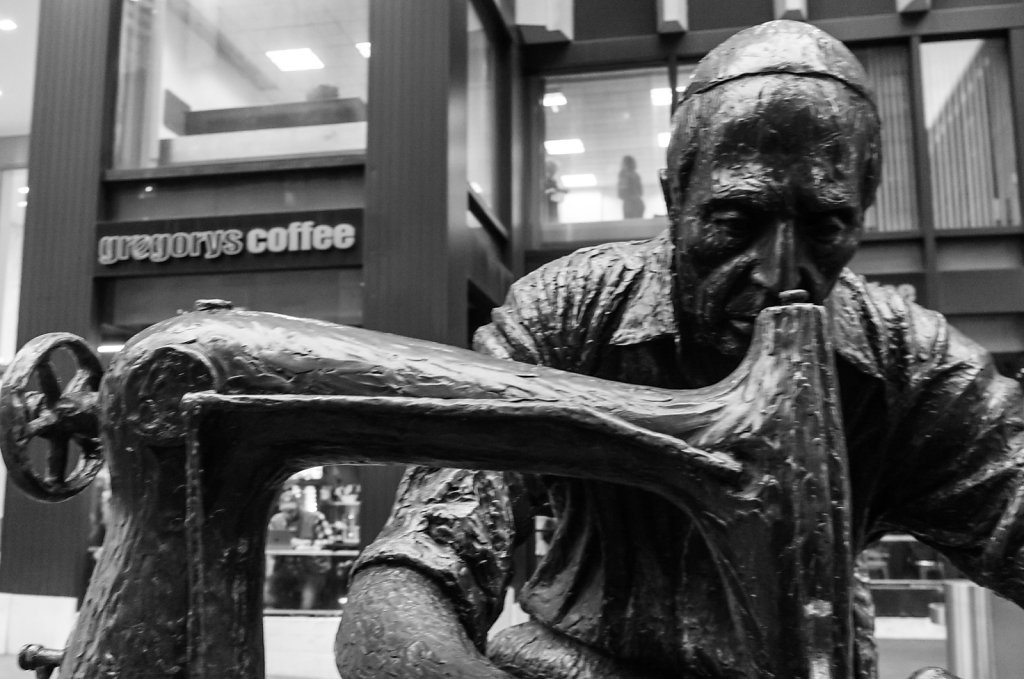
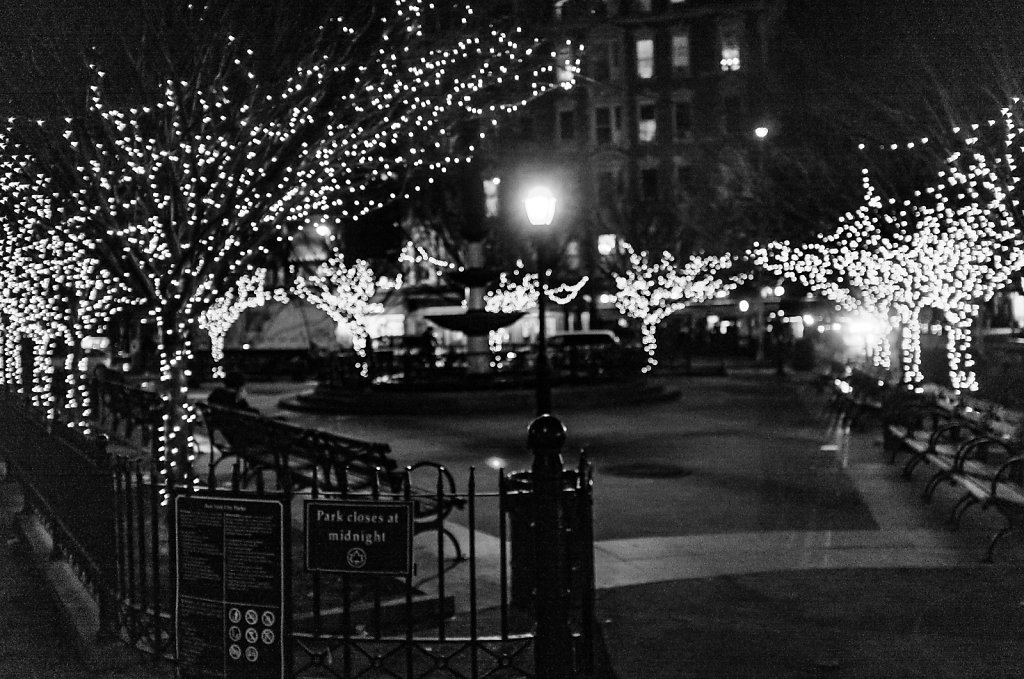
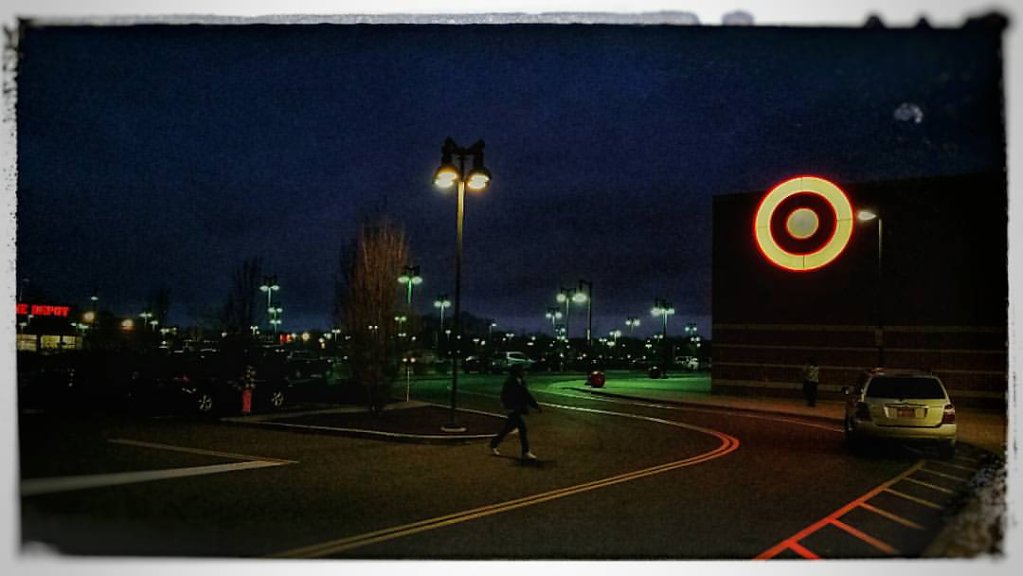
Twilight falls upon the City. New York becomes this wondrous place when Helios takes his chariot beneath the horizon and the stars like diamond dust fill the skies.
The people who live and work here bustle about, the City taking a deep relaxing breath as it heads from twilight to an obsidian night.
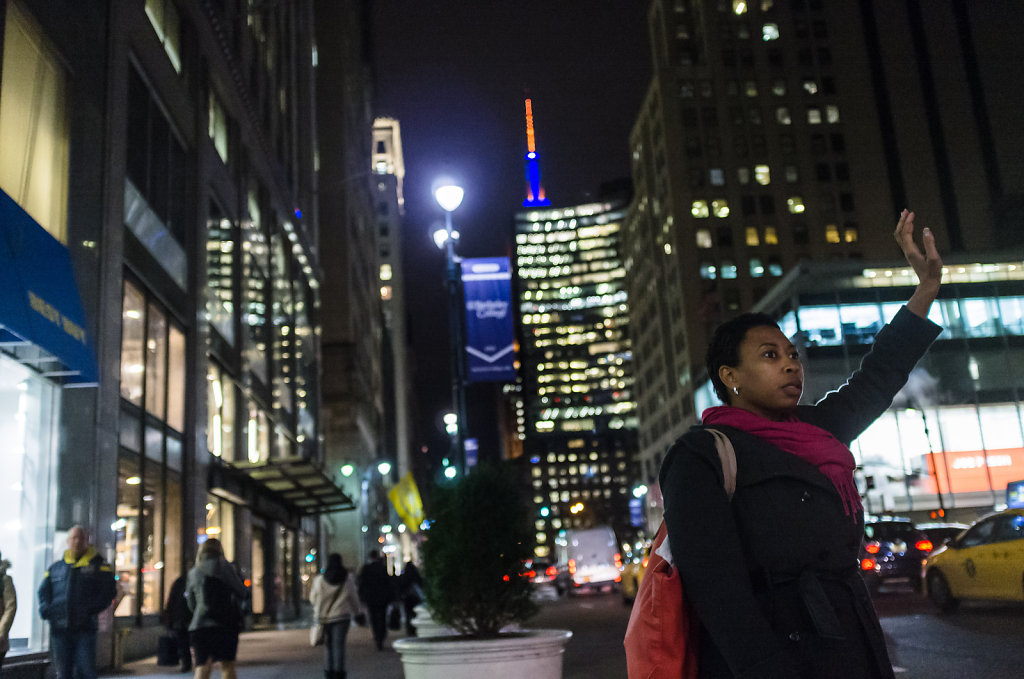
Like fireflies the leviathans along the great avenues begin to flicker and glow, their light filling the void with amber and blue.
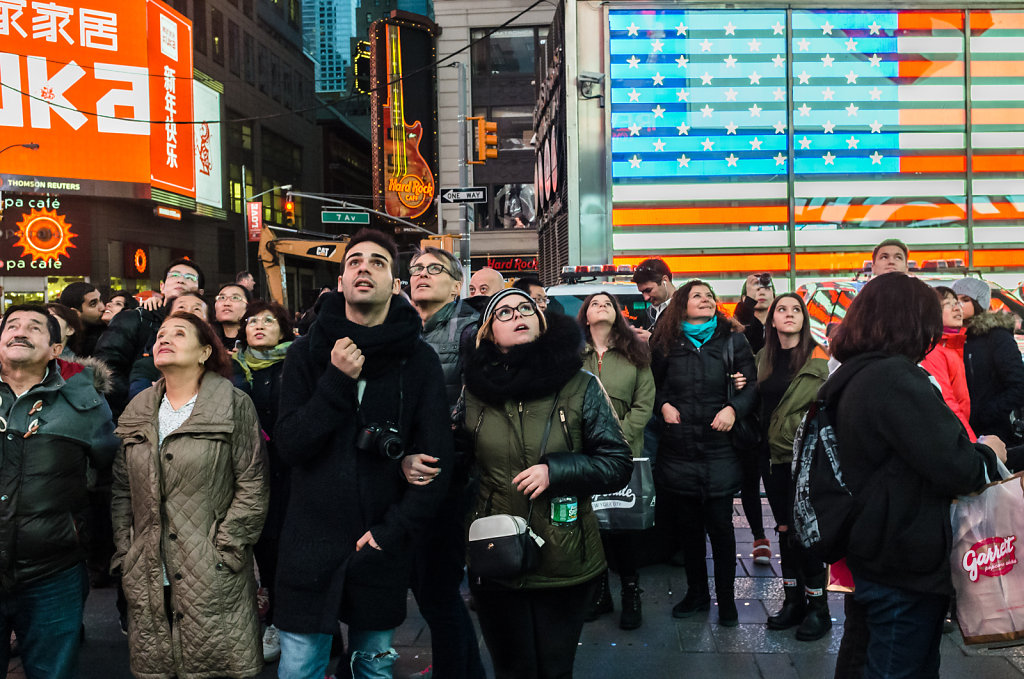
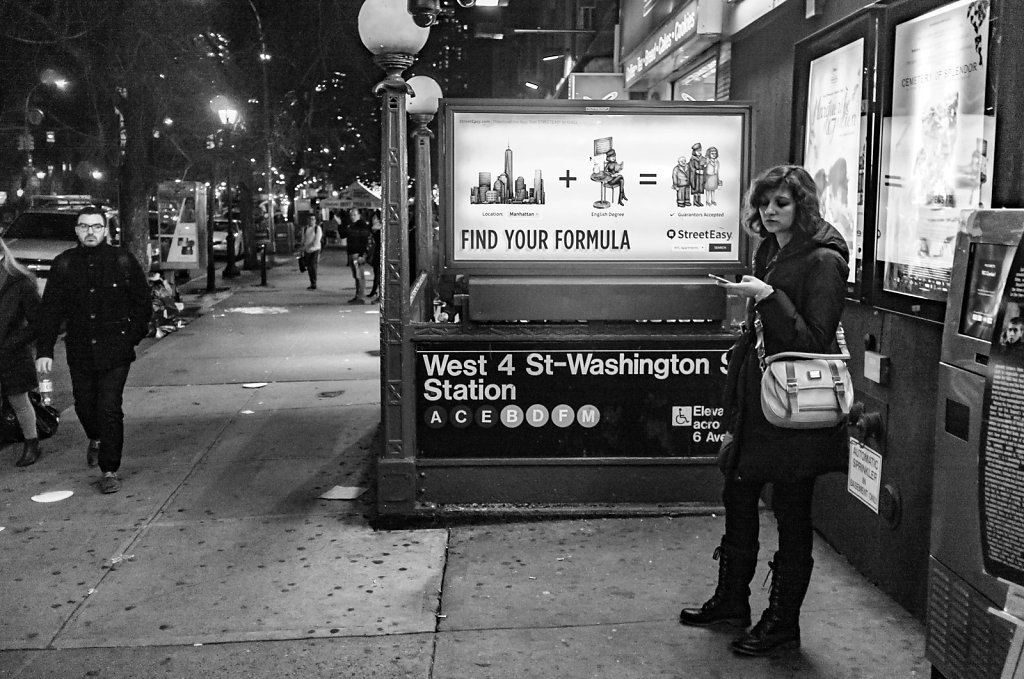
The people look up into that brilliance amazed the garish beauty of it all, enthralled by the spell the City weaves in neon and sodium light.
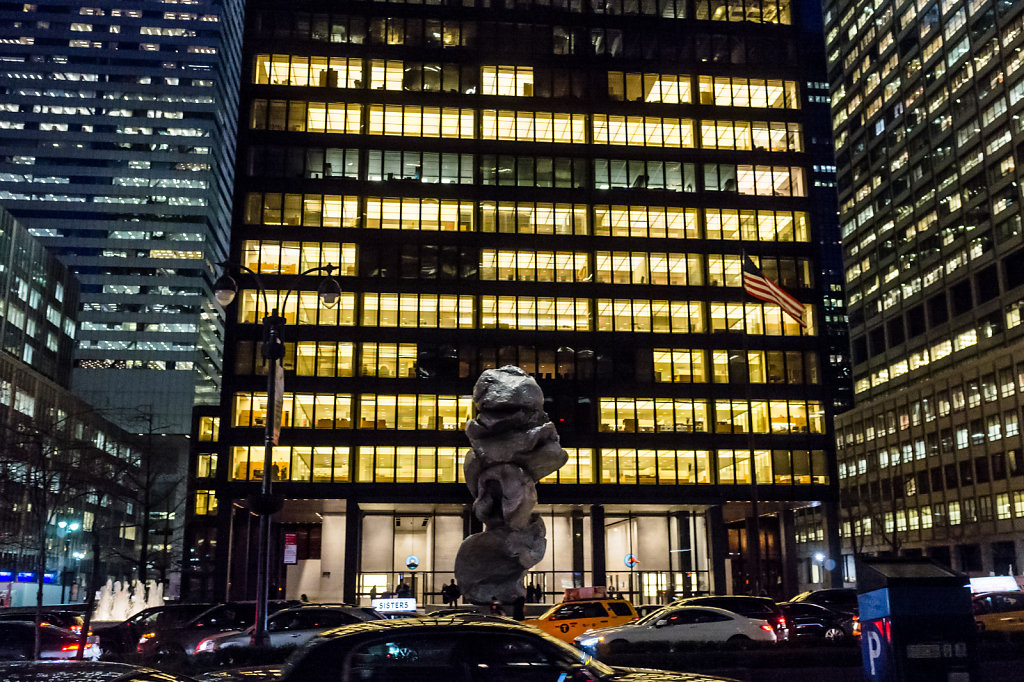
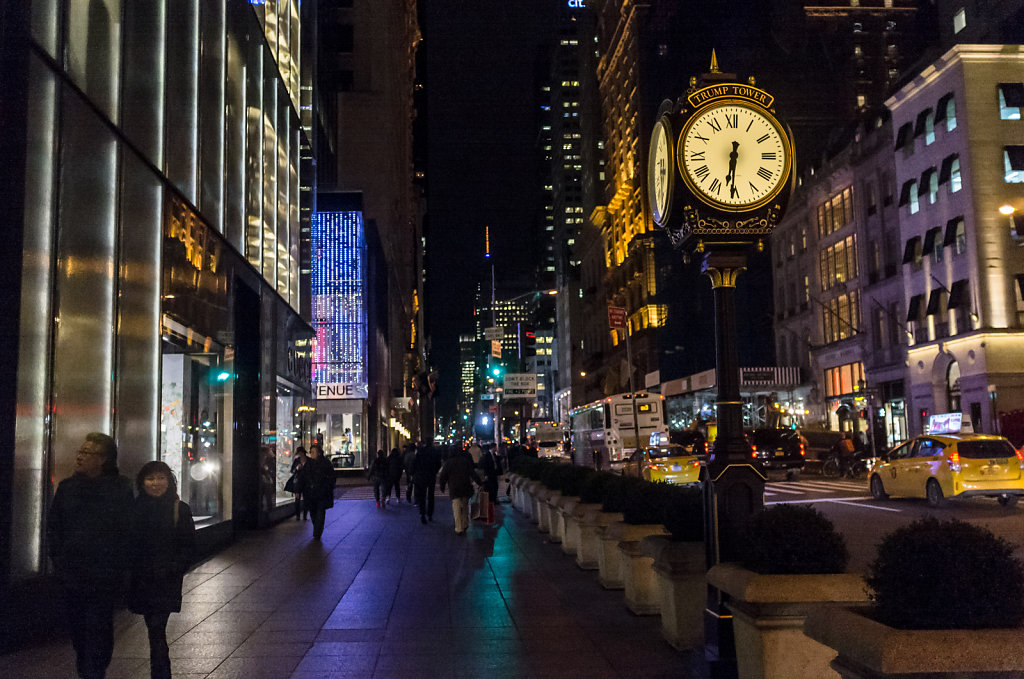
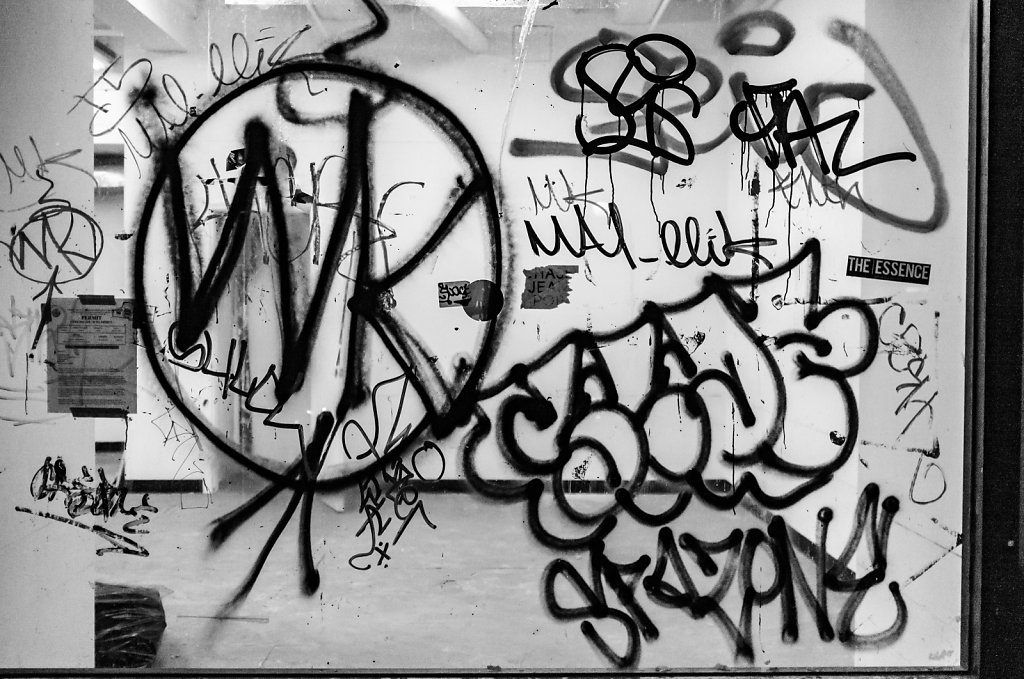
No matter where in the City, no matter the business the Night becomes a new and different form of life.
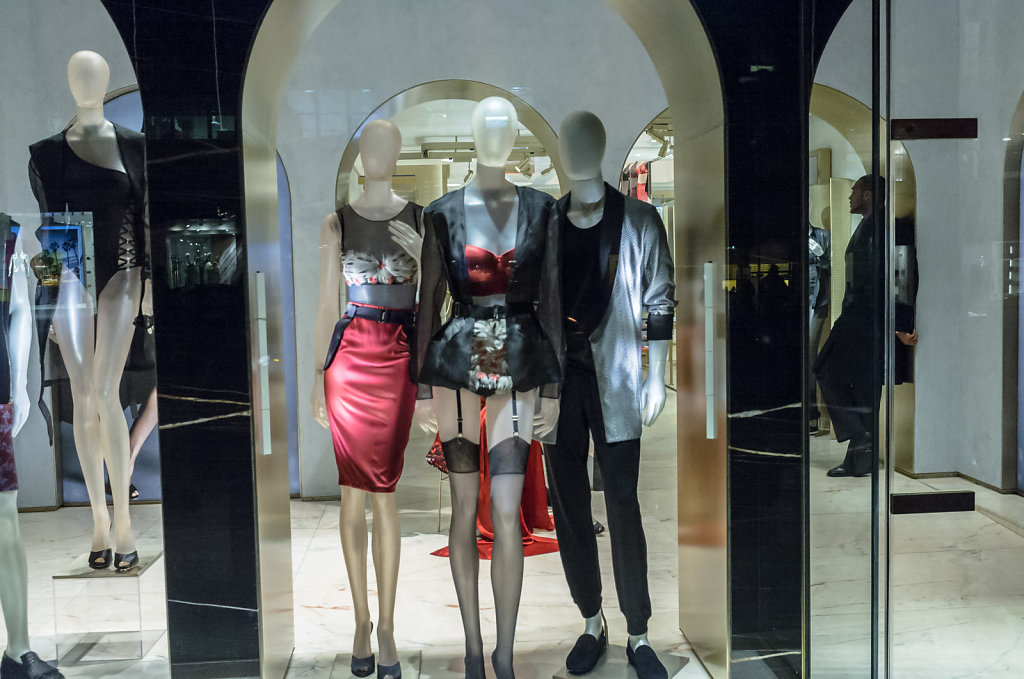
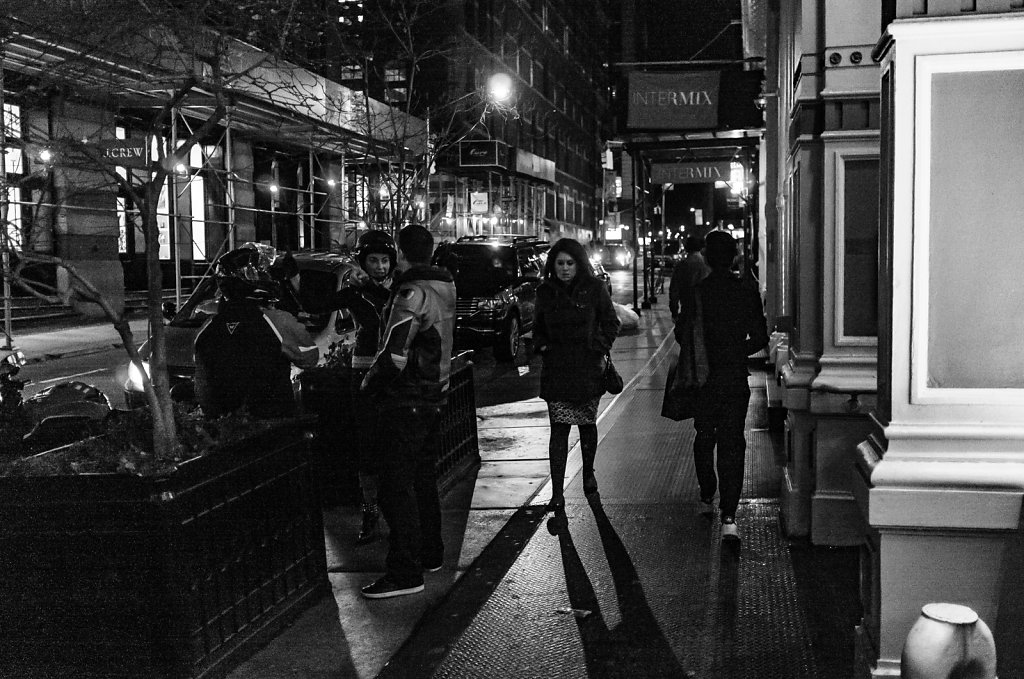
The windows of the great stores on Madison giving a floor show for all who wish to see.
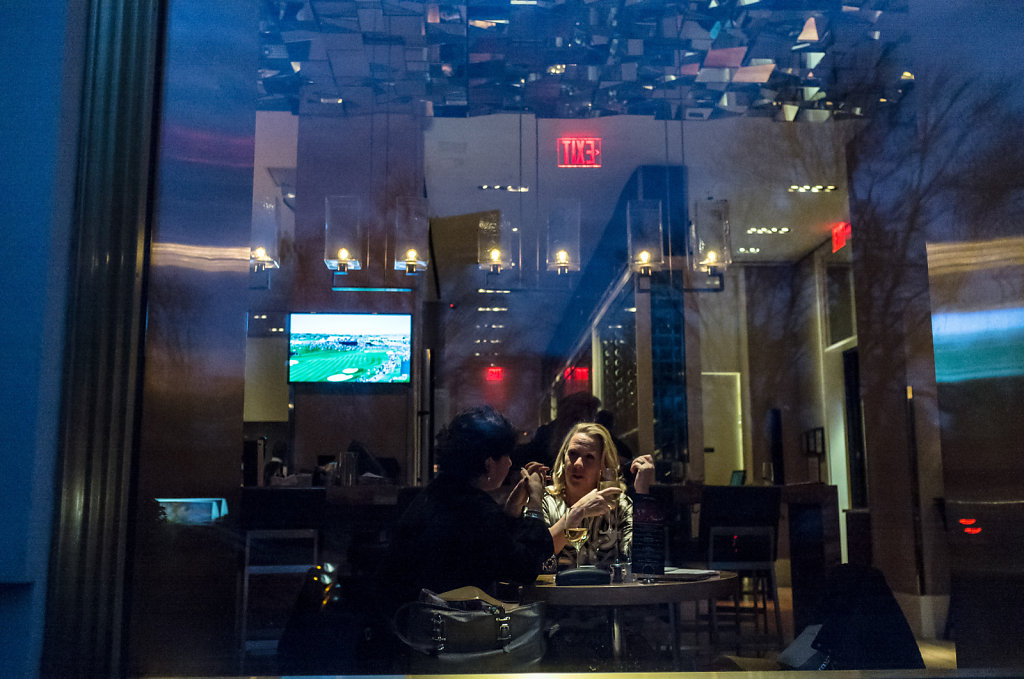
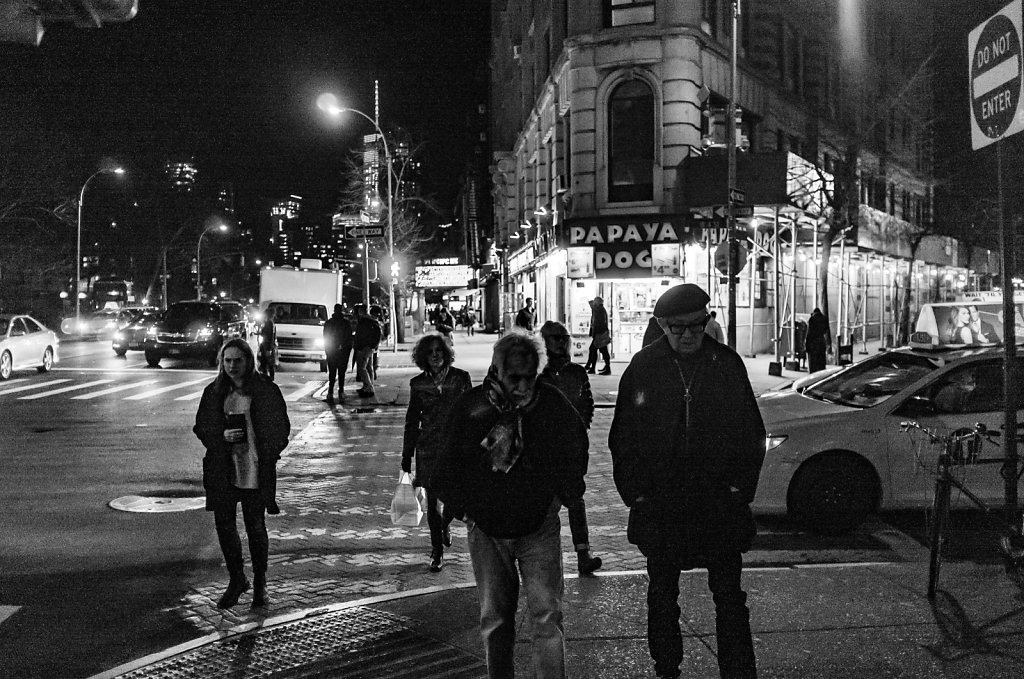
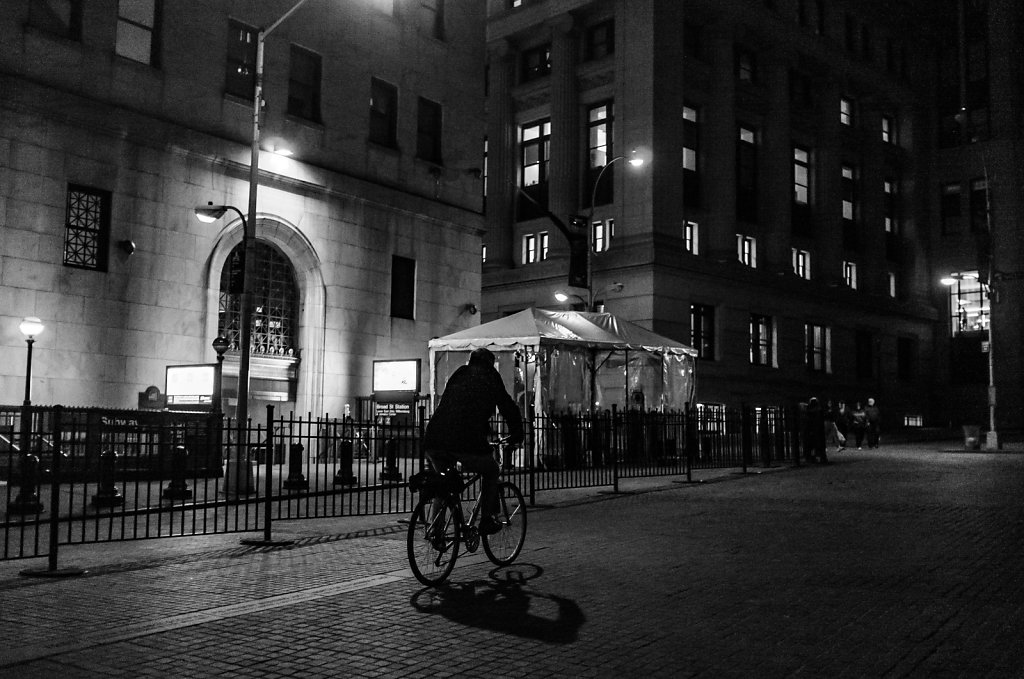
All the while people live their lives with their friends,
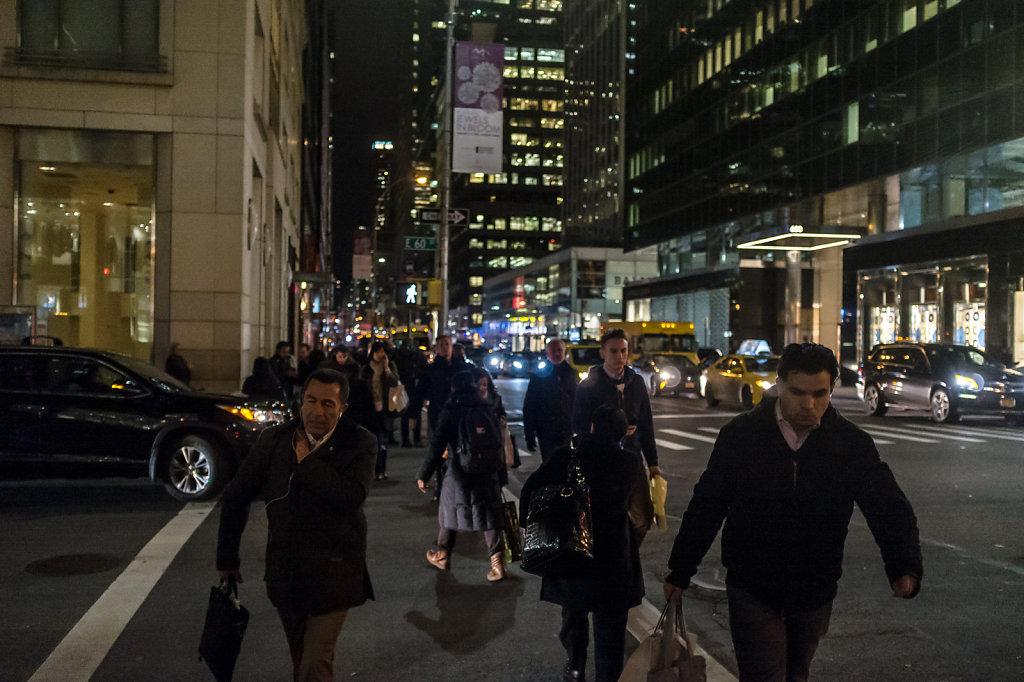
And begin their journeys home
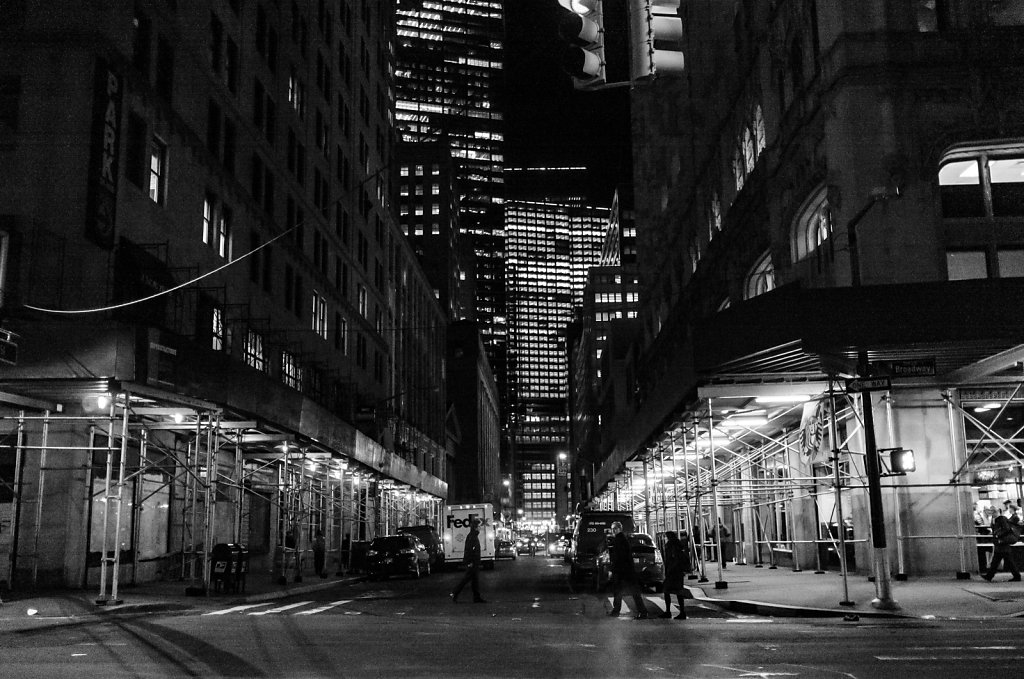
The cars filling the streets looking to escape back to wherever they need to be
Slowly the streets empty
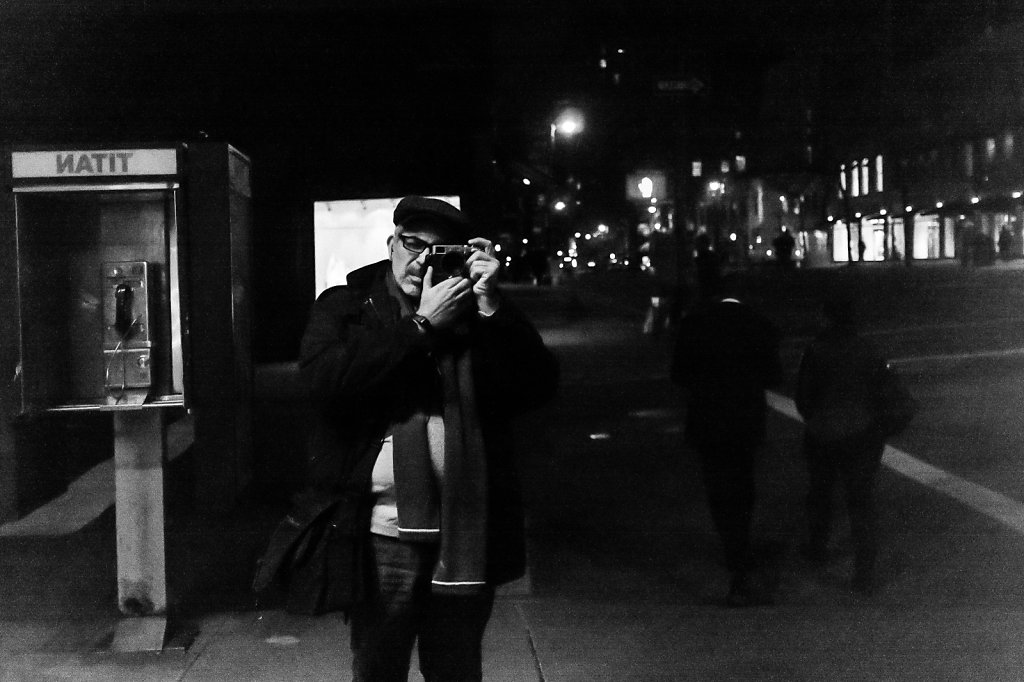
And the color finally washes out to a soft white
A different magic begins to fill the Night now
One in which retrospect of the day that has passed begins to fill our thoughts
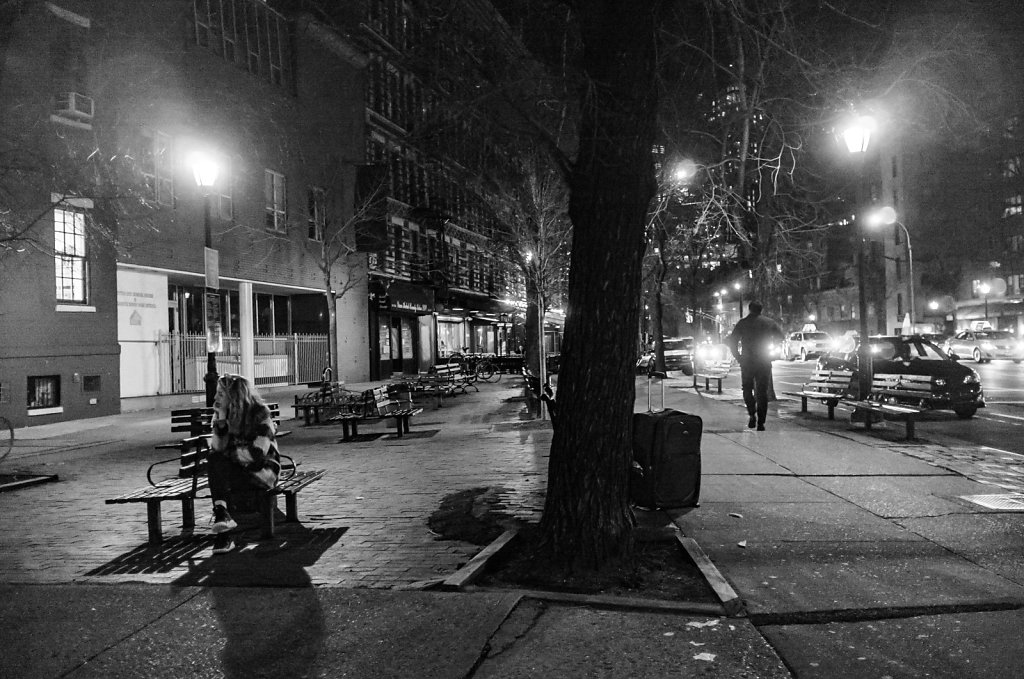
The urgency to find sanctuary heightens as we look for that safe haven until the Sun rises again
We wonder if we shall be abandoned and forgotten in the fading glow
Perhaps a late show to chase away the feeling of isolation
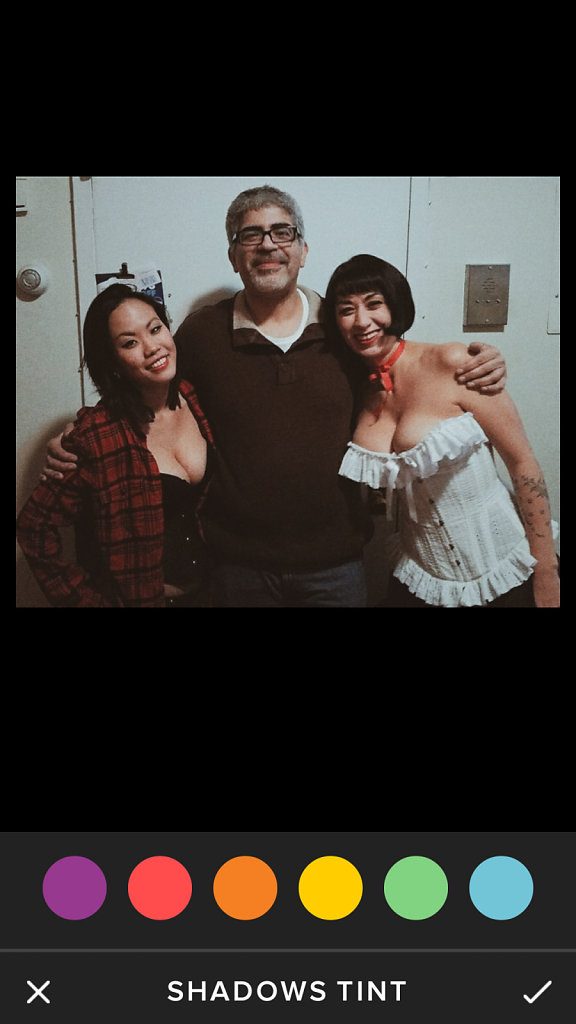
For many of us, the camera we use most is the one on our phone. Be we professional shooters to casual snap shooters, the phone is always with us. “The best camera is the one you have with you” is something Chase Jarvis once said, and by that axiom the camera on your phone is the best camera of all time. Sure from a technical standpoint it may not be as full featured as say a Pentax 645Z or as fast as say a Canon 1DX, but honestly those cameras are heavy, and don’t have Instagram built in. The smartphone, be in an iOS or Android device, has made us a connected world that information can be transmitted in real time. In photography this is even more evident with the work of photographers like Eric Kim and Takei out in Vancouver. Both use smartphones heavily for street photography, the instant nature of them being perfect for the documentary nature of this type of work, the deeper narrative reserved for the Ricoh GRs, Leicas and Fujis they also use. Of course we all want our images to look great when we release them to the online world. A cottage industry of image editors and manipulation apps exist on both iOS and Android. In this first of a series on these apps and integrated workflow we will look at VSCO.
What is VSCO?
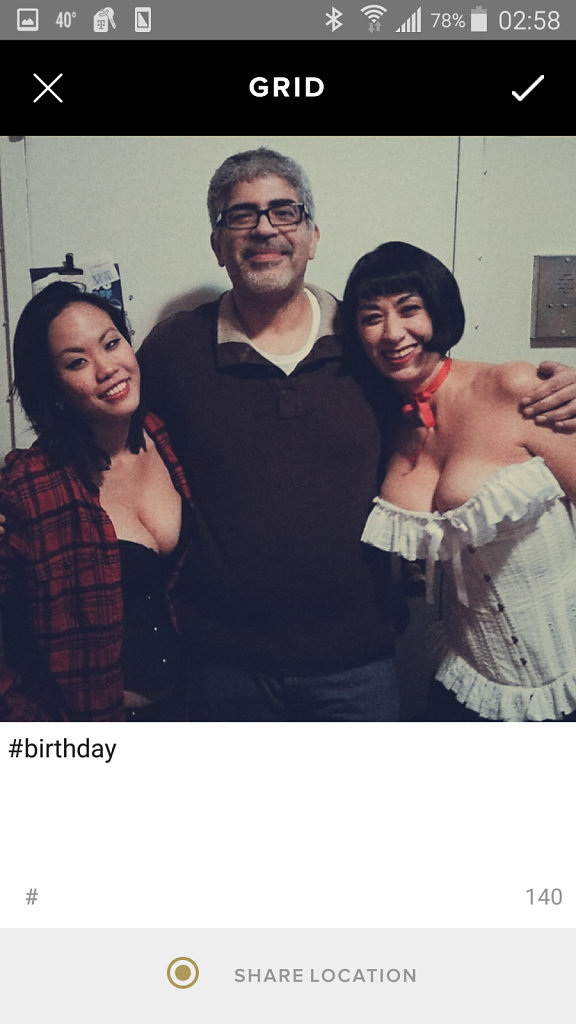
VSCO is short for Visual Supply COmpany. What VSCO is best know for are plugins that work in Lightroom and Photoshop simulating various types of film emulsions from the days of yore, much like DXO Film Pack and many others. Last year they released a mobile version of there plugin system that like everything else has a Social Media element as well as the photo editor aspects.
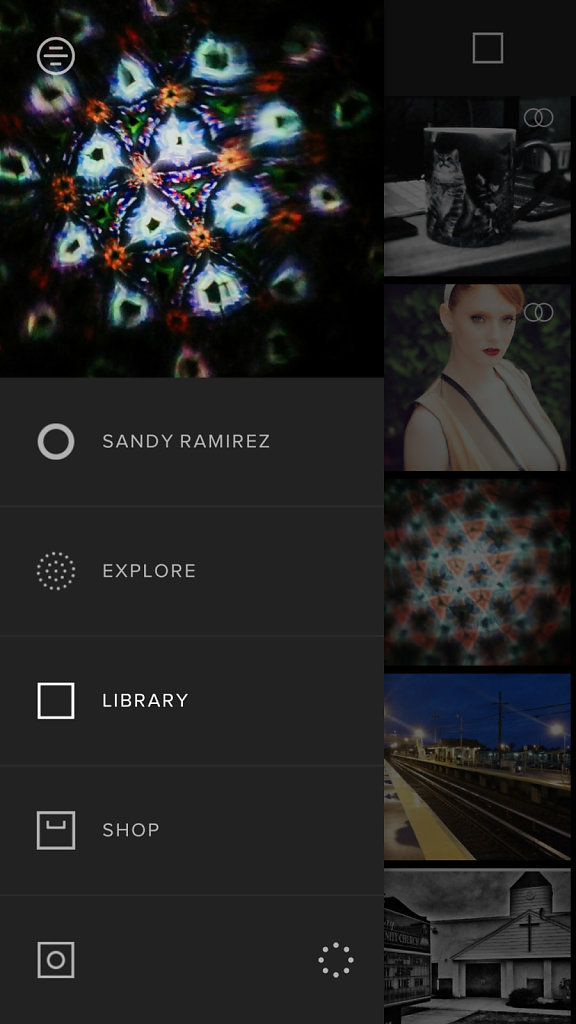
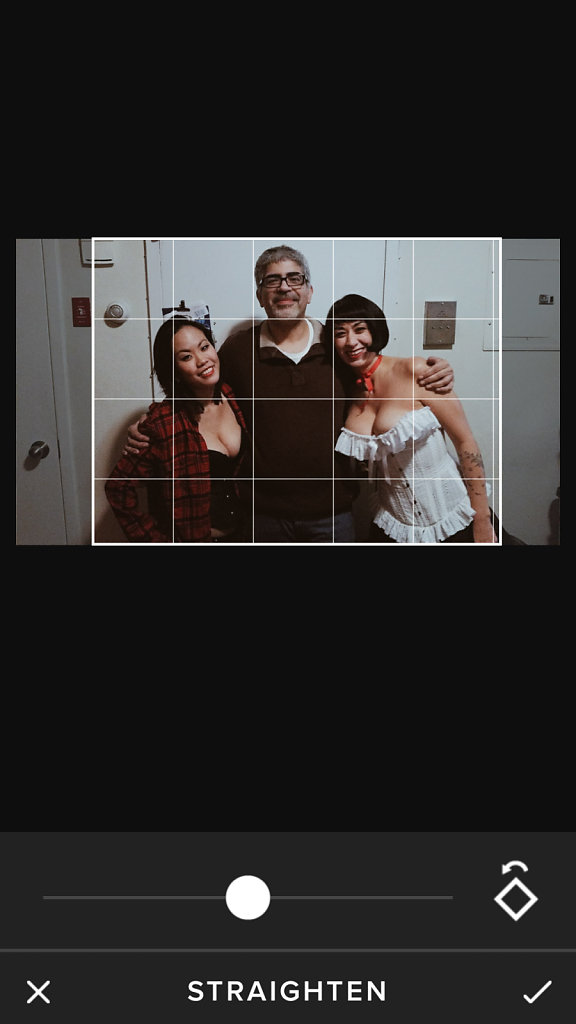
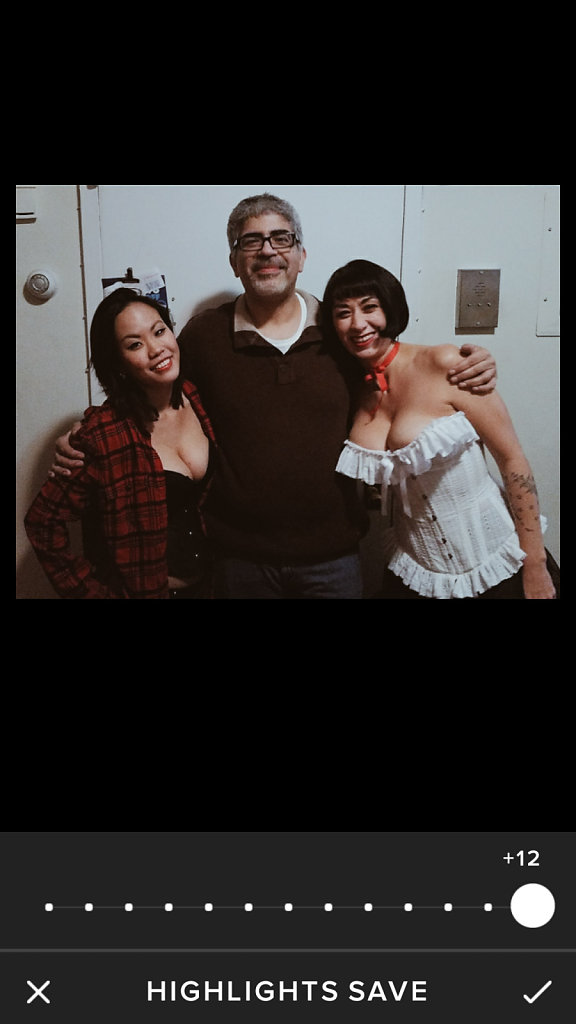
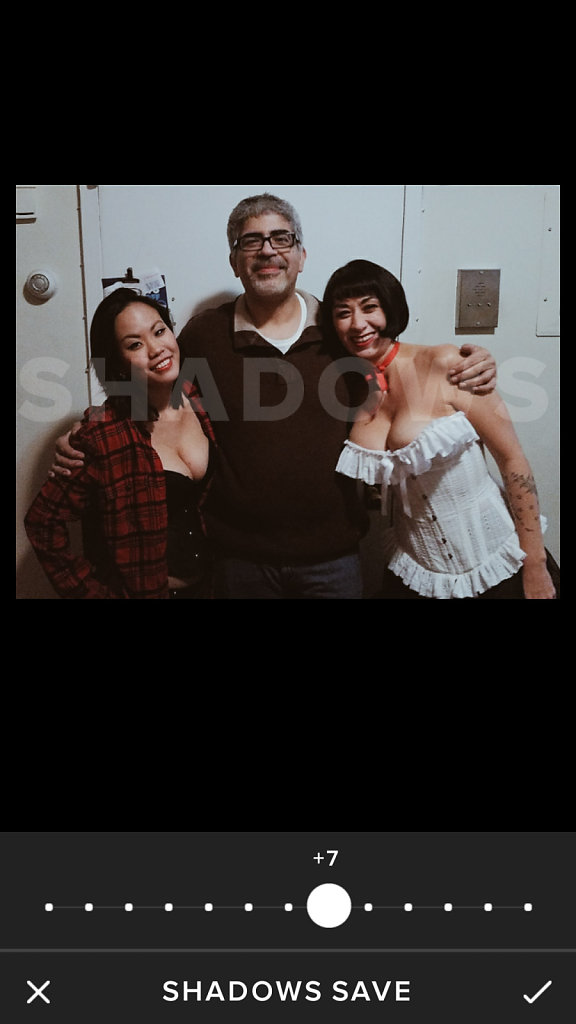
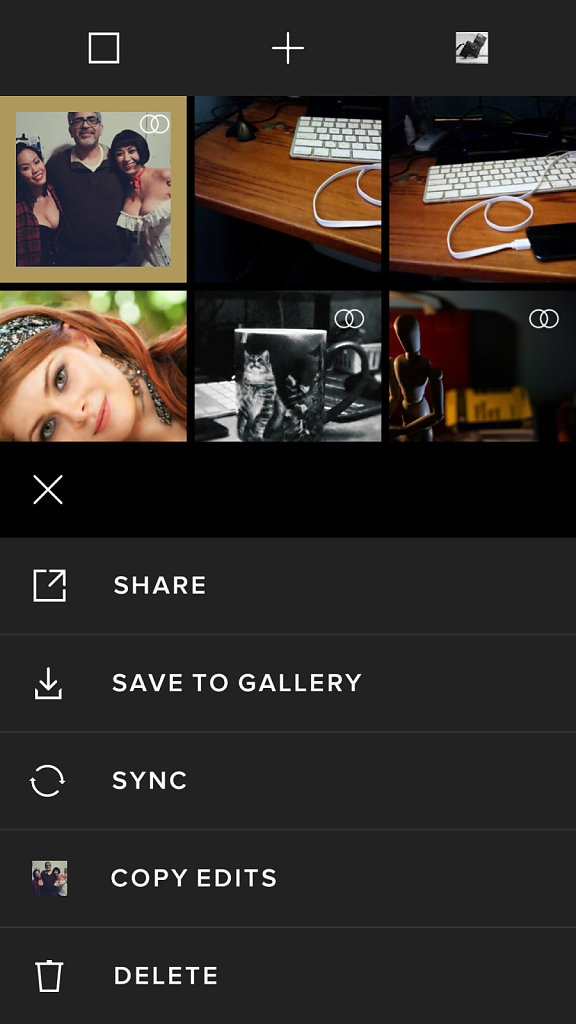
When you open the app you are brought to the main screen which is the Library with menu bar open. Once you click on Library the screen clears the menu sidebar and comes to the main screen.
The main screen is very clean, with just a few icons that go to one of the various features. The video below will go over everything but here in the article we’ll focus on the icon in the lower left - the mixer.
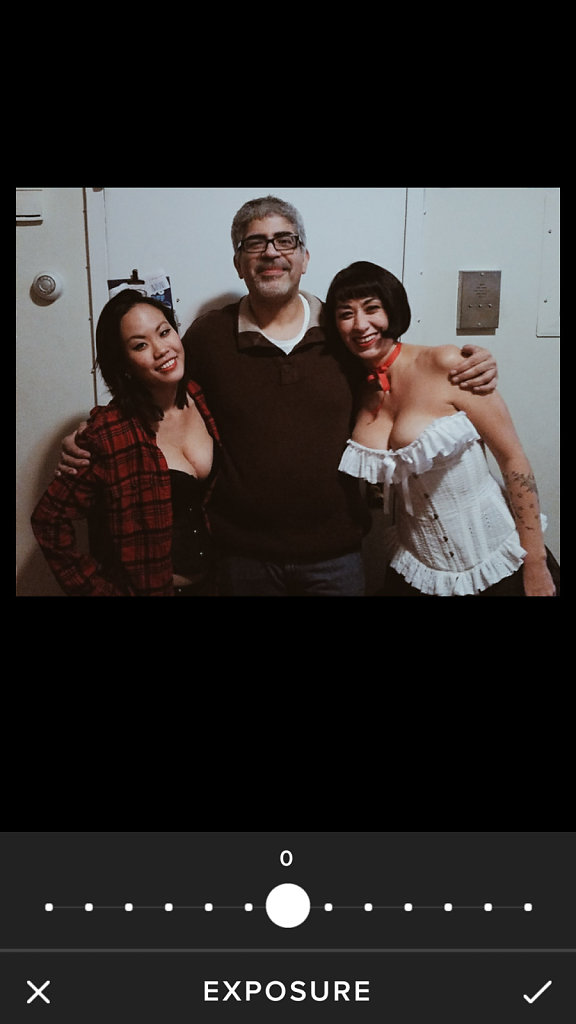
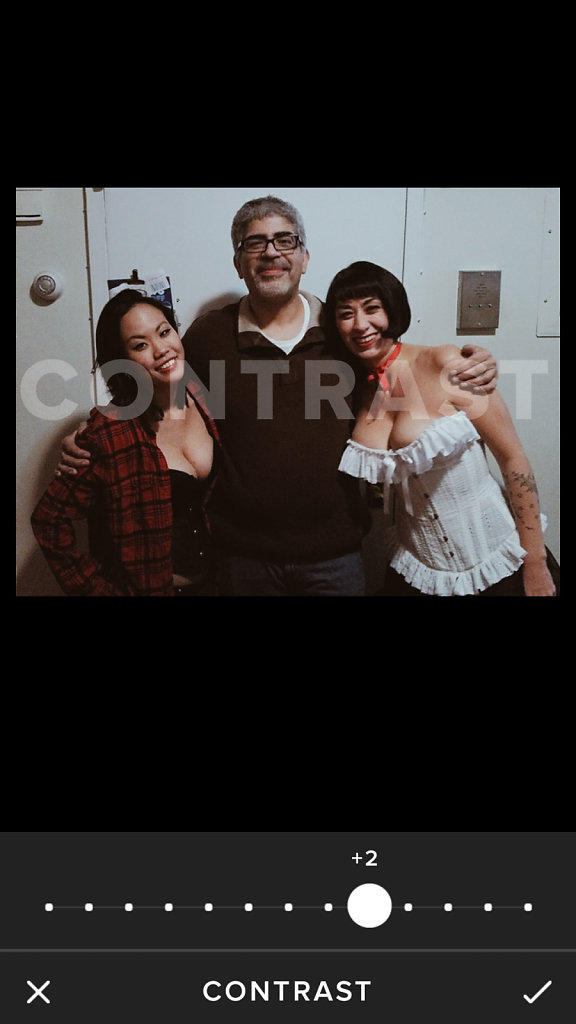
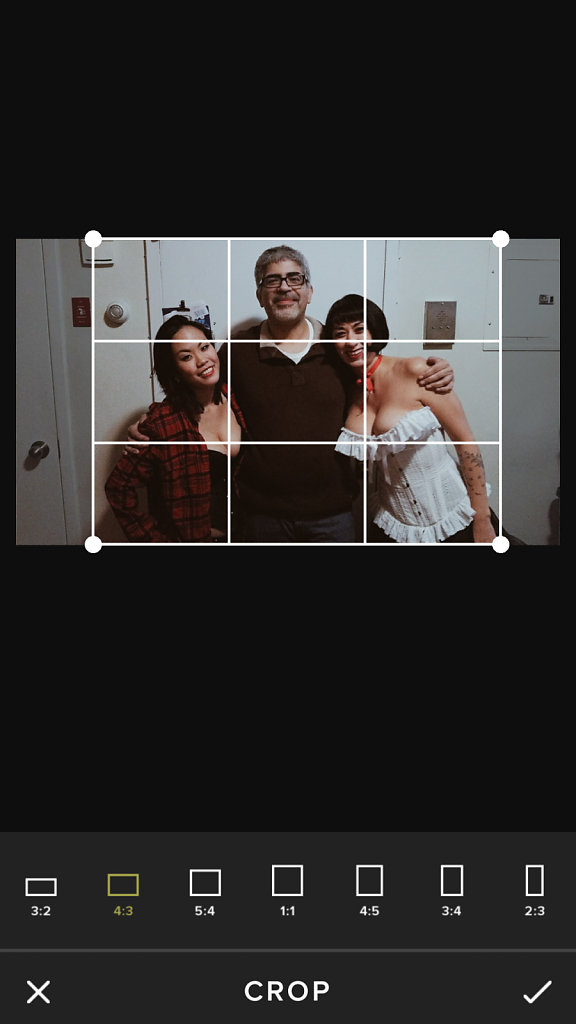
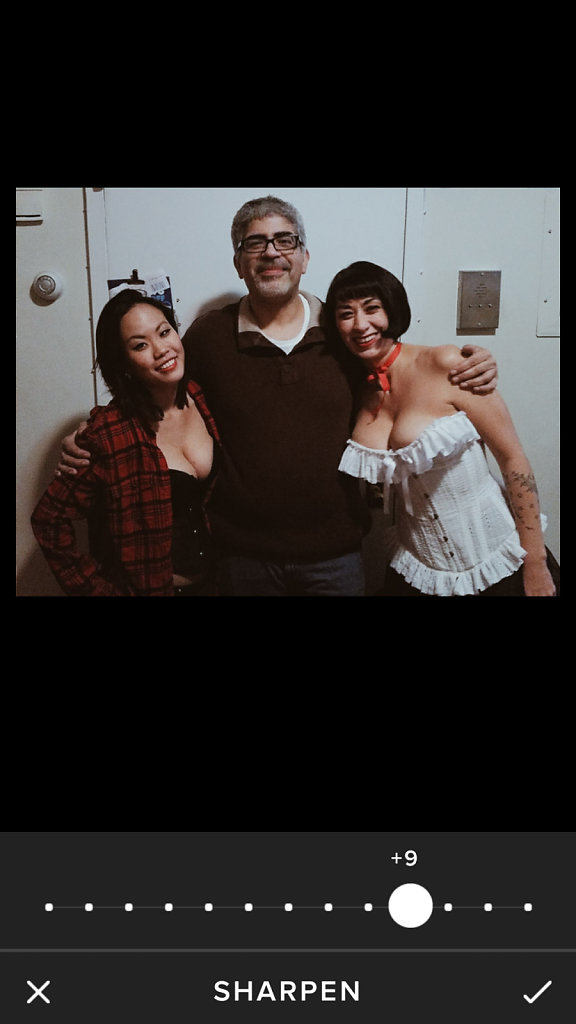
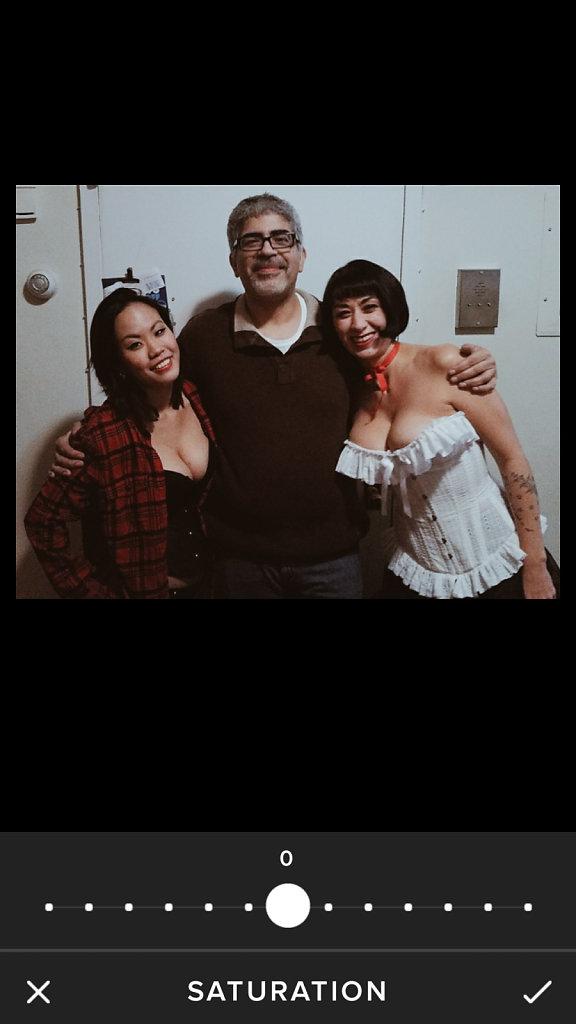
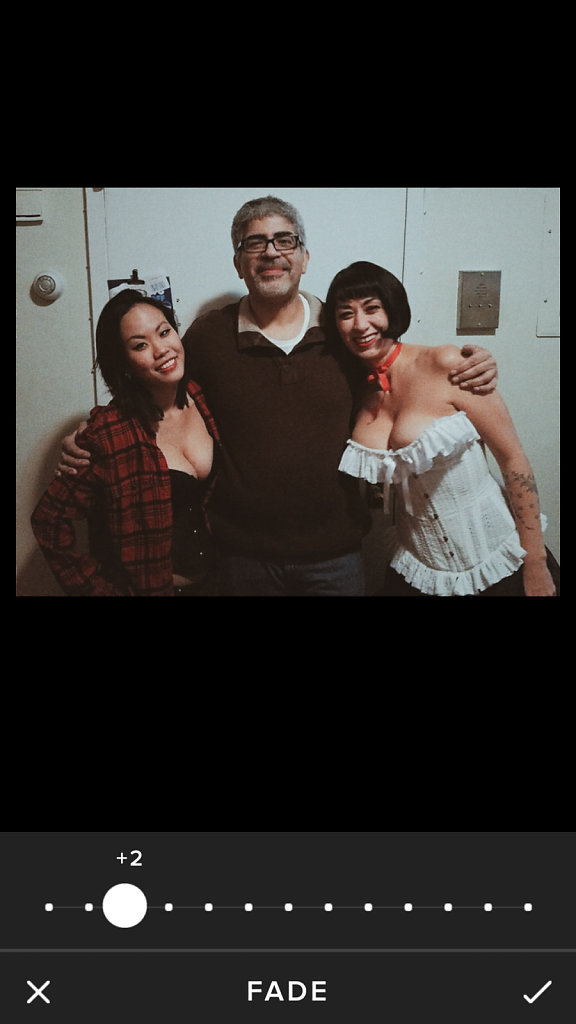
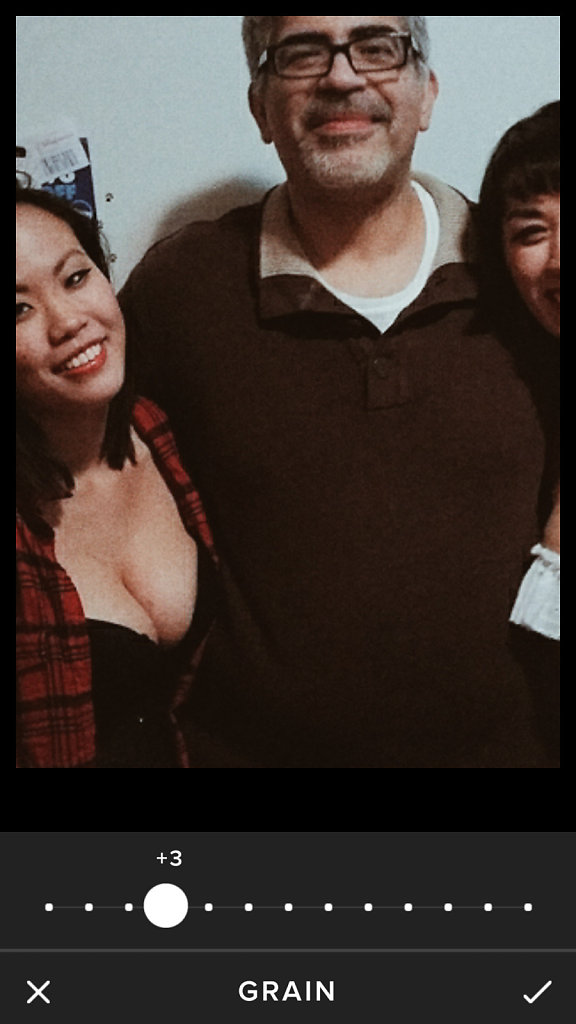
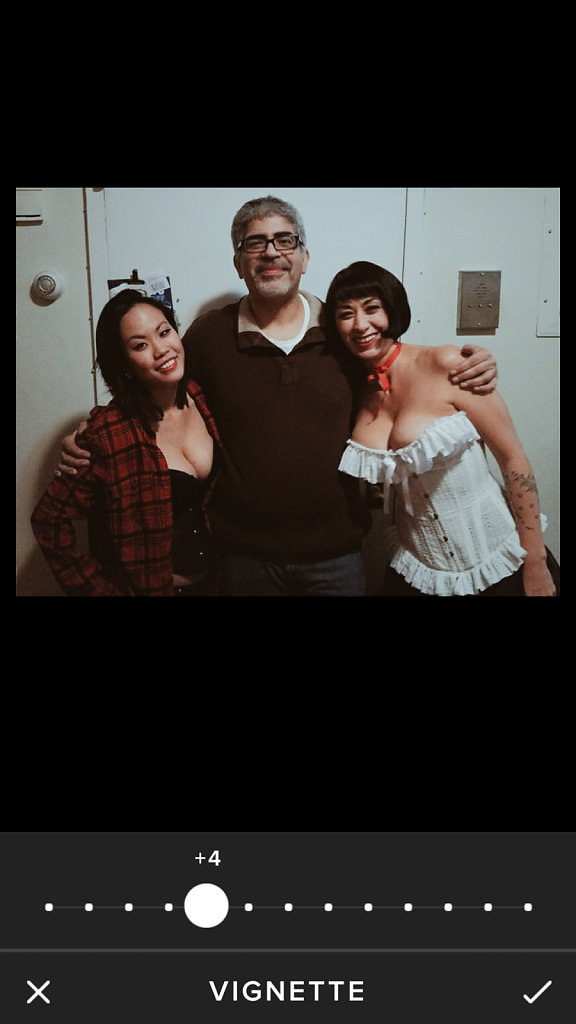
In the mixer you can adjust quite a few variables. In the included video we go over each one. Here are some clearer images of each screen for reference.
Just follow the video below.
If I could change anything in this app it would be the ability to edit in landscape ala Snapseed, also in the crop section I would add classic photography aspect rations such as 6x17 and 6x12 as well as a free ratio option.
This little video goes over what I carry each day in my daily camera bag. This is basically what I have with me when I walk around daily, and whenever I do documentary photography. For the most part the why's and wherefore of the individual cameras and digital gear are covered in earlier articles here about mobile photography. Just click that tag on the left and you'll find them. The only thing I really didn't talk about was the bag itself, the Domke F-802.
I love Domke bags. My old F-2 and F-1x have been with me for a couple of decades along with the F-803. The way these bags are made out of military grade impregnated canvas is just bulletproof. Outside of a Pelican Case, nothing is better than a Domke. They may not be as flashy as say a Billingham, but they do the job well and for the most part are designed much like the cameras that were around when Bill Domke created the bag when on the staff of the Philadelphia Enquirer, to last a lifetime.
As far as the large number of notebooks I carry, what can I say. I do use them heavily, and have a fetish for Moleskin notebooks specifically. There is just something about a well crafted little notebook like the ones they make. Something very Zen, much like shooting film on an old Leica Rangefinder. To be honest that is why I love shooting documentary (or euphemistically "street") photography. I don't shoot it to get into Time Magazine or anything like that. I shoot it to document the world I see and in all honesty to relax and almost meditate. I try not to worry about much when I shoot street and while for time and cost primarily shoot this work digitally, on occasion I will break out one of my old film cameras, many of them without built in meters and shoot the old fashion way, f/8 and be there as well as Sunny 16.
Enjoy the video, and do read the articles that go in more detail about the items I carry.
As many of you know I shoot with a Pentax 645Z for a large portion of my work. Prior to that I shot with a Pentax 645D and before that I rented a Phase One back for an old Contax 645 I use to own. Now many of you will of course ask the obvious, why shoot medium format digital today? With cameras available in the 30+MP range that are smaller and less expensive what is the allure that would lead one to medium format? Let me get this clear right off the bat, I have a very strong relationship with Ricoh Imaging, the owners of the Pentax brand. This article was suppose to be a simple white paper on how to get around Capture One for tethered shooting. It was suppose to be quick and easy, but with many thanks to Ricoh and of course much patience and a few revisions this has become something a bit longer.
Now back to the question - “Why Medium Format”. As I noted there are cameras by several manufacturers that easily get into the resolution of many medium format units. Cameras by Sony, Nikon, Canon and soon Pentax as well all have “full-frame” options that reach into the 30+ mp range. Resolution must therefore not be the driving reason for the desire to shoot medium format. What could it be?
In the image above you see three shots side by side using different cameras and their respective “normal” lenses. Each uses a different sensor size and have the identical field of view. In all the shots the ISO and aperture are identical as well as the FOV. Yet in each the DOF is vastly different, getting shallower with each increase in sensor size. Why is this? Focal length is the answer. On the far left is a shot using a Pentax Q with it’s 8.5mm f/2.8 lens, next to it is a shot from a Pentax K3 using a 16-50 at 35mm, and finally the Pentax 645Z using a 75/2.8. Even though each of these lenses provides a near identical FOV, the shorter actual focal lengths will have a lot more DOF. You cannot argue with he law of physics. This is why one shoots Medium Format, you use longer focal lengths for the same FOV. Because of this you get better subject isolation and shallower DOF for the same FOV. The penalty of course is you need to be a lot more careful with your focus technique, and of course you can’t shoot rapid fire, willy nilly. The exploit the benefits of Medium Format fully, you have to slow down your approach and take a bit more time.
Now let’s move on to the next matter, workflow. When Pentax released it’s first MFD, the 645D, it enjoyed support in Capture One for DNG conversion. One could capture via a workaround into Capture One as well, much like Hasselblad H3D users had to do. Unfortunately Phase One has decided to block DNG support not only for the 645Z, but all Pentax cameras. Since their product is vastly more expensive with far less technology, Phase has decided to block all competitors in an attempt to monopolize the market and take choice away from the consumer. Now for the vast majority of Pentax users this is of little consequence, but for 645Z users this is a major headache. Most work done with Medium Format cameras is done in a tethered workflow model. This is primarily due to the market sector MFD users are in. While the 645Z has expanded these markets and the places one can confidentaly use a MFD, the vast majority of the work still is done in markets where an AD will want a realtime view of what is being shot.
Thankfully for us Capture One is not the only solution available. Adobe’s Lightroom CC provides us with two methods to implement tethered workflow. One of these methods also provides the added benefit of compatibility with Lightroom Mobile, thereby allow you to provide an experience similar to using Capture Pilot only without the iOS only restrictions. So let's dive in!
Option 1 Pentax Transmitter Software
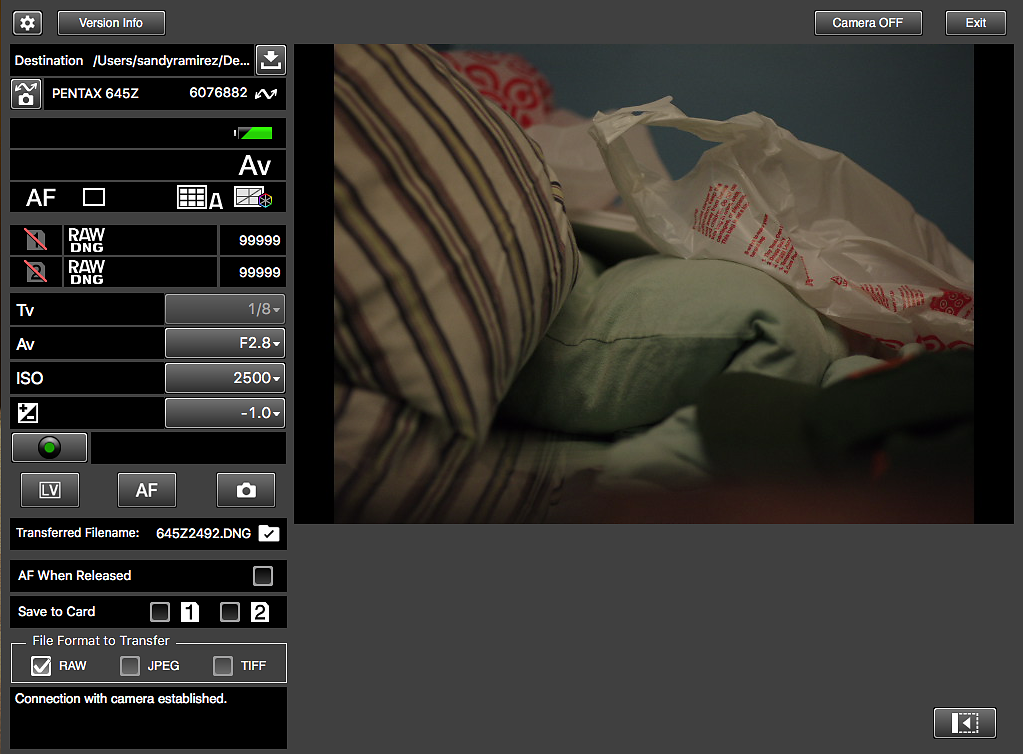
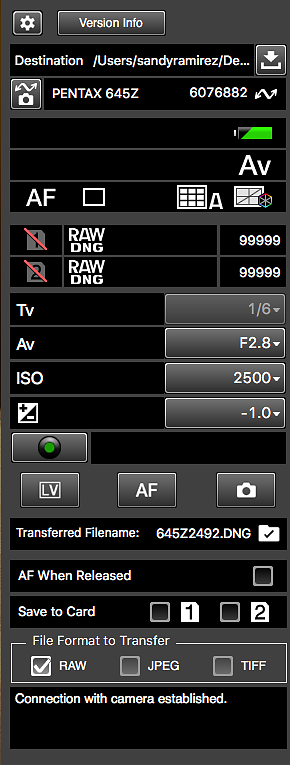
This first option is the least desirable of the options available. It is basically similar to the old “watched folder” work around in previous versions of Capture One. The application is Pentax Image Transmitter 2.0. This version of the package does provide an image preview and allows you to fully control the camera as seen from the screenshot below.
One very interesting thing is the LV function that gives you the Live View screen right from the camera. It also allows you to write directly to the memory cards while tethered, and allow you to shoot in TIFF as well as the usual DNG and JPEG formats. What Image transmitter basically boils down to is a quick and dirty way to whether and capture to your computer.
The control panel above is the key for what we are trying to do. The section at the top marked “Destination” is where you will choose the folder your captured images are stored. This will be important when we get to Lightroom in the next step. Now the most important thing to remember is that folder must be empty for Lightroom to do what we need it to do. The video below will demonstrate the final steps.
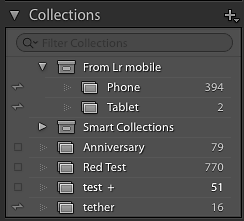
The live view feature is the most interesting thing and as you can see includes focus peaking. The only real bad thing here is the fact that one cannot enlarge the window or use the Transmitter Software to also do video capture direct to the hard drive. Another limitation of this method is the fact that in Lightroom I cannot target a Collection. Collections is where the real power of Lightroom in a capture workflow lies. Collections allow you to sync via the cloud to mobile devices such as an iPad or Android Tablet like the Samsung Galaxy Note Pro.
Option 2 - Pentax Tether Plugin
While the above does work to capture to a hard drive and as you see in the video above apply a recipe as the images are imported into Lightroom, the limitations on syncing with an exterior device is problematic. Another issue is of course the need to run additional software. The less one has to worry about the better. To that end the folks at Ricoh Imaging worked together with Adobe and created a plugin for Lightroom that allows direct tethered captured. The major benefit of this is that you can send the files directly to a Collection that can be synced with Lightroom Mobile. This allows you to hand the client a tablet and they can watch the image pop up right there. Now granted Capture Pilot does this as well, but Lightroom Mobile goes a few step farther allow not only selection of the images which gets synced back to Lightroom, but it works via the Adobe Cloud, not just WiFi. This allows the client to be remote from the shooting location, hell even the other side of the globe if need be. LR Mobile also allows the client, or better their Art Director to modify the DNG development recipe and have those changes updated to whatever the photographer is shooting.
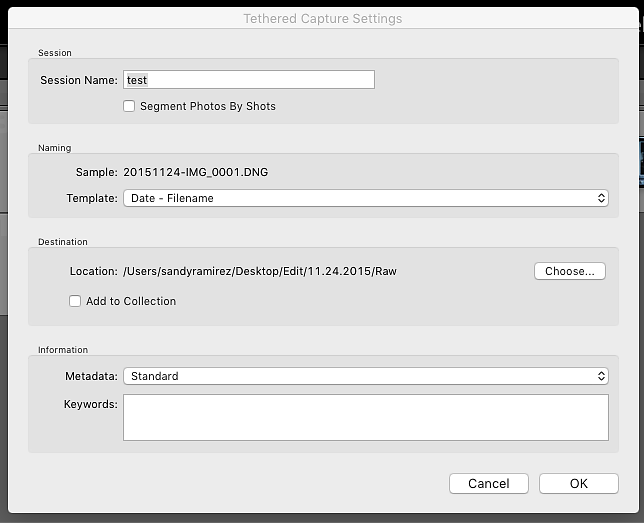
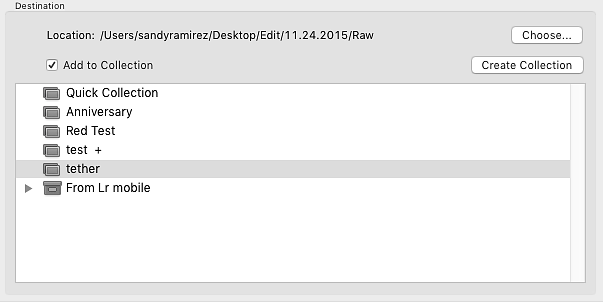
After going to File>Tethered Capture the following dialogue box should pop up. Here much like in Capture One you can set the location, file naming, metadata and of course the ability to “Add To A Collection” where the real magic happens. Once you click OK the following control bar pops up;
Unlike the Transmitter Software, the options are far more limited for camera control. Outside of the big silver button to fire the camera, the control panel only shows the information that you have set on the camera itself. usually I first create a collection for the shoot and make sure that I have it sync with LR Mobile. On the Collections Panel this is represented by a small double ended arrow to left of the collection name.
Once Capture occurs the images are transmitted immediately to LR Mobile allowing the client to select and of course if they are capable make needed adjustments to the photos and have those elections and adjustments sync back to the host computer.
Just a quick update folks. I haven't added an article in a little bit as I've been a bit busy. That said however I will have great content soon for you all including a two part on using old lenses on MILC's and a special educational article on shooting tethered with the Pentax 645Z. I will also be giving you all a review of Polarr, a new image editing app that is similar to Snapseed 2.0 and works nicely in conjunction with it.
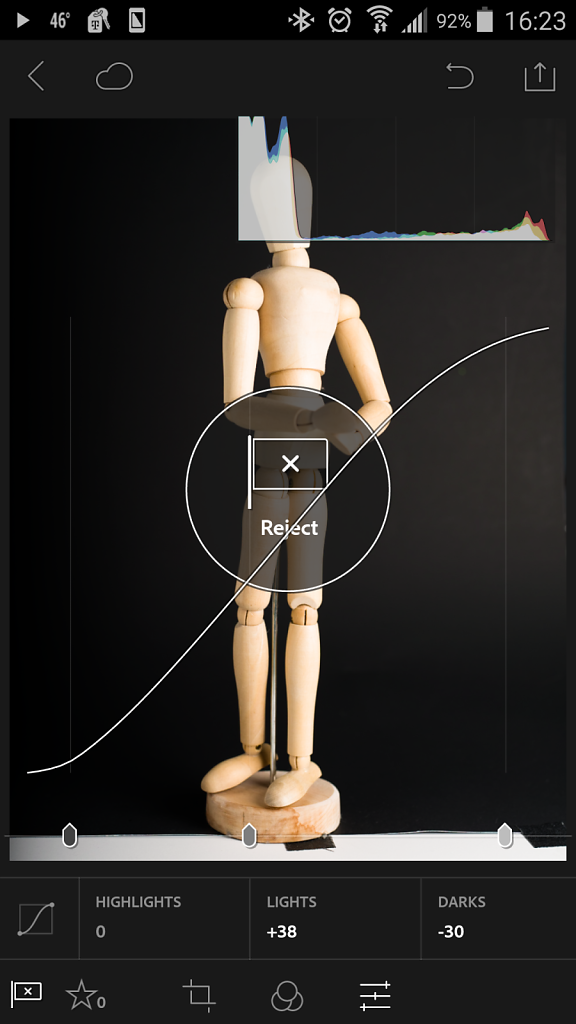
In the meantime some nice test images shot with my Samsung Galaxy S5 and processed using Polarr and Snapseed.....
So in my last entry on mobile life I discussed the various cameras and other sundries I carry in my daily camera bag. In this article I will discuss the software I use when being mobile. The first step is however getting the images onto the tablet I use. Luckily the Android OS allows for the use of USB mass storage devices. A simple cable is all I need to attach a card reader and transfer or read directly from the memory card of my camera, in this case my Ricoh GR.
What you see above is the initial screen for PhotoMateR2, the RAW conversion software I use on my Samsung Galaxy Note 10.1 2014 Edition tablet. What you have is basically a file manager much like what you have on a PC or in Lightroom CC, with folder views and easy to navigate touch interface. This is the major reason why I switched to Android over iOS. The ability to control where your files go and the support for mass storage devices via the USB port. If you use an app like Camera FV-5 which supports DNG Raw capture with your cell phone an app like PhotoMateR2 is an absolute must.
PhotoMate does provide a viewer which does take time to render the images as you see above. The faster the card and of course how large the files are, the faster it will render. Usually for me the RAW files from my Ricoh GR, Fuji X100, Pentax Q and Sony NEX-6 all read quite quickly. My Pentax K-3 takes a bit longer and my Pentax 645Z can take quite a while. That said it is amazing that my tablet will handle (or any mobile device) a 51mp image of the type my 645Z generates. If you shoot JPG you could se a WiFi card like an EyeFi Mobi, though to be honest if you are shooting a modern compact you most likely won't be shooting JPEG.
Once you select and filter out the images in the review module using a procedure that transfers directly to Lightroom CC or Adobe Bridge as it is compliant with those packages, you can develop those images in PhotoMate as seen in the screen above. The controls for development are not that different from those you will find in Lightroom CC as you can tell from the above image. I must say that I find it a lot easier to deal with adjustments using a stylus over my finger. I do have PhotoMate on my Galaxy S5 as well as on my tablet so the larger screen is a definite benefit. Once done the image can be exported in either TIFF (both 8 bit and 16 bit) as well as JPEG. Unfortunately there are very few apps in the Android environment that support TIFF for post work unless you want to play with the current GIMP build for Android. Usually I export right back to the card as a JPEG.
At this point I take the developed files over to Snapseed 2.0. Above you can see the UI. What I love about Snapseed is that it works in nondestructive and adjustable layers. These layers can then be copy and pasted on other images and of course readjusted ad nauseum. Again I find using Snapseed a lot easier, especially the new Brush adjustment feature, with a stylus. Really this app has replaced Adobe Photoshop Touch as my go to post production app. Touch BTW recently has had support discontinued as Adobe will be replacing it soon with a new app first on iOS and later on Android.
Let me close out this article with some shots from a walk I recently took at a decommissioned hospital grounds all taken with my Ricoh GR and developed and post processed on my tablet using the two apps discussed here.
Finally for those who subscribe to the Flipboard version of this blog, I've flipped in an article on why shooting RAW is a good thing.
One thing you always hear when using a wide angle lens is to "get close". Since the typical FOV for a cell phone camera is about 28mm, I thought to give this a shot...
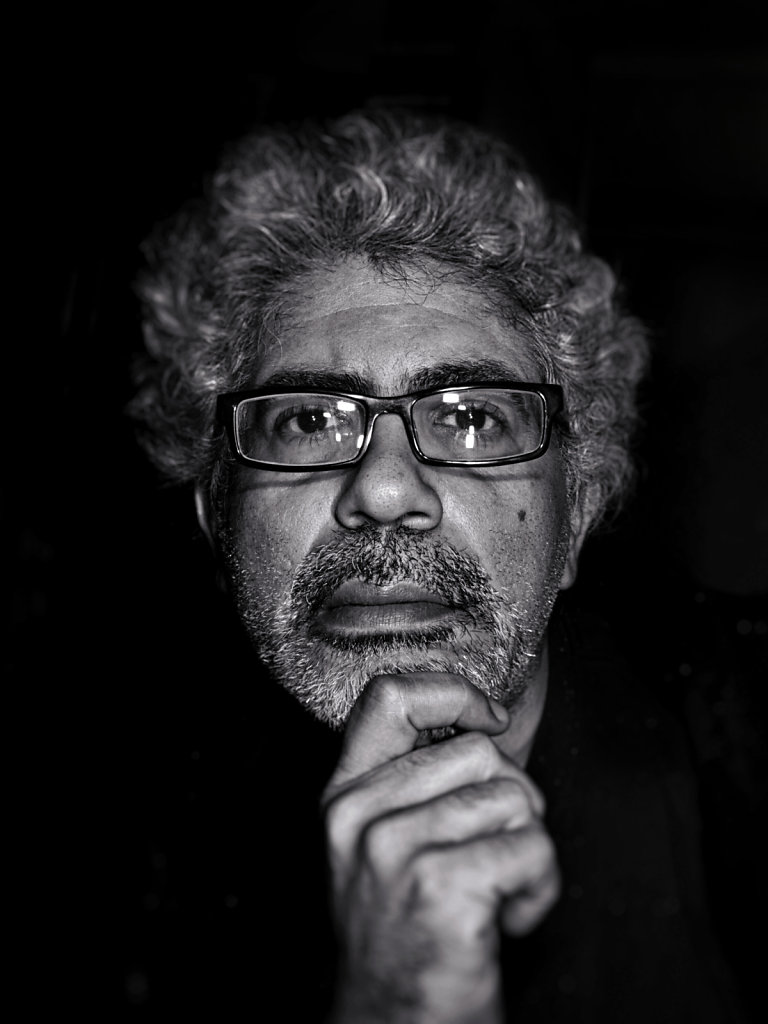
Shot on my Samsung Galaxy S5 with post work in Snapseed 2.0. Lighting is a video light inside a Gary Fong Lumisphere and a table top light box. This entry entirely done from my Galaxy S5.
"Is in focus?" As a photographer you get this question often. Often enough a shot in crystal razor sharp focus is what is best. Then sometimes in a rare bit of luck you just discover that magic happens....
So on the last entry I discussed very briefly what I use as a camera phone. It was very brief. Simply put I have a Galaxy S5. Now why a Samsung and not an iPhone? The reasoning is simple, I like that an Android phone has more options as far as OS flexibility for the power user. I didn't just buy an S5 for the camera, but primarily as a phone that I use for a lot of functions. While the camera is important to me, and was a factor, primarily it is a phone and scheduling device for me.
As a point of disclosure I do also have an Android based tablet that I write this blog entirely on. It is a Samsung Galaxy Note Pro 10.1 2014 Edition. The major reason I have this over say an iPad is again the power user aspects. It has a nice USB port that I can hook up a 240GB external SSD for file storage when shooting. I can run Photo Mate R2 which is basically a great Raw developer for Android which reminds me more of Lightroom than Lightroom Mobile does, we'll at least the development module of it. For post processing work I use two apps heavily and a suite of tools primarily for certain unique function. I'll go over the software I use in a later article, but let's first take a look at the main instruments of this mobile workflow - what I capture images with.
Usually when wandering around New York I carry three cameras on average at all times. This is primarily because I like keeping things simple. When I did this shooting film I did nearly all my work with a 35mm FOV lens, be it the 25/2.8 Olympus Zukio for my PenFT or the 35 Summiron on my old Leica. For that I carry with me everyday for the most part a Fuji X100. Not the new one, just the original 12mp model. Does a fantastic job. That being said many of you will say "three camera is simple"? Well yes when you consider the cameras.
My second camera pretty much falls into the small easy to carry category. That would be my Ricoh GR. Recently Ricoh released a GR II which is basically the same as the original GR but with WiFi. The GR is a 28mm FOV which I am finding more and more enjoyable, but to be honest I still prefer 35mm. That said I do find myself using this camera more and more often. The slightly wider FOV does get a bit getting used to especially since I am a zone focus sort of shooter, something the GR excels at due to the Snap Focus feature.
As I mentioned earlier in the article I do use as my third camera my Galaxy S5. Using it with an app like Camera FV-5 basically gives me near total control over the camera, and depending on the phone you use, DNG capture and full manual control over exposure and focus! Overall I've been much happier using this camera phone over the one made by Apple on the iPhone.
Finally I carry a few Moleskin notebooks, either for sketching or taking actual notes that eventually get digitized into Evernote. That is my daily bag. All carried in a Domke messenger bag. I love Domke bags. They are quite durable and look great. Best functional camera bag ever made. Next article I'll discuss some of the software I use. Also I promise a lot more timely and frequent updates.
I promise a new update soon folks but here are a couple of images from a camera I'll be discussing in my next article, the Samsung Galaxy S5. Shot with Camera FV-5, post work done in Snapseed 2.0...
If there is one saying in photography that is perhaps the truest it is the old "The best camera you own is the one you have in your hand". What exactly that means is simple. When the moment comes, not just any moment, but that compelling point in time Henry Cartier Bresson would call "The Decisive Moment", then it doesn't matter what camera you have as long as you have one to capture that moment. It is one of those axioms of documentary photography that goes hand in hand with "F8 and be there".
In this day and age of course nearly everyone has a camera with them. Be it an iPhone or a Leica M240, nearly everyone walking the streets of someplace like Manhattan has a camera of some type on their person. The question becomes if they really know what to do with them. It is great that today nearly any event of note will have a vast sea of images associated with it, but how many of those images are worth looking at? Photography is more than just owning a camera and understanding some software, it is knowing instinctively how to create a compelling image no matter what you have in hand.
Of course since this is the Internet and the vast majority reading this want to know exactly what I use and why, it may seem the last two paragraphs have been nothing but a flow of non information that they've heard before. Like any good entertainer I shall of course give you what you want in a moment, but let me finish my platitudes with the following;
It doesn't matter what camera you use, as long as you get the results you want....
Personally I use Android based systems for my mobile work. In a later article I'll go over all the software and reasoning behind that decision, but suffice it to say that I personally find Android a bit more flexible and suited to what I like to do. Does that mean that iOS sucks? No. It means for me I prefer the abilities of the Android OS. It is basically a power users OS, while iOS is much more a consumer OS. Both work very well and everything I will discuss over these articles is capable on both platforms.
The shot above I created using my Galaxy S5 and Snapseed 2.0 for post work. Can you create a shot just like this using an iPhone? Of course and just as easily. If there is one thing I can suggest no matter the platform used is to find a better camera app than the one the phone provides. On my Galaxy I use an app called Camera FV-5. It's a great app, doesn't cost much, and depending on the phone gives you a plethora of functions including the ability to shoot in DNG Raw for those who cry to the heavens "JPG SUCKS!!!! You Can Only Shoot A Photo If It Is In RAW!!!! " or some such nonsense. The reason I recommend getting a better camera app is that most give you better control over what you shoot. Now I'm not talking Instagram or VSCO or anything like that. What I'm discussing is an app that gives you near DSLR control over your phone. On iOS I will recommend an app called 645Pro as it gives nearly the same options as Camera FV-5. While it cannot save DNG, it does have an option to save files as 16bit TIFF which can be just as good when doing post work.
This brings us to post processing options. Here things get a little tricky as most post processing apps on either mobile platform of note don't support DNG or TIFF. How do you get these nice hi res images into something like Snapseed 2.0 or Adobe Photoshop Touch? I'll discuss that next week....
The idea of photography today is quite different than say 30-40 years ago when many of us got our start. Today photography has become the most democratic of all visual arts. Everyone has a camera, and in truth most cell phone cameras are as good as the vast majority of compact point and shoots that once were the bulwark of the photo industry. A good example is my Samsung Galaxy S5. It has a fantastic 16mp camera that gives great quality at base ISO, especially when controlled using an app like Camera FV-5. What does this mean however to all of us who call ourselves "photographer" and do this as a profession?
That is the "Big Question" in our industry. Recently listening to the American Fashion Podcast, a designer mentioned how he had hired an Instagram Photographer to shoot his latest campaign. The person he hired never owned a camera until he got his iPhone, yet now shoots campaigns on said iPhone, processed through Instagram for post work. The technology has democratize photography to the point that someone with no formal training but an outstanding eye can land major work. Please note I am not complaining. To me this means that the cream floats to the top and really talented folks can find work where in the past they wouldn't. That said however the other side of the coin is also true.
No other visual art has become as devalued as photography. To quote The Incredibles, "When everyone is special, then no one is". What was once the realm of a select few has become a cacophony of visual overload. One must not be only technically suave in the art of mobile photography, but must also be skilled in composition and lighting control. You have to figure out how to get your voice heard over this abattoir of imagery. For end clients this has also become troubling. It's like looking for a needle in a haystack. What we must become therefore is a rather large magnet to help potential clients find the needle that is you (or me for that matter). Over the next few articles I'll discuss the various technological options we have available to create compelling imagery using mobile technology to help draw eyes, and hopefully clients to all of us.
I leave you with an image that I shot, developed and edited right here on my Android tablet, as well as write this very article you are reading. The camera was the Ricoh GR, shot in DNG RAW and developed using PhotoMate R2, with post work done in Snapseed 2.0...
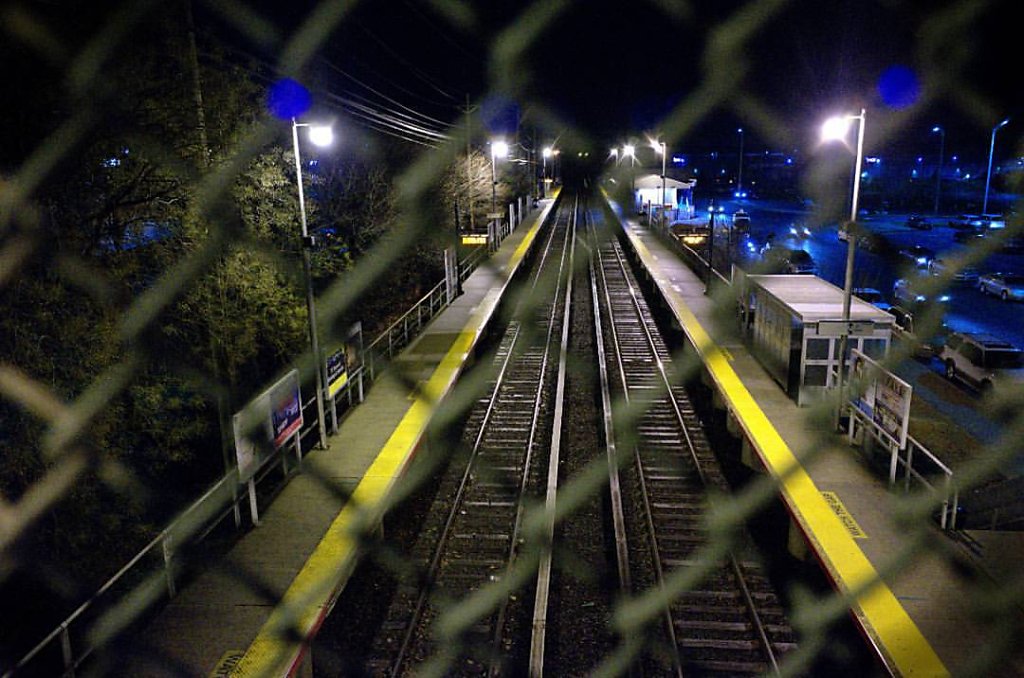
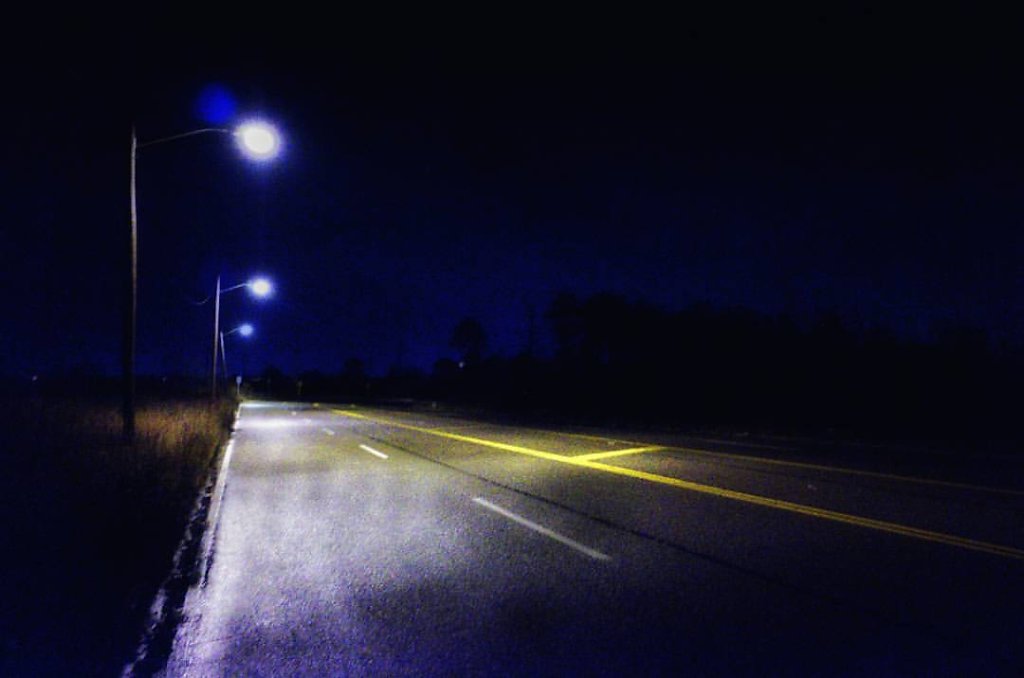
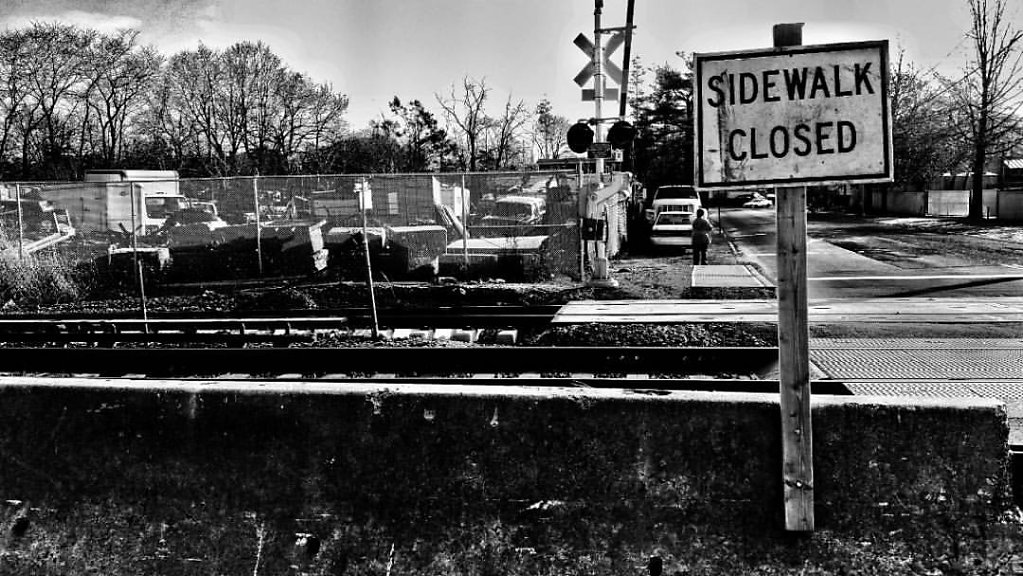
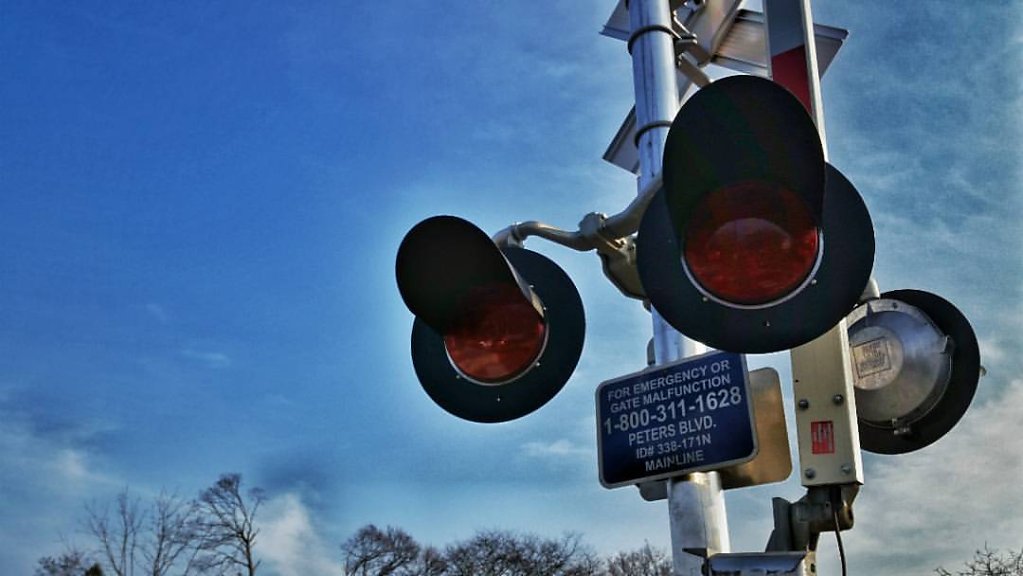
So today I got the latest update to Snapseed, Snapseed 2.0. It is just amazing what can be done with this app. I have it both on my Samsung Galaxy S5 and my Samsung Galaxy Note 10.1 2014. The most amazing thing is the fact that it works in layers and allows maskings. When used with a pressure sensitive stylus (such as the one with my tablet) the power of this application rivals that of Photoshop CS on a desktop. It is really quite amazing. To test this I went out in the fog and took a shot of the local railroad crossing with my S5. I then edited the image using my S5 and an iKross capacitive stylus. The results were amazing. Very much like a large format camera with extreme tilts.
This got me wondering how else could I use this application. The tonal contrast controls were amazing as well as a slew of other features. I grabbed a shot off my tablet I had done at the Coney Island Mermaid Parade a few years back. Using Snapseed on my tablet with it's stylus was a revelation. I am certain now that I can use this tablet along with my phone to create some amazing imagery. I am hoping to work with Kaytee Papuza in June to do this. Here is the re-edit I made;
Truly amazing.
I'll keep you all up to date on this.